A mere 1dB change in eq mastering can sometimes mean the difference between good and great. That’s the power of subtlety we’re working with here.
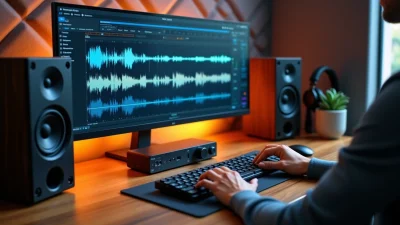
EQ Mastering moves ripple across the whole soundscape, and understanding proper equalization mastering techniques becomes crucial. Whether you’re selecting the best mastering eq for your workflow or dialing in precise mastering eq settings, a few dB of gain should be enough. We’ll walk you through when to use a mastering equalizer in this piece, step-by-step techniques and advanced strategies to achieve professional-sounding results.
When and Why to Use EQ Mastering Techniques
Mastering EQ serves multiple roles beyond tone-balancing. It tackles frequency imbalances and lends creative shaping to a track. It also maintains consistency across an entire project. Mixing allows EQ changes that can be more localized and specific. Mastering EQ moves affect the composite mix differently. A boost in the highs to add sheen to the hi-hats will brighten everything that shares that frequency space. This includes vocals and the sparkle on the cymbals.
Correcting Tonal Imbalances
Even a well-mixed track can have problematic frequency buildups or deficits. Maybe there’s too much energy in the low-mid range or a thin high end. Mastering applies EQ to ensure the final mix is balanced from bass to treble. The track won’t fatigue the listener or sound weak on certain systems.
Low end build-up is one of the most common challenges mastering engineers encounter. The most transparent way to address this is through the use of EQ. Thoughtful application of low-shelf EQ or highpass filter controls low end build-up without compromising the music’s sound. A wide cut around the 150-250 Hz area will open up a mix that sounds cluttered and heavy in the low-mids.
Tonal balance describes the overall relations between the lows, mids and highs in a recording. A recording sounds “bright,” “boomy” or “muffled” when the tonal balance of the mix falls outside of the expectations for the genre. Correcting these imbalances means bringing the track back to where listeners expect it to sound.
Sometimes you can’t return to the multitrack session. The mastering engineer may use EQ to minimize that problem directly in the stereo file if a final mix exhibits a harsh frequency or a resonant ring. You would want to go for broad Q bandwidths and EQ adjustments no greater than around 4dB when adjusting the EQ on the master channel. You may get more transparent results by going back to fix things in the original mix before mastering if the adjustments are greater than this.
Enhancing Overall Character
EQ in mastering adds artistic character beyond mere correction. A track might need a little “warmth” in the low mids or some added “shine” in the highs. One common practice is to add air and presence in a master using EQ. This usually means a sense of openness and clarity that’s derived from a transparent top end.
Subtle gain with a bell EQ or low shelf EQ achieves improvement of the mix’s warmth and body. A tiny high-shelf boost can add that professional sparkle and ‘air.’ The whole track feels more open. A gentle low-end cut might be all it takes to clear out some mud and let the kick and bass punch through with more definition.
Different genres have different tonal balance norms. A hip-hop track might emphasize lower frequencies more than a folk song would. You’ll often want a strong, punchy low end in hip-hop or EDM. Acoustic or folk genres require more midrange clarity and subtle highs. Recognizing the genre-specific nuances is essential to maintain the musicality and integrity of the piece while mastering it.
EQ helps songs feel cohesive when mastering a collection. One song might need a slight cut in the midrange to match the brightness of another. This ensures a uniform experience when listeners play tracks in sequence.
Ensuring Playback System Compatibility
Every playback system lies in its own special way. Each playback system has its own EQ and transient signature inherent in its design. This makes it different to every other playback speaker you’ll listen to. One of the main goals of mastering is ensuring compatibility across playback systems of all types. This includes addressing issues such as frequency balance, stereo width and phase coherence to ensure that the music translates accurately across different devices and environments.
Cars tend to illustrate deficiencies of low end in the sustain of sub and bass material. Tiny phone speakers strip away almost all your sub bass and squash your stereo image into near mono. What’s left is the upper midrange and top end. Any harshness or brittle edges are going to leap out with nowhere to hide.
Headphones give you an intimate viewpoint on your mix. They excel at revealing micro details but they’re also misleading when it comes to stereo imaging and low end. Headphones often lie to you in not giving you enough bass and trick you into pushing more of the bass up.
Finding a reference track in a genre like yours with comparable arrangement and instrumentation can act as a reliable target to shape your mix. You can confidently shape your own mastering eq settings to match its tonal qualities when you work with a reference track that sounds great across all playback systems. This helps it translate on any device.
Setting Up Your Mastering EQ Workflow

Your mastering equalizer workflow starts with three critical preparation steps before you touch any mastering eq settings. These elements create the environment where you can make accurate decisions that translate on any playback system.
Prepare Your Monitoring Space
We hear frequencies differently at different volume levels. Less bass when it’s quiet, more bass when it’s loud. Your monitoring level being off means you’ll start making EQ decisions based on a lie and boost or cut things that don’t need it.
The 85dB SPL reference level often cited for monitoring was intended for larger spaces like cinema rooms. This level would be super loud and overwhelming in most home studios. Room size plays the most important part in determining the appropriate monitoring level. Most home studios are smaller than 142 cubic meters, so 73-76dB SPL C is a more appropriate target.
Here are the recommended SPL levels based on room size:
|
Room Size (Cubic Meters) |
Recommended dB SPL (C) |
|
> 566 |
83 |
|
284 – 566 |
80 |
|
143 – 283 |
78 |
|
42 – 142 |
76 |
|
< 42 |
74 |
Place an SPL meter in the listening position to adjust your monitoring level. Most SPL meters are designed to have the microphone pointed to the ceiling rather than the source. Set your monitor volume to its lowest setting and make sure your output and master fader in your DAW are set to 0dBFS. Play pink noise audio. Increase the volume of your monitors until your SPL meter reads the appropriate level for your room size. Make a note of the volume so you can set the same monitor level in the future quickly.
Professional mastering engineers work around 76-77dB SPL C/slow in their rooms, with occasional checks 3-6dB louder and quieter at the end of the session. Some engineers drop playback 10dB below their reference level when checking album levels between mastered tracks, as this can help identify where the overall presentation sits best.
Load Reference Tracks
Mastering without a clear sonic target is like navigating without a map. Listening to great-sounding tracks at the beginning of your session will give you a good frame of reference for what a pro master should sound like before you start making changes to your master processing.
Select one in the same genre that you’re working in when choosing a reference track. Find a track with similar instrumentation and sounds to your production. There will be differences, but choosing a reference track that represents your sonic goal will help you make the best decisions for your track.
Match the perceived loudness of your reference track to your mix before making any decisions when using reference tracks. Your mix will be much quieter than the mastered reference tracks. We humans notice sound in a way that gives us the illusion that louder music sounds richer in the low-end with more clarity in the high end. Use a loudness meter to match the level of your track with the reference (e.g., -14 LUFS) so you’re comparing apples to apples without being misled by volume differences.
Focus on how each frequency range sits in the mix as you compare your track to your references. Is the low-end tight and controlled? Do the mids feel balanced or boxy? Are the highs crisp or dull? Take notes on what stands out. This process isn’t just about spotting flaws but about defining your sonic goal.
Tools like Tonal Balance Control 3 can analyze audio from any popular streaming platform or audio source and collect data on key sonic characteristics. This helps you visualize, compare, and match your favorite reference tracks. The reference analysis combines smoothly with plugins including Ozone and eliminates the need to download tracks or set up tedious audio routing.
Set Your Starting Point
One common beginner mistake when mastering is jumping straight into EQ processing even before thoughtfully listening to the music. Not every song requires the same treatment. You learn better about the unique EQ challenges that lie ahead by taking the time to digest the music beforehand. Listen to the music the whole way through because different sections in the song can present different EQ challenges.
Loop the section of the song that covers the widest range of frequencies when adjusting the EQ of your production, often the drop or chorus. You might overcompensate and boost the low-end too much if you work on the verse where the drums might be quieter or the bass might not be present.
A/B gain-matched listening comparisons are your friend. With EQ adjustments being 1 dB or less in scale, it can be a challenge to listen critically for the differences. A/B listening comparisons help your ears become more attuned to these nuanced adjustments. You’re also preventing loudness bias from influencing your decisions by enabling gain match.
Step-by-Step Guide to Mastering Equalization
Now that your workspace is fine-tuned and references are loaded, the actual equalization mastering work begins. Each step builds on the previous one and moves from foundational cleanup to final polish.
Step 1: Clean Up the Low End
First, apply a gentle high-pass filter around 20-32 Hz to remove subsonic rumble and inaudible low-frequency noise that can muddy the sound. A 24dB/octave slope cuts out these frequencies without sacrificing anything above 20Hz. This frees up headroom without thinning the bass.
Good bass fundamentals often lie between 40 and 80 Hz. If the low-end seems fluffy or lacks clarity, find the root note or tonic of the song to bring out the very low fundamental at a particular musical frequency. Home studios suffer from less-than-perfect room acoustics, which makes it challenging to judge bass levels with accuracy. Room modes can either exaggerate or hide certain low frequencies and mislead you to make poor decisions.
Narrow cuts on the low end don’t work as well as on the rest of the mix, so avoid them. Focus on broad cuts when needed. Use your mastering eq earlier in the chain to make considerable low-end changes; place it near the end to make subtle tweaks.
Step 2: Balance the Midrange
Once the low end is controlled, address the midrange in distinct zones. The low-mids between 250-500 Hz create foundation and warmth and provide the body of most instruments. A wide cut around 150-250 Hz will often open up a mix that sounds cluttered and heavy in the low-mids. A boost around 200-300Hz can impart low-mid warmth across the entire mix.
The mid-mids from 500Hz to 2kHz determine presence and vocal clarity. A boost in the mids around 500 Hz can help if you need more definition from the snare and guitars. The upper-mids between 2-5kHz require careful balancing since our ears are most sensitive to this range. Boosts here bring out the vocal but can turn harsh quickly.
Step 3: Control Harshness
Humans are especially sensitive to frequencies covered by speech, roughly 1 kHz to 10 kHz. Harshness shows up around 3 kHz to 8 kHz and makes the track fatiguing. A narrow or moderate-Q cut of 1-3 dB in that zone can relieve the ear-piercing edge.
Use a high-end boost that reduces when the signal gets louder if you want to boost the high-frequencies but doing so makes some sounds too harsh. Dynamic EQ allows you to create an EQ boost with dynamic ducking when the audio signal gets louder and boosts brightness whilst avoiding harshness when the mix itself gets brighter.
Step 4: Add High-End Sparkle
A gentle high-shelf boost around 10 kHz or higher adds the sought-after air if a mix sounds dull. Some engineers use air bands at 15 kHz or even 20 kHz to introduce a subtle, open sheen. Cutting a harsh region like 2.5kHz to 3.5kHz on a lead vocal and then boosting just above that range, like 6kHz to 8kHz, will add back the shine so that the cut doesn’t result in a dull tone.
Step 5: Make Final Adjustments
Match the output gain to avoid being misled by changes in loudness at this point. Our ears perceive louder music as better, which can cause us to favor the louder signal when comparing two versions of a track. Level match the post-EQ signal to the pre-EQ level to judge the effect of your mastering eq settings. Toggle the bypass button to hear the difference and ensure your adjustments sound natural and balanced.
Best Mastering EQ Tools and Settings
Your choice of mastering equalizer affects the sonic possibilities available to you. Each tool brings distinct characteristics, from surgical precision to musical color.
Digital Parametric EQs
FabFilter Pro-Q3 stands as one of the most versatile options. It gives you up to 24 bands with dynamic EQ capabilities and a frequency range from 10Hz to 30kHz. You can make each band dynamic for compression or expansion, something that proves useful when mastering. The spectrum grab feature lets you select and boost or attenuate frequencies via the spectral analyzer.
Brainworx bx_digital V3 excels at subtractive work. It solos the band as you click on the frequency knob. This lets you sweep through and find problematic frequencies with precision. I often place this at the beginning of the mastering chain to remove unwanted frequencies before other processing is applied.
Sonnox Oxford EQ provides four modes that shape how the EQ behaves. Mode four lends itself to broader curves with a more gentle approach often used for mastering. Sonoris SMEQ offers seven bands of parametric equalization. You can switch between minimal phase and linear phase response.
Analog-Modeled EQs
The UAD Manley Massive Passive delivers silky highs and defined lows. The Mastering version has detented gain and bandwidth knobs for consistent recall, with gain ranging from +/-11dB and mastering-appropriate high and low-pass filter frequency options.
Pultec EQP-1A emulations let you boost and attenuate at the same frequency at once. This seems counterintuitive, but because the boost and attenuation curves are different, the resulting curve has its own distinct flavor. The Maag Audio EQ4 features a legendary air band that extends up to 40kHz. It adds presence without the harshness that sometimes comes with high shelf boosts.
Specialized Mastering Equalizers
iZotope Ozone has matching EQ. This lets you identify and capture the frequency spectrum of a chosen mix or master and apply it to your own material. Pulsar 8200 emulates the GML 8200 with added sub, air and tilt bands, a full de-esser, auto-gain controls, and full mid/side functionality.
SSL Fusion Violet EQ offers fixed frequency selections designed for fast, intuitive tonal shaping. The low band offers four frequencies between 30 and 90 Hz, while the high band covers 8 to 20 kHz.
Advanced EQ Techniques for Professional Results
Advanced equalization mastering techniques open doors to precision control that separates amateur from professional results. Three approaches deserve attention when you refine your mastering eq settings.
Mid/Side Processing for Stereo Control
Mid/side processing allows you to EQ the center channel and stereo sides independently. Mid-side equalizing is more precise and transparent than stereo equalizing. Cut the side image lows up to about 80Hz and this centers the low frequencies. The bass becomes mono and tightens the low end.
Boost low-mid frequencies on the side and you create a fuller and deeper sound. Dip 2.5-5kHz on the side to reduce its masking effect on vocals. If vocals stick out too much, dip 2.5-5kHz on the mid-image. Boost the highs on the side with a shelf and this expands the highest frequencies. A high shelf to the mid channel around 1.7kHz, maybe half a dB to 1dB, can bring a vocal forward.
Dynamic EQ Applications
Dynamic EQ reacts to the audio signal live. This makes it especially useful when you have to address harshness or muddiness without compromising the overall mix. It’s a great problem solver to control specific frequencies that are too loud. The signal exceeds a threshold and it reduces the gain of that frequency band. This tames unwanted peaks while the sound’s character remains intact.
Proper EQ Chain Positioning
I use EQ as the first insert in a mastering chain. Subtractive EQ allows you to find problems first and attenuate them instead of having to fight them later. Saturation introduces harmonics that would amplify problematic ranges and exacerbate the problem they cause.
Testing and Refining Your Master
Refinement happens through systematic comparison and validation in a variety of listening environments. Your mastering eq settings are applied, and work to be done on verification begins.
A/B Testing Your Changes
You need to level-match first to compare two pieces of audio. One version that is half a dB louder will sound better, even if it’s not. Use an LUFS loudness meter to measure both versions at the same point in the song and set levels to match them before making any judgments. Toggle between the processed and unprocessed versions to determine whether the mastering eq has improved the sound.
Checking on Multiple Playback Systems
Check your masters on at least 3-5 different playback systems and mix between earbuds and headphones or speakers. Cars tend to illustrate deficiencies of low end, especially with the sustain of sub and bass material. Headphones excel at revealing micro details but mislead you with stereo imaging and low end. Phone speakers expose whether your vocal feels smooth or if cymbals and consonants poke too harshly. Every playback system is a filter on top of your mix.
Making Level-Matched Comparisons
Volume matching prevents you from confusing louder with better. Turn up one master that is softer than another to match the volume of the louder one before making quality evaluations. Turn down the louder version to match the softer one as well. This step makes your master evaluations faster and more accurate.
Table of Contents
Conclusion
You now have the complete roadmap to achieve professional-sounding masters through proper eq mastering techniques. Begin with an optimized monitoring environment, treat your room as much as possible, and always start your eq mastering process by calibrating your ears with high-quality reference tracks. This step alone can completely change how you approach eq mastering, because it grounds your decisions in reality instead of guesswork.
Work through each frequency range in a structured and intentional way. In eq mastering, nothing should be random. Low-end control ensures power without mud, midrange shaping defines clarity and presence, and high-frequency adjustments bring air and detail. The key to great eq mastering is understanding how each move impacts the entire mix, not just a single element.
Subtlety remains your greatest ally in eq mastering. A boost or cut of just 0.5 to 1 dB can dramatically shift the balance of a track. Over-processing is one of the most common mistakes in eq mastering, especially for beginners trying to force a “professional” sound. In reality, professional eq mastering is about restraint, precision, and intention.
Most importantly, trust your ears—but always verify your decisions. Great eq mastering translates across all playback systems. Test your track on studio monitors, headphones, car speakers, and even phone speakers. If your eq mastering holds up everywhere, you’re on the right path. Translation is the ultimate goal of eq mastering, not just sounding good in one environment.
Another crucial aspect of eq mastering is consistency. The more you practice eq mastering, the faster you’ll recognize problem frequencies and tonal imbalances. Over time, your workflow will become more efficient, and your eq mastering decisions will feel more natural and confident.
Remember that reference tracks are not just for comparison—they are a learning tool. Analyze how professional tracks handle low-end weight, vocal clarity, and top-end brightness. Applying these insights to your own eq mastering process will accelerate your progress significantly.
Finally, keep in mind that great eq mastering is about refinement, not radical transformation. You are enhancing what is already there, not fixing a broken mix. If the mix is solid, eq mastering will elevate it to a polished, cohesive, and competitive level.
Stay consistent, keep training your ears, and continue refining your eq mastering workflow. With time and experience, your eq mastering will sound cleaner, more balanced, and truly professional—ready for streaming platforms, clubs, and radio alike.