Stereo Imaging Techniques Tested: What Actually Works for Mix Width in 2026
I’ve tested dozens of stereo imaging techniques to figure out what creates usable mix width, and the results surprised me.
Stereo imaging refers to the spatial perception of sound between left and right speakers. Getting it right can make each instrument stand out in your mix. The challenge? Over-widening can make your mixes sound thin and weak, while under-using stereo width leaves everything crowded in the center. I tested stereo imaging plugins, stereo widening methods and traditional panning approaches. This helped me identify what works and what wastes your time.
Here’s what I found about creating stereo width in 2026.
Understanding Stereo Imaging: 2026 Fundamentals
What Is Stereo Imaging in Modern Mixing
Stereo imaging manipulates how sounds position themselves within the space between your left and right speakers. The process creates an illusion of multi-directional audible perspective using two independent audio channels. Stereo imaging allows me to place instruments at specific locations within this stereo field when I work on a mix. Each element occupies its own space rather than piling everything into a single point.
The system works by exploiting how our ears and brain process sound. Stereo creates what’s called a phantom center, where sounds playing from both speakers appear to originate from the middle. This isn’t an actual speaker position but a psychoacoustic trick. The whole concept of stereo imaging relies on differences between what each speaker outputs.
A stereo system needs careful speaker placement and room acoustics to deliver accurate imaging. Setups with big level differences between channels or unequal distances to the listening position fail to reproduce a convincing virtual soundstage.
The Role of Left-Right Channel Differences
Stereo width comes from differences between your left and right channels. These differences can take several forms: level variations, phase relationships, panning positions, timing discrepancies, or combinations thereof. You hear mono when both channels output the same signals. The moment any difference appears between channels, you sense stereo.
The concept breaks down into mid and side components. The mid channel contains mono or center information shared by both speakers. The side channels contain the differential parts that exist only in the left-right differences. What’s common between channels sits in the center, and what’s different spreads outward.
Panning in your DAW achieves stereo placement through volume differences between channels. Pan a guitar left, and you’re reducing its volume in the right channel while keeping the left at full level. Frequency spectrum differences between channels also contribute to stereo perception. Some engineers apply different EQ curves to left and right channels, boosting and cutting opposite frequency bands on each side. This technique can increase perceived loudness by preventing frequencies from competing in the same channel.
Stereo Width vs Stereo Depth
Width and depth represent distinct dimensions in your mix, though they’re often confused. Width refers to the horizontal spread of sound across the stereo field from far left to far right. Depth describes the perceived distance of sound sources from the listener, creating a front-to-back dimension.
You create width through panning and stereo differences between channels. The more you spread elements across the left-right spectrum, the wider your mix sounds. Depth comes mostly from reverb, with longer decay times pushing elements farther away from the listener. Less reverb brings sources closer.
The frequency content you choose to widen makes a big difference. Widening high frequencies adds spaciousness without diminishing focus or power. Low-frequency content loses punch when spread in stereo. This explains why keeping bass and kick drums in mono maintains their foundation while spreading higher-frequency elements creates openness.
Testing Monitors and Headphones for Stereo Width Decisions
Your monitoring chain determines whether your stereo imaging decisions translate to real-life playback systems. Speakers outperformed headphones for making width choices that work in multiple formats when I tested them.
Why Speakers Work Better Than Headphones
Speakers create what’s called crossfeed, where each ear hears both the left and right channels. The sound from your right speaker reaches your left ear quieter and with a small delay, and vice versa. This natural interaction helps your brain construct spatial information with accuracy.
Headphones eliminate crossfeed. Each ear receives only one channel, isolated from the other. This separation makes stereo imaging feel wide in an artificial way and creates an “inside-the-head” sensation rather than a soundstage in front of you. Panning decisions that seemed perfect collapsed or sounded excessive once played through speakers when I mixed on headphones alone.
The phantom center behaves differently between both systems. A center-panned vocal sits in front of you in the space between monitors on speakers. That same vocal positions itself between your ears on headphones. Reverb and panning effects sound more prominent on headphones than speakers. I found myself under-panning elements and over-applying spatial effects when working solely on headphones.
Speakers also provide the physical sensation of bass that headphones cannot reproduce. Feeling how low frequencies fill a room helps gage whether your mix maintains power in different systems.
Crossfeed Simulation: Does It Help?
Crossfeed plugins attempt to solve the headphone monitoring problem by blending a controlled amount of each channel into the opposite ear. These tools mix a small, delayed, and filtered portion of the left channel into the right and simulate what happens with speakers.
I tested several crossfeed implementations, including CanOpener and built-in DAW options. The results showed genuine improvement for making panning decisions on headphones. The stereo image narrows to a more realistic width and makes it easier to judge whether elements sit too far left or right.
Crossfeed also reduces listening fatigue during extended headphone sessions. The natural speaker-like presentation feels less fatiguing than the isolated channel approach.
Crossfeed introduces its own complications though. You’re hearing a simulated room rather than reality. Adding reverb becomes challenging since you cannot determine what the actual effect sounds like versus the simulation. Crossfeed proves useful for composition and balancing, but final mixing decisions benefit from speaker verification.
Acoustic Treatment Impact on Width Perception
Room acoustics change how you perceive stereo width. Untreated rooms create peaks and dips at certain frequencies through standing waves and nulls. These variations misrepresent your mix and cause you to compensate for problems that exist only in your room.
Treatment improves your psychoacoustic interpretation of music in the frequency spectrum. I noticed clearer width decisions after adding basic absorption and diffusion to my mixing space.
Checking Your Mix in Mono: The Essential Test
Collapsing your mix to mono reveals phase problems. Phase cancelation exists somewhere in your stereo imaging chain if elements disappear or change level when summed to mono.
I check mono compatibility by using my audio interface’s mono button or DAW’s channel mode switch. Play your mono mix from a single speaker rather than two speakers outputting the same signal for the most accurate test. Two speakers in mono create comb filtering as you move your head and mask actual phase issues.
Stereo will only enhance your mix if it sounds balanced in mono. Problems hidden by stereo width become obvious in mono though.
Traditional Stereo Width Methods: Panning and Balance
Panning remains your primary tool to create stereo width. I tested different panning strategies in a variety of mix scenarios systematically and found that understanding which elements belong in the center versus the sides makes or breaks your spatial decisions.
Center-Focused Elements: What Should Stay Mono
Kick drums, snare, bass and lead vocals performed best when panned dead center. The kick and snare provide rhythmic foundation. Off-center placement calls attention in an eccentric way immediately. Bass frequencies present a challenge: our ears struggle to detect spatial position in the lowest spectrum range. This makes stereo bass sound unfocused.
Hard-panned elements drop approximately 3-6 dB in level when collapsed to mono. Focal elements at or near center keep their relative levels consistent across playback systems. Background elements moved to the stereo field edges won’t overpower center content when summed to mono. This matters especially when frequency masking intensifies as sounds share the same location.
Creating Width with Strategic Pan Positions
LCR panning limits your options to hard left, center or hard right positions[163]. This approach maximizes contrast and stereo width. It provides space between instruments. I tested LCR against continuous panning and found LCR created clearer separation in busy arrangements.
Modified LCR works well for complex mixes. The most important tracks go at center and sides while secondary instruments get distributed throughout the stereo field. Balance matters just as much: high-mid frequency content on one side needs balancing with similar frequency content opposite.
Drum kits function as one stereo instrument rather than separate mono tracks. The kick and snare stay centered while hi-hats and toms pan to opposite sides. I position hi-hats 30% left or right typically. Toms spread 15-30% around center and overheads at 75% on either side.
Contrast Techniques: Using Width Selectively
Professional mixes sound wide because engineers consider which elements remain mono. Standards at the extreme left and right positions establish reference points. These make intermediate positions feel more defined. Widest positions reserved for musical climaxes create effect. Automating pan positions to widen through each chorus builds tension gradually.
Genre-Specific Panning Approaches Tested
Electronic music played in clubs requires attention since many club systems run mono. Even stereo club systems mean most listeners hear predominantly one speaker. Ultra-wide effects sound out of place in folk or traditional jazz recordings compared to pop production.
Advanced Stereo Widening Techniques That Passed Our Tests
Advanced stereo widening techniques go beyond traditional panning and deliver controllable width without sacrificing mono compatibility. I tested multiple processing methods to determine which approaches produce genuine spatial enhancement versus artificial artifacts.
Mid-Side Processing with EQ and Compression
Mid-side processing applies different treatment to the center and sides of your stereo image. The technique converts left-right signals into mid (sum) and side (difference) components, processes them independently, then reconverts to stereo.
You can boost the mid channel or cut the side channel to narrow specific frequencies. Cut the mid or boost the side to widen frequency areas. High-pass filtering the side channel at 100-150 Hz keeps bass centered while widening higher frequencies, which I found effective. Side channels above 10 kHz add openness to guitars and pads without affecting low-end punch when boosted.
Mid-side compression works as dynamic width control. The overall image expands when loud center sounds trigger the compressor on the mid channel. The image narrows during loud wide content when you compress the side channel. A 2:1 ratio with 1-4 dB of gain reduction on the side channel makes background elements more present without overpowering center content.
Phase Rotation: 45-90 Degree Testing Results
Phase rotation applies all-pass filtering to shift waveform symmetry. The technique reduces peak-to-average ratios and was developed for AM radio transmission. My tests with 45-90 degree rotation showed minimal audible stereo width enhancement, though some engineers report subtle improvements in specific mastering scenarios.
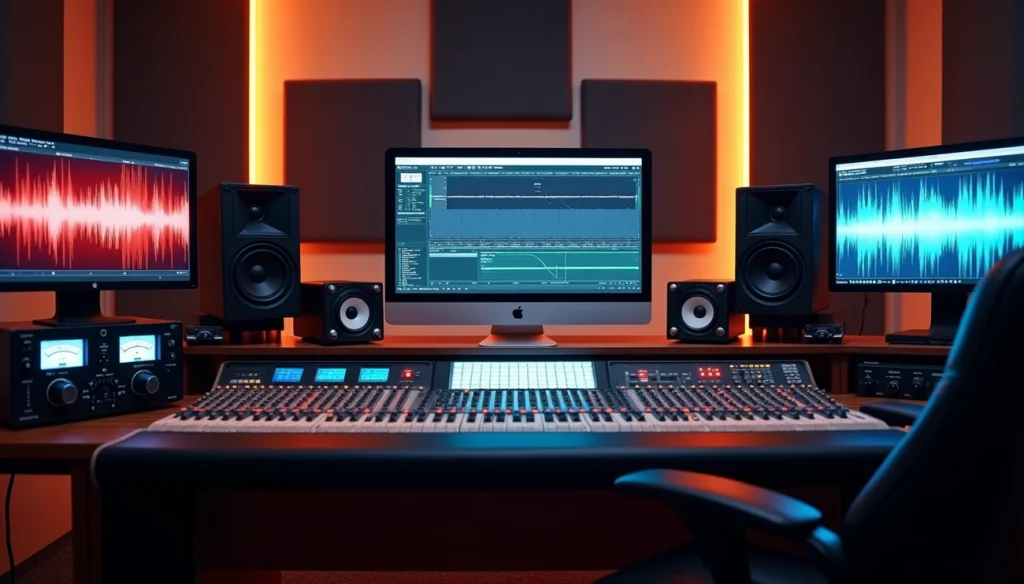
Stereo Imaging Plugin Comparison
I tested multiple stereo imaging plugins across different source material. StereoSavage 2 excels at multiband width control and allows separate widening for different frequency ranges while maintaining mono bass. The Bass Bypass feature keeps content below 200 Hz strictly mono while widening mids and highs.
Ozone Imager provides straightforward width adjustment with Stereoize mode. Brainworx bx_stereomaker and Polyverse Wider remained 100% mono-compatible for transparent widening without phase issues. StageOne 2 adds perceived depth rather than just horizontal spread and creates front-to-back dimension[202].
Haas Effect: Optimal Settings Found
The Haas effect duplicates a signal and delays one copy by 2-50 ms to create perceived width. Delays between 5-20 ms produce tight, focused width suitable for drums. The 20-40 ms range creates spacious effects for sustained sounds.
Mono compatibility remains the primary concern. Haas delays create comb filtering when summed to mono[231]. You can apply the effect only to the side channel in mid-side mode to prevent mono cancelation, as the delayed signal simply disappears rather than causing phase issues[231].
Reverb and Delay for Stereo Space
Reverb creates depth by simulating room reflections. Longer decay times push elements farther back in the mix. I use pre-delay to maintain source clarity before spatial information begins. High-pass filtering reverb below 600 Hz prevents low-frequency buildup.
Delay provides stereo width with less frequency masking than reverb. Dotted eighth-note and quarter-note delays panned opposite directions create rhythmic stereo movement.
What Doesn’t Work: Stereo Imaging Techniques to Avoid
Certain stereo imaging approaches failed my testing consistently and produced problems that outweighed any benefits I could see.
Over-Widening: When More Becomes Less
Spreading every element across the stereo field creates a hollow, washed-out sound with no center or punch. Wide elements only feel influential when you contrast them against strong, centered anchors. Your mix loses focus entirely when everything sits at the edges. Dense arrangements showed me how excessive widening made individual instruments harder to distinguish rather than clearer.
Delay-Based Stereo Expansion Pitfalls in Mastering
Delay-based stereo imagers cause phase cancelation that becomes problematic on your master bus. Widening tools applied globally affect elements that don’t benefit from expansion at the mastering stage. Duplicating tracks with slight delays produces destructive phase issues when you sum them to mono. The mix becomes washed out rather than wider.
Table of Contents
Low-Frequency Stereo: Why It Fails on Most Systems
Bass below 100-200 Hz performs better in mono on systems of all types. Club PA systems run mono frequently and make stereo bass problematic in electronic music. Our auditory system cannot derive directional information from low frequencies anyway.
Plugin Settings That Destroy Mono Compatibility
Excessive mid-side processing destroys the balance mixing engineers work hard to achieve. Boosting side channels too much creates spatial distortion where everything feels pushed forward unnaturally. Check correlation meters when you apply spatial effects.
Conclusion
Stereo imaging doesn’t require complicated tricks or excessive processing. The techniques that worked best during my testing were the simplest: keep bass and drums centered, pan with intention rather than automation, and use mid-side EQ to widen only the frequencies that benefit from expansion.
StereoSavage 2 and Ozone Imager delivered the most reliable results among plugins. Delay-based widening caused more problems than solutions. Your monitoring setup matters just as much. Speakers outperformed headphones every time to make width decisions that translate across playback systems.
The golden rule? Contrast creates width, not blanket processing.