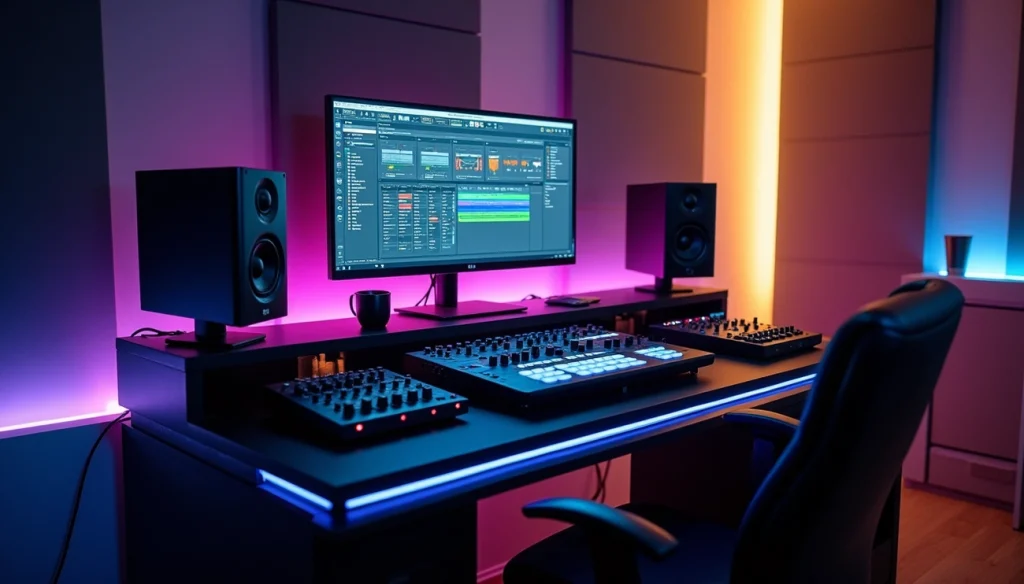
Common techno mastering mistakes can change your powerful, driving track into a muddy mess that falls apart on club systems. Mastering tends to have the notorious reputation of being difficult to learn for aspiring engineers. The pressure to compete often overshadows what might be appropriate treatment for your mix. Mastering techno music just needs a different approach than other genres. Throughout this piece, we’ll get into the errors in your techno mastering chain, from EQ and compression blunders to stereo imaging issues, plus practical fixes you can apply right away that electronic music producers face.
What Makes Techno Mastering Mistakes Different in Music ProductionWhat Makes Mastering Techno Music Different
The Unique Demands of Club Sound Systems
Club sound systems operate under conditions that differ a lot from home studios or streaming platforms. Dense crowds absorb and alter room acoustics, and hard reflective materials like concrete, glass and steel create challenging acoustic environments. Low ceilings limit throw distances and increase reflections. This creates frequency build-ups that can destroy balanced mixes.
The frequency response of professional club systems extends down to 30-35Hz at -3dB. Systems at venues like Fabric reach around 30Hz in their main rooms. Many professional installations using high-end subwoofer arrays cut off around 33-35Hz. This means the crossover’s high-pass filter removes any frequency content below 30Hz. This response range shapes how we approach low-end mastering decisions.
Club systems just need high SPL with low distortion, even coverage across multiple zones and tight controlled low end without room boom. Your master needs to maintain clarity and punch at extreme volumes. Tracks that are over-compressed or balanced wrong collapse at these volumes.
Frequency Balance in Techno vs. Other Genres
Mastering techno music to play in clubs requires hitting specific loudness targets. The integrated LUFS range sits between -8 and -6 LUFS. True peak levels stay below -1 dBTP to prevent clipping on club converters. These numbers reflect a balance between competitive loudness and preserving the dynamic punch that makes kick drums physically felt rather than just heard.
Dynamic range proves much more valuable than raw loudness in club environments. Well-mastered albums used to average -12 to -14 dB RMS while still peaking at zero dB. The main body of music sat with 12dB of headroom available for kicks, snares and builds to provide dynamic punch. Kick drums dropped in clubs with physical weight that made dancing involuntary.
The change toward higher RMS levels has compressed that headroom a lot. Many techno tracks now arrive at mastering facilities with RMS levels around -5dB or higher. There’s nowhere for the kick drum to go except straight into a brick wall limiter. This destroys the transient punch that defines techno’s energy and creates tracks that measure loud but feel lifeless on proper systems.
Why Standard Mastering Approaches Fail for Techno
Standard mastering techniques optimized for streaming platforms or radio don’t translate to techno’s requirements. Over-compressing kills punch and dynamic movement. Ignoring mono compatibility leads to disappearing bass or phase-canceled kicks. The repetitive nature of techno exposes these problems over extended club sets.
Limiters that increase volume at the expense of dynamic punch have become the main reason techno tracks fail in club environments. The bite at the beginning of a kick drum remains important when done right, without limiting to stymie it. Producers who place heavy limiters on their master bus and can’t hear the resulting distortion often work in poorly treated rooms with inadequate monitoring.
RMS figures alone don’t tell the complete story when mastering techno music. Tracks at -10dB RMS can sound quieter than others at -5dB. This depends on how dynamic energy distributes in the frequency spectrum. This explains why dialog with clients about loudness targets matters more than chasing arbitrary numbers. Professional DJs compensate for level differences, but quality dynamic masters hold together better and introduce more energy to the dancefloor.
Critical EQ Mistakes That Muddy Your Techno Master
Boosting Instead of Cutting in the Low-Mid Range
EQ boosts eat into headroom faster, especially when you have them applied across the stereo bus during mastering. Boosting guides you toward transient distortion when fast peaks run out of available headroom. The ear proves sensitive to high-Q boosts but remains oblivious when similar Q settings are used for cuts. This psychoacoustic reality means cutting unwanted frequencies produces more subtle and transparent results than attempting to boost around problem areas.
Boosting frequencies often clogs up your mix when other instruments fight for that same space. If your kick feels weak, cutting some muddy mids makes the low end stand out rather than boosting the sub-bass and creating more problems. Boosting with digital EQs degrades the signal and produces strange, unmusical tonality, especially beyond 3-5dB. Cutting retains the musicality in the sound while carving out space for other elements in your mix.
Neglecting the 200-400Hz Build-Up Zone
The 200-400Hz range represents where most mix problems occur in techno mastering. This frequency tier, which some engineers call “cello tone,” contains the body and weight of classic recordings. Untreated rooms and poor converters create massive build-up in this exact range, which leads producers to scoop it out.
Too much energy between 200-400Hz creates a boxy and unclear sound. Overlapping bass and kick frequencies in this zone produce muddy and undefined low-end that destroys club playback. Narrow Q cuts of 2-4dB around 300-400Hz address muddiness without removing the warmth. A single instrument can cause mud all by itself if it lingers too long. Resonant kicks, roomy pianos, or wooly bass sounds are the usual culprits.
Cutting too much in this range produces a destructive result. Scooping these frequencies on every track creates a hollow, thin and bright master. When placed against proven reference tracks, over-scooped mixes reveal missing weight in the lower-mids and comparable dullness in the top end. The fix requires better monitors, room treatments and reference mixes.
Over-Brightening the High End
Adding top-end to every track during mastering produces tin can results. You only need one or two elements to brighten a whole track. A vocal at 16kHz here, some overheads at 10kHz there, maybe a slight high shelf on an important bus. Leave the rest alone. High-frequency shelves often begin lower than intended, around 6-7kHz, and result in present and painful mixes.
MP3 encoding creates high-frequency problems that mastering engineers must anticipate. Lowering frequencies over 8kHz by 1-2dB addresses encoding artifacts. Keeping peaks at least 1dB under 0dBFS prevents the signal from getting hotter during MP3 conversion.
Using Linear Phase EQ at the Wrong Times
Linear phase EQs introduce pre-ringing artifacts that suck punchiness out of transient-heavy techno material. This reverse reverberated sound splices at the beginning of transients and softens the impact that defines techno’s energy. Phase smearing from regular EQs can sound nice, but linear phase processing imparts a cold and digital tone unsuited to pleasant tone shaping.
Only use linear phase EQs when there’s a specific reason to do so. Parallel processing and narrow corrective cuts represent valid use cases. For general mastering moves, regular EQs preserve the musical character your mix needs. Linear phase latency ranges from 3,000 to over 20,000 samples. This translates to 100 milliseconds or more than half a second of delay.
Compression and Limiting Errors in Techno Mastering
Setting Attack and Release Times for Techno Groove
Attack and release settings shape how compression interacts with your track’s rhythmic patterns. Techno usually needs faster settings than general mastering recommendations suggest. I work between 5 and 15 milliseconds on the master. Depth tends to collapse below that range. Above it, the compressor feels detached from the rhythm.
You need exaggeration to hear what’s happening when you set attack times. The compressor flattens the front edge of sounds when the attack is very fast. Kicks lose definition and percussion becomes smaller. There’s a point where transients regain their punch without becoming uncontrolled as I increase the attack time. The attack is too fast if the track loses energy and feels smaller.
Release determines how the compressor lets go after it reduces gain and influences groove. I explore 50 to 150 milliseconds as a starting range for techno and house. Shorter releases add density and drive, but they introduce audible pumping when pushed too far. I listen to check whether the compressor lets go before the next kick arrives. The release is too fast if the groove feels nervous or starts breathing audibly.
Mastering compression should use ratios around 1.5:1 to 2:1 with gain reduction of 1-3dB at most. These settings might seem barely noticeable, which is correct. The effect accumulates with the rest of your chain.
The Brick Wall Limiter Trap
Brick wall limiters have infinite ratios and completely squash anything louder than the threshold. Nothing ever exceeds the threshold, which can either be terrific or a disaster. Producers use limiters to increase volume at the expense of dynamic impact. This creates the biggest reason techno tracks fail in club environments.
The waveform looks like a continuous block when smashed through a limiter. There’s no color, no dynamic and no interest musically. The weight and impact of a kick that should drive the track is lost. Then RMS levels have been climbing since first software limiters were introduced and regularly reach -5dB RMS or higher on techno mixes.
Start with a slow attack and fast release that only shaves off the loudest transients. Set your threshold below 0 dBFS to prevent clipping, at least -0.3 dB. Add a few milliseconds of lookahead to help avoid pumping and distortion.
Sidechain Techniques for the Master Bus
Bass carries a lot of power and dominates the detector circuit. The compressor reacts too strongly to low frequencies if you hear pumping or the entire mix dips every time the kick hits. A sidechain high-pass filter controls what the compressor reacts to without changing the audio signal itself.
I engage a high-pass filter in the sidechain during mastering. Begin around 80 Hz and move up to 120 Hz for bass-heavy material. The compressor becomes more responsive to mids and highs. This gives frequency-consistent gain reduction.
Avoiding Pumping Artifacts in Repetitive Sections
Many mixes already arrive compressed at mastering. Additional compression simply isn’t needed more times than not. Set your compressor settings in time with the BPM if compression is needed. This prevents losing dynamics while it maintains cohesion across repetitive sections.
Stereo Width and Imaging Problems
Making Bass Too Wide in the Master
Stereo bass destroys club playback. Human ears cannot distinguish bass direction, so stereo imaging does more harm than good in live environments. Most clubs either play in mono or sum low-end frequencies to mono. Phase cancelation loses weight, power, or the whole signal when your bass isn’t mixed for mono and gets converted from stereo to mono.
Keep everything below 300Hz mono. All low-end frequencies under 120Hz get the mono treatment from me. Modern speakers handle stereo bass mostly, but club PA systems present unpredictable configurations. Subs might output mono-summed signal from both channels, only one channel, or different channels to different subs. Making bass mono will give it the intended output whatever the configuration.
Mid-Side Processing Mistakes in Electronic Music
Mid-side processing fails to give perfect separation between center and sides. Audio in the far left corner appears in both M and S signals in a similar way. Mid-side processing affects instruments panned hard to one side in both M and S signals.
Boosting the side channel too much destroys the balance mixing engineers fought to achieve. Lifting sides seems great at first, but excessive processing distorts the stereo field image in ways that harm more than help. Over-compressed elements in hard left and right positions with muted midrange presence won’t feel as wide as material that’s balanced.
Mono Compatibility for Club Playback
Mono systems in clubs are something I still encounter plenty of when DJing. Tracks that sound fine in headphones sometimes have core elements disappear when mixed in. Professional production audio engineers who work on large-scale mono systems emphasize taking mono seriously. Otherwise tracks sound terrible.
Checking in mono reveals what happens on mono systems. Even stereo systems that aren’t lined up and in phase present problems. You ignore mono compatibility at your own risk.
Phase Issues That Kill Your Mix on Big Systems
Phase problems cause mixes to sound hollow or thin. Classic widening tricks like duplicating and panning tracks with slight delays introduce destructive phase cancelations. Most producers don’t realize it until synths feel ghostly, guitars vanish, and vocals lose definition.
Check your mix in mono. Phase problems exist if core parts drop out or sound thin. Correlation meters help identify issues, but ears tell the story fast. I check if anything drops in level or disappears in mono.
Table of Contents
Mastering Environment and Monitoring Mistakes
Why Your Home Studio is Lying to You
Every playback system colors sound differently. Your brain does you a favor at the time you listen to familiar tracks and smooths out bumps and inconsistencies in the playback chain. You lose that helpful filter at the time you master your own work. Room reflections, speaker resonances and acoustic treatment gaps create frequency response anomalies you’ve grown accustomed to hearing. You’re mastering the room rather than the music if you lack accurate monitoring and a well-treated room.
The Importance of Checking on Multiple Systems
I check masters on car stereos, headphones and kitchen speakers. Cars reveal low-end sustain deficiencies. Cheap soundbars and kitchen radios show whether your mix still feels like a record at the time it’s forced into the background. Reference tracks you know very well help identify problems on unfamiliar monitoring devices.
Using Spectrum Analyzers vs. Trusting Your Ears
Spectrum analyzers help find problematic frequencies you can’t locate by ear. They help identify comb filtering in a visual way. Your ears make the final call on whether the master sounds good. People don’t listen with their eyes, so mixing in a visual way never translates.
When to Use Headphones vs. Monitors for Mastering Techno Music
Headphones excel at revealing micro details but mislead on stereo imaging and low end. Open-back designs provide wider soundstage than closed-back models. Monitors deliver physical bass impact and natural phantom center imaging that headphones can’t replicate. I use both and understand how each translates.
Conclusion
Without doubt, mastering techno requires a completely different mindset than simply chasing streaming platform loudness targets. One of the most common techno mastering mistakes is focusing too much on LUFS or RMS values instead of the actual impact and translation of the track. In techno, especially when your music is meant for large club systems, preserving transient punch, low-end clarity, and groove is far more important than squeezing out every last decibel of loudness. Many producers fall into techno mastering mistakes by over-limiting their tracks, which can flatten the energy and make kicks lose their weight on powerful sound systems.
Another of the recurring techno mastering mistakes is misunderstanding how loudness is perceived in a club environment versus headphones or streaming platforms. What sounds loud in a bedroom studio can completely collapse on a big rig if the dynamics and low-end balance aren’t properly managed. The mistakes outlined here share a common thread: they all sacrifice punch in favor of perceived loudness. Choosing to cut frequencies instead of boosting, keeping the bass tightly mono, and resisting the temptation of aggressive brick-wall limiting can completely transform how your tracks translate to the dancefloor. Avoiding these techno mastering mistakes alone can dramatically improve clarity and power.
I still catch myself making these techno mastering mistakes, especially when working in poorly treated rooms or rushing through the process without proper referencing. Your ears naturally adapt to your monitoring environment, which makes it easy to overlook issues like phase problems, stereo imbalance, or harsh high frequencies. That’s why avoiding techno mastering mistakes also means building habits—like checking mono compatibility, referencing professional tracks, and testing your master across multiple systems. These simple steps are essential if you want your techno tracks to hit hard, stay clean, and perform consistently in real-world club conditions.