A proper surround sound setup transforms your listening experience, but getting it right requires more than just placing speakers around a room. A 5.1 surround sound system has six distinct audio channels: five speakers and one subwoofer that work together to create immersive audio. This configuration stands out as one of the most balanced and affordable options for home theater audio. I’ll walk you through everything from understanding your 5.1 surround sound setup components to essential mixing techniques in this piece. You’ll learn how to setup 5.1 surround sound, follow a practical surround sound speaker setup diagram, and avoid common mistakes that compromise your home theater 5.1 setup.
Understanding 5.1 Surround Sound System Components
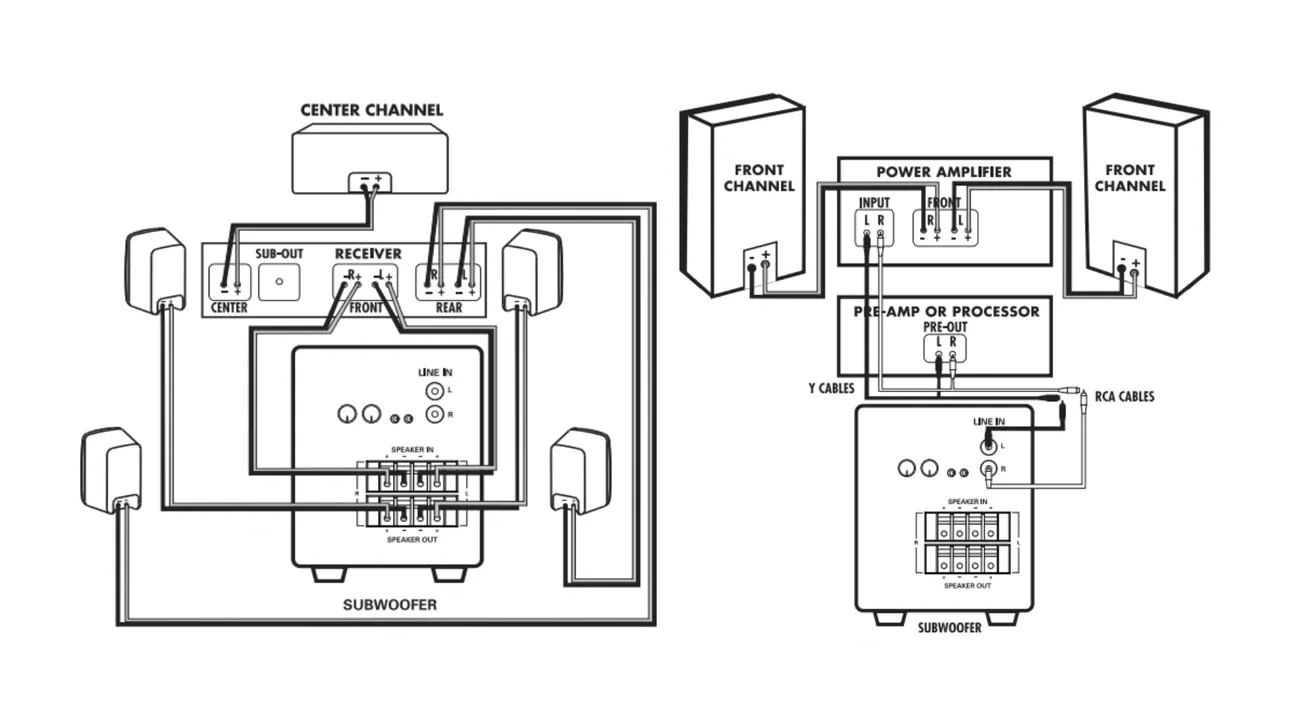
Image Source: ListenUp
Understanding 5.1 Surround Sound System Components
Each speaker in a 5.1 configuration serves a specific purpose. Understanding these roles helps you make informed decisions during your surround sound setup. The designation “5.1” refers to five full-bandwidth channels plus one Low Frequency Effects channel. These five main speakers (front left, front right, center, surround left, and surround right) handle the complete audio spectrum. The “.1” represents a bandwidth-limited channel dedicated to increased bass content.
Front Left, Right, and Center Speakers Explained
Your front speakers are the foundations of the entire system. You should position the front left and right speakers three feet from each side of your television and angle them toward your main listening position. The International Telecommunication Union recommends angles of 22 to 30 degrees for music reproduction. Film content works best at tighter angles around 22.5 degrees. This angling creates what professionals call a soundstage, where audio appears to come from specific locations rather than just speaker positions.
The tweeters in your front speakers need to match ear height when seated. This placement affects how you hear high-frequency content and dialogue. Speaker spacing matters just as much. The distance between your front left and right speakers should match the distance from these speakers to your listening position. This creates an equilateral triangle. This geometry produces excellent channel separation and a wide, immersive soundstage.
The center channel speaker handles a different task. You position this speaker above or below your screen at ear level, and it anchors dialogue and on-screen sound effects. Film soundtracks route most vocal content through the center channel, which explains why this speaker plays such a vital role in your home theater 5.1 setup. Angle it upward if you place the center channel below your television. Tilt it downward if it sits above the screen to direct sound toward your listening position.
Timbre matching across your front three speakers creates a cohesive sound as audio moves between channels. Voices and instruments maintain their natural character as they pan from left to center to right when speakers share the same voicing and tonal balance. This consistency prevents the jarring effect that occurs when mismatched speakers handle the same audio source.
Rear Surround Speakers Positioning
The rear surround channels create the spatial dimension that separates true surround sound from simple stereo playback. These two speakers belong to the sides or behind your seating position for a 5.1 surround sound setup. The ITU standard recommends positioning surround speakers at 110 degrees from the center viewing position. This angle places them behind and to the sides of where you sit, creating an enveloping sound field.
Height placement for rear surrounds generates discussion among audio enthusiasts. Dolby recommends positioning these speakers at 1.2 meters off the floor, which corresponds to average ear height. The company allows flexibility up to 1.25 times the height of your front speakers, translating to a range between 1.2 and 1.5 meters. Mounting surrounds too high produces sound that appears to come from above rather than around you. This contradicts the design intent of 5.1 systems.
You can position surround speakers a few feet behind your listening area and angle them toward your seating position when side placement proves impractical because of room layout. Mount them above ear level and aim them downward at your listening spot. This configuration still delivers effective surround sound, though the ideal side placement produces better results.
The surround speakers in modern 5.1 systems handle full-range audio, not just ambient effects. This represents a most important change from earlier surround formats where rear channels carried limited frequency information. Current surround channels can reproduce bass content below 200 Hz, which means selecting surround speakers with adequate low-frequency capability improves overall system performance. Setting these speakers to send bass below 80 Hz to your subwoofer through your receiver’s bass management creates a balanced approach.
Subwoofer (.1) Role in Low-Frequency Effects
The “.1” designation in 5.1 surround sound setup diagrams represents the Low Frequency Effects channel, abbreviated as LFE. This channel holds 8 to 10 percent of the low frequencies you hear during movie playback. Understanding LFE requires distinguishing it from your physical subwoofer, as these terms describe different concepts.
LFE functions as a bandwidth-limited channel capped at 120 Hz for Dolby formats and 80 Hz for DTS audio. The channel has an additional 10 dB of electrical headroom above the five main channels. Film mixers created this dedicated effects channel to deliver large explosions and other intense low-frequency content without exceeding the capacity of main screen channels in movie theaters. The LFE channel provides a way to add specific low-frequency energy to increase dramatic moments in film soundtracks.
Your subwoofer output differs from the LFE channel. The subwoofer can receive bass information from all six channels through your receiver’s bass management system. You determine which frequencies from each speaker route to the subwoofer when you configure your receiver’s bass settings. Most receivers offer two modes: LFE mode sends only the dedicated .1 channel content to the subwoofer, while LFE+Main mode combines the .1 channel with low frequencies redirected from all five main speakers.
Bass management handles this routing based on your speaker size settings. Bass below your selected crossover point (80 Hz) redirects to the subwoofer if you set your front speakers to “small” in your receiver menu. This prevents smaller speakers from attempting to reproduce frequencies they cannot handle. Speakers set to “large” reproduce their full frequency range, with the subwoofer receiving only the dedicated LFE channel content.
The LFE channel serves as an effects channel rather than a general bass channel. Sound mixers use it for explosions, thunder, and earthquakes. You should never place content that’s most important to the overall mix in the LFE channel alone. Dolby Digital decoders drop the LFE channel when they fold down a 5.1 source to stereo. This means any musical or dialogue content placed in the LFE would disappear during downmixing.
The LFE channel sees limited use for music production since most musical bass content fits within the headroom of the main channels. Film and multimedia applications benefit most from the LFE channel’s knowing how to add low-frequency improvement without compromising the five primary channels. Your surround sound speaker setup should account for this difference when setting crossover points and speaker configurations.
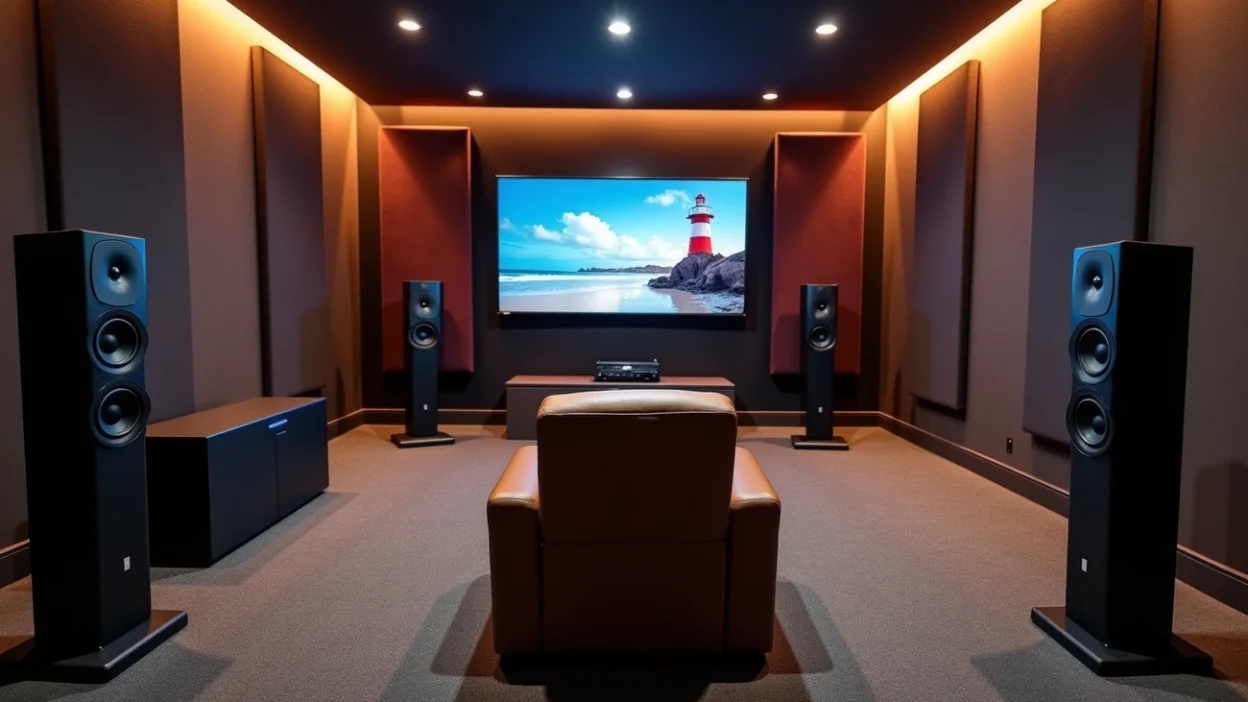
How to Setup 5.1 Surround Sound: Room Preparation and Speaker Placement
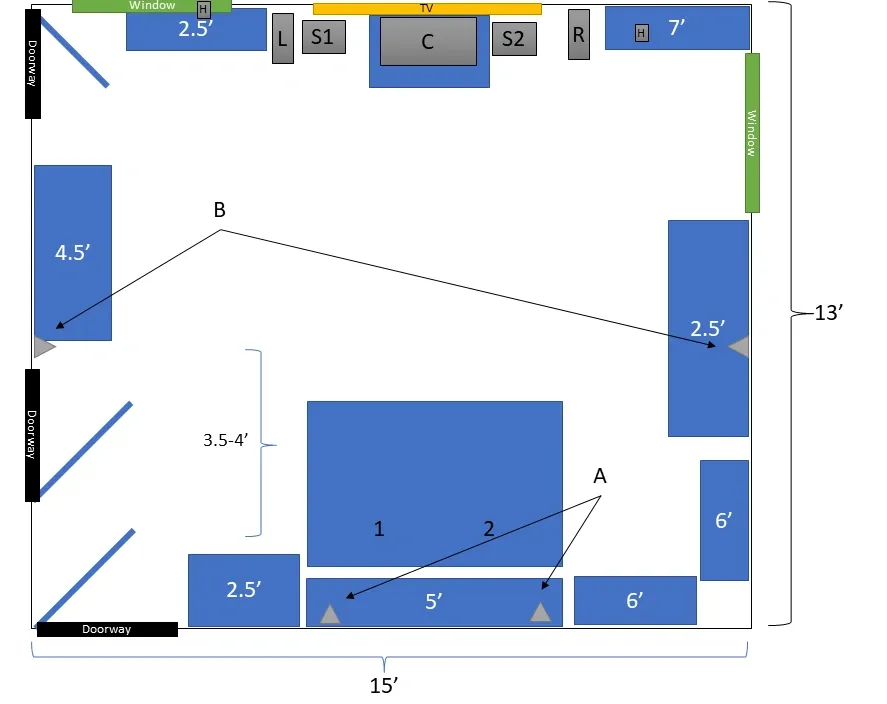
Image Source: AVS Forum
How to Setup 5.1 Surround Sound: Room Preparation and Speaker Placement
Correct speaker setup determines whether you experience true surround sound or just noise from different directions. The physical room you choose and how you position each speaker within that space makes the difference between mediocre audio and an immersive home theater 5.1 setup.
Choosing the Right Room for Your Home Theater 5.1 Setup
Room selection affects your surround sound setup more than most people realize. A large living room or dedicated home theater space works best, though smaller spaces can deliver excellent results with proper configuration. The seating area should occupy the room’s center, within range of all speakers. This central positioning allows each channel to reach your ears at the intended time and volume level.
Avoid overly reflective rooms for your 5.1 surround sound setup. Hard surfaces like wood floors, tile and bare walls bounce high frequencies back toward your listening position and make them too loud. They create short echoes that mask dialogue and ambient details. These reflected frequencies arrive later than the direct sound from your speakers and interfere with dialogue intelligibility. A thick area rug between you and your speakers on hard floors reduces these reflections substantially. Small end tables work better than large coffee tables in front of your seating position. Coffee tables reflect sound upward toward your ears.
Keep your speakers and seating position away from corners and walls where possible. Corners reinforce low and mid frequencies and make explosions disproportionately loud while obscuring dialogue. Pulling your main speakers away from corners improves imaging and reduces boundary reflections. A minimum distance of two to three feet from walls works well, though any separation you can manage helps.
Sound-absorbing and sound-diffusing treatments handle reflections from walls, floors and ceilings. If you must place your center channel inside media furniture, position it as far forward as possible so the speaker’s front aligns with the furniture’s edge. Acoustic foam lining the space around the speaker absorbs reflections that would otherwise color the sound.
5.1 Surround Sound Setup Diagram: Optimal Speaker Angles
Speaker angles relative to your primary seating position follow standards based on years of audio research. The International Telecommunication Union standard ITU-R BS.775-3 provides the baseline for listener-level speaker placement. Your front left and right speakers should sit at 25-30 degrees off-axis from your center viewing position. This positioning creates proper stereo imaging and a wide soundstage.
Some sources recommend tighter angles of 22-30 degrees, while others suggest starting at 17 degrees and experimenting up to 30 degrees. You can calculate precise angles using simple math. Measure the distance from your center seat to where your center channel will sit. Multiply this distance by 0.3 to find how far your front speakers should sit from the center channel for about 17 degrees off-axis. Multiply that same original distance by 0.6 to achieve 30 degrees.
The surround speakers in a 5.1 surround sound setup diagram should appear at 90-110 degrees off-axis. This range places them directly to your sides or behind your seating position. The flexibility in this range accommodates different room layouts. Dolby documentation shows both 90-degree and 110-120 degree configurations for 5.1 systems, though 110-120 degrees provides better results for most home theater applications.
All listener-level speakers should maintain equal distance from your listening position. Your AV receiver can compensate using time alignment to synchronize audio arrival from each speaker at the time equal distances prove impossible. Speaker height should remain consistent across all channels, at 3.9 feet (1.2 meters), which matches ear level for average seated listeners. If rear speakers must sit higher than front speakers due to room constraints, keep their height below 1.25 times the front speaker height.
Table of Contents
Front Speakers: Distance and Height Guidelines
Your front speakers need proper spacing to create an effective soundstage. Position your front left and right speakers roughly three feet from the sides of your television. A useful rule of thumb suggests separating front speakers by about half the distance you sit from them. If you sit 12 feet back, separate the front speakers by about 6 feet. This formula allows variation; at 12 feet, anything between 5 and 8 feet works well.
Use enough separation so you notice clear stereo effects and directional cues without sensing that sound emanates from two separate boxes at the room’s front. You want a smooth, seamless stereo soundstage. The center channel speaker fills in the middle nicely, but you should still want an unbroken soundstage. If you get a hole-in-the-middle effect during stereo playback, move the two main speakers closer together or angle them inward toward your listening position.
Tweeter height matters for front speakers. Position tweeters at ear height for optimal high-frequency response and imaging at the time you’re seated. Tower speakers accomplish this naturally, while bookshelf monitors require stands to reach the proper height. Tweeters produce the most directional frequencies. Pointing them above, below or to the sides of your ears results in inaccurate frequency response.
Experiment with “toe-in” by angling speakers directly at your center seat versus firing them straight out to the left and right. Some speakers sound best facing straight forward, while others benefit from inward angling. Check your speaker manufacturer’s recommendations for their preferred toe-in angle. Switch your receiver to stereo mode during testing so only the left and right speakers play. This makes it easier to review soundstage width and center imaging.
Rear Speaker Positioning: The 110-120 Degree Rule
The surround speaker positioning debate centers on whether 90 degrees or 110-120 degrees produces better results for 5.1 systems. Standards vary between sources and create confusion about optimal placement. The ITU standard specifies 90-110 degrees, while practical implementations often favor the 110-120 degree range for boosted immersion.
Position surround speakers 2-3 feet above ear level. This placement, about 2 feet above ear level, maximizes ambiance and makes the speakers harder to localize. Your brain notices a more realistic, enveloping sound field at the time you cannot pinpoint exactly where surround sound originates. Mount these speakers on sturdy wall brackets or tall stands to achieve the proper height.
Point surround speakers directly at your listening area for maximum clarity. If side placement becomes impractical in your room, move surrounds behind your couch and angle them toward you. Try slim speakers mounted high on the wall and angled downward at the time your seating backs onto a wall.
Both back wall and side wall placement work acceptably in a 5.1 system where you only have two surround channels. Side wall placement behind your listening position delivers more immersive effects and helps the surround channels disappear into the soundfield. The rear speaker tweeters should sit about 2 feet above head level and maintain consistency with side placement recommendations.
Subwoofer Placement: The Crawl Method
Subwoofer placement affects bass quality substantially due to how low-frequency waves interact with room boundaries. The same subwoofer can sound markedly different at the time you move it to another spot. Bass waves behave differently from mid and high frequencies and create standing waves that result in peaks and nulls throughout your listening space.
The subwoofer crawl method identifies optimal placement locations through empirical testing. This procedure helps you find where bass sounds smoothest and most balanced:
Place your subwoofer in your primary listening position temporarily
Play a track with consistent, repeating bass content
Get on your hands and knees at knee level
Crawl around the room and listen to bass response at various locations including corners, along walls and in the center
Mark the spot where bass sounds most consistent, articulate and balanced
Move your subwoofer to this marked location
Crawling at knee level matters because standing puts you about 5 feet off-axis with the subwoofer and changes sound characteristics enough to cause non-optimal placement decisions. The logic behind this method is simple: a location that sounds good at the time your ears occupy the subwoofer’s normal position will perform well at the time the subwoofer sits there.
Starting with corner placement excites all possible room modes and creates a denser standing wave pattern that reduces the likelihood of encountering nulls. But corners can reinforce bass excessively at the expense of clarity and definition. They produce boomy, muddy bass that obscures detail. Placing your subwoofer directly against walls reinforces low frequencies but often sacrifices definition.
Pull your subwoofer away from walls and corners for cleaner, more defined bass. Even small distances make substantial differences and allow bass waves to develop naturally. A minimum of two feet from room corners prevents excessive boominess. Starting with wall placement along the front stage often works well and aids integration with your soundstage so bass seems to originate from the same general direction as other frequencies.
Call yourself fortunate if corner or front wall placement sounds excellent. If not, the crawl method reveals the best available location. Adding a second subwoofer evens out bass response and minimizes dead spots throughout the listening area for large rooms.
Calibration and Connection: Getting Your Surround Sound Speaker Setup Right
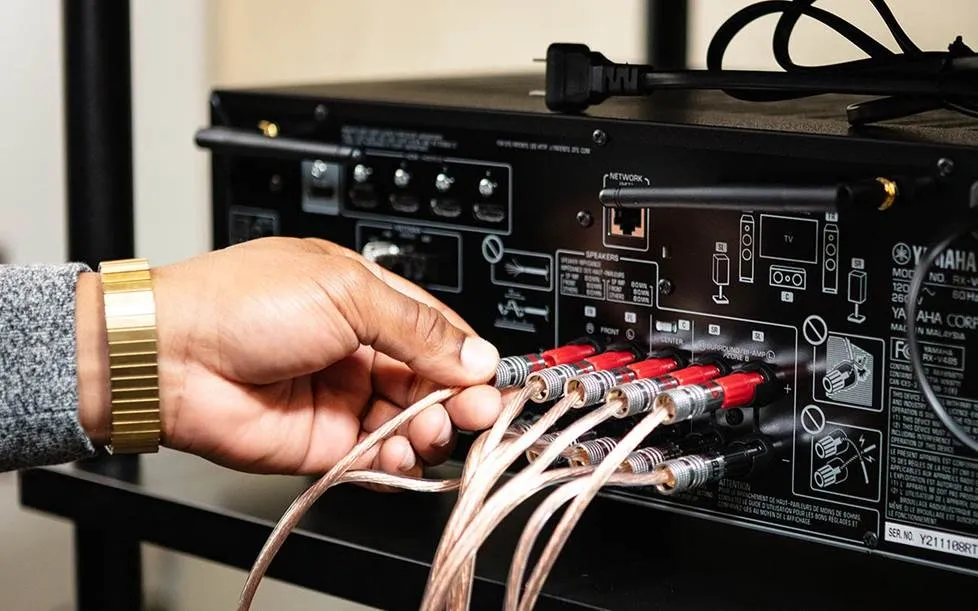
Image Source: Crutchfield
Calibration and Connection: Getting Your Surround Sound Speaker Setup Right
You need to connect your speakers the right way. This is the foundation of any successful surround sound setup. First, verify your AV receiver supports 5.1 channels. This means it powers five speakers and provides an output for your powered subwoofer. Use appropriate speaker wire to connect your main speakers to the designated outputs on your receiver. Make sure each speaker matches its intended channel. Your subwoofer connects via RCA cable rather than speaker wire. Double-check that each speaker connects to the correct receiver output. This proves important for keeping the immersive effect where sounds direct to their intended locations.
Connecting Speakers to Your AV Receiver
Most 5.1-channel systems follow standard connection patterns. Variations exist for bi-amplifier configurations or additional speaker zones. You face a choice between automatic calibration systems and manual setup procedures after you connect all speakers.
Auto-Calibration vs Manual Setup
Modern receivers include advanced auto-calibration features designed to simplify a surround sound setup. These systems use a measurement microphone to detect the distance and sound level of each speaker, then automatically adjust the receiver settings. Popular technologies such as Audyssey MultEQ, Yamaha’s YPAO, and Pioneer’s MCACC analyze the acoustics of your room and generate correction profiles to optimize your surround sound setup. When performed from multiple listening positions, these tools can deliver highly precise adjustments, sometimes measuring speaker distance with accuracy finer than 0.1 feet. For many users, this automatic process provides a quick and convenient way to improve a surround sound setup without extensive manual adjustments.
However, auto-calibration systems also have limitations that can affect the overall quality of a surround sound setup. Subwoofer calibration is one of the most common issues. These systems often boost the subwoofer volume too aggressively and can overestimate the physical distance between the listener and the subwoofer. For example, a real distance of 10 feet might be detected as 20 feet or more, which can negatively affect timing and bass integration in a surround sound setup. Automatic systems also tend to select crossover frequencies that are too high, sometimes setting them at 150 Hz, which limits the natural bass response of your speakers.
For a better-balanced surround sound setup, many audio enthusiasts prefer manually adjusting crossover settings after running auto-calibration. A common recommendation is an 80 Hz crossover for speakers with 4- to 6-inch woofers and around 100 Hz for smaller 3-inch drivers. Higher crossover points between 120 and 150 Hz should generally be reserved only for the smallest satellite speakers in a compact surround sound setup.
Manual calibration requires more time, but it can significantly improve the performance of your surround sound setup. By using your receiver’s built-in test tones and carefully adjusting speaker levels and distances, you can fine-tune the system beyond what automatic tools provide. An SPL meter can further increase precision by ensuring that each speaker in your surround sound setup produces balanced sound levels at the listening position. With careful manual adjustments, you can achieve a more accurate, natural, and immersive surround audio experience.
Setting Speaker Levels and Distance
Level calibration between all speakers in your 5.1 system represents one of the most critical adjustable parameters. Many listeners boost rear speaker levels too much relative to fronts and center channels. This creates an unnatural surround field that your ear localizes.
Follow this procedure for proper level calibration. Select your common listening position and adjust your receiver’s master volume to your typical listening level around 75 dB. Initiate the receiver’s test tone and allow it to sweep each speaker. Adjust individual channel volumes until they sound similar in level. An SPL meter set to C-weighting with slow response provides greater accuracy. Position the meter at ear level in your sweet spot and point it at the ceiling rather than at speakers. Calibrate volume levels within 1 dB relative to each channel.
Distance settings affect timing synchronization between channels. Sound travels at 1,100 feet per second. Every 1 millisecond of delay corresponds to 1.1 feet of increased speaker distance. Adjust delay short between 5-15 ms if your surround speakers sit close to your listening position. Set delay longer at 15-35 ms for surrounds located 20-30 feet away. Setting delay too long results in echoed, unnatural surround fields. Too-short delays create flat, two-dimensional soundfields.
Testing Your System for Balanced Sound
Test your system with film content featuring strong surround mixes once you finish calibration. Listen for clear dialogue from your center speaker and deep yet balanced bass from the subwoofer. Surround effects should appear to originate from all around you. Most receivers offer test modes that cycle sound among speakers with visual indication of which channel plays. Fine-tune levels based on actual content. Some recordings boost rear channels 1-3 dB higher than nominal. Lower rear levels until they balance with front and center channels if they sound excessive during movie playback.
Essential Mixing Techniques for 5.1 Surround
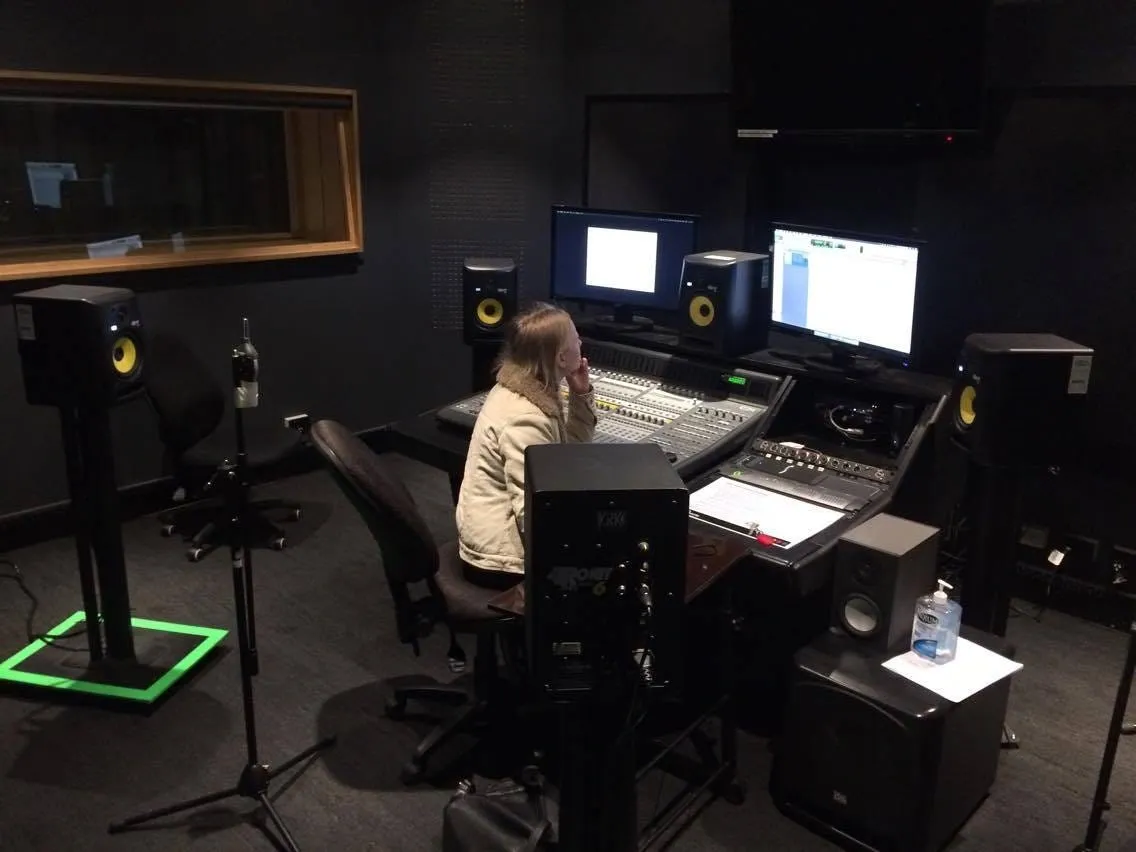
Image Source: Medium
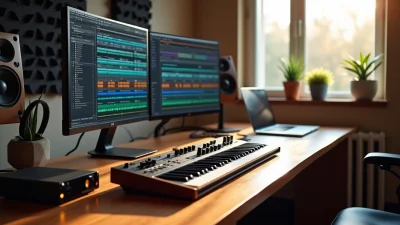
Once you physically configure and fine-tune your surround sound speaker setup, the real creative work begins. Mixing for 5.1 surround sound requires understanding how to position audio elements across multiple dimensions. You create an immersive soundfield that boosts rather than distracts from your content.
Panning in Two Dimensions: Left-Right and Front-Back
Traditional stereo mixing taught us to pan sounds left and right across a horizontal plane. Surround mixing adds a front-to-back dimension and allows placement of sounds anywhere within a 360-degree field. The panning interface in most digital audio workstations displays an overhead view of your speaker arrangement. A movable dot indicates where sound positions within this field.
Dragging this dot forward places sound in your front speakers. Pull it backward and audio routes to rear channels. Moving it left or right adjusts lateral positioning. The divergence control determines how discrete your panning becomes. A sound panned hard left plays only through the left speaker at 100% divergence. Lowering divergence bleeds signal into adjacent channels and narrows the perceived width.
Creating Space for Dialogue in the Center Channel
Dialogue anchors to the center channel in nearly all professional mixes and routes at 100% to this speaker. This placement will give voices that remain clear and synchronized with on-screen action. But routing dialogue to center alone can create harshness, especially when you have lower-quality home theater center speakers.
You can add depth to lead vocals or dialogue by routing the primary signal in mono to center. Then send a small amount in stereo to rear speakers, perhaps through reverb processing. This technique brings vocals forward and spreads them without phase issues. Diverging dialogue to left and right at a 70-80% center/20-30% LR split helps listeners on the sides of larger rooms feel connected to the mix for theatrical releases.
Using Stereo Effects in a Surround Environment
Music and stereo effects require thoughtful distribution across your 5.1 surround sound setup. Stereo music tracks route 75% to front left/right and 25% to sides/rear. Try 50% front, 25% sides, and 25% rear for balanced envelopment when working with individual stems.
Background ambience and atmospheres spread 50% to front left/right and 50% to sides/rear. Apply hall reverb to surround speakers and add subtle delay of 10-20 ms to surround channels for spatial emphasis.
Dynamic Panning for Movement Effects
Automated panning creates the sensation of sound moving through your surround field. Most mixing software allows keyframe automation. You set specific positions at different timeline points. The smoothness slider between keyframes adjusts interpolation curves. Higher settings produce curved motion paths rather than linear movement. This curved motion sounds more natural for effects like vehicles passing or objects flying overhead.
Common 5.1 Setup Mistakes and How to Avoid Them
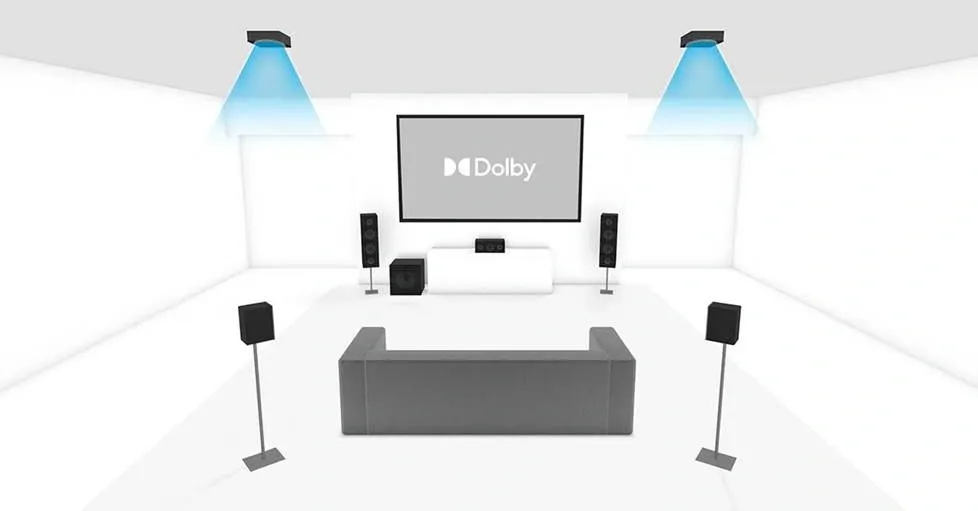
Image Source: AVFusionHorizon
Even properly adjusted systems encounter performance issues. Loose cable connections cause audio loss and distortion. Configuration settings require manual verification as receivers may not detect 5.1 output if previous configurations remain active.
Monitoring Position: Beyond the Sweet Spot
The sweet spot shrinks when monitoring with fewer speakers. A phantom center only works for listeners in or near this center position where all speaker axes meet. Stereo imaging and center channel cohesion collapse when you move outside this zone.
Dealing with Room Acoustics and Reflections
Hard surfaces reflect sound and create echoes and muddy audio. Direct sound travels straight to your ears. Reflected sound bounces off walls, floors, ceilings and furniture before arrival. These reflections distort sound by magnifying certain notes while canceling others. Place area rugs between your seat and speakers on hard floors. Move seating away from walls to reduce bass buildup where standing waves collect. Acoustic panels at reflection points reduce flutter echo that affects midrange and treble.
Speaker Level Imbalances
Mismatched speaker sensitivity creates imbalances. Fronts rated at 87dB sensitivity paired with rears at 81dB require receiver adjustment to compensate. Surrounds closer than mains play louder. Excessive rear level boosts create unnatural surround fields.
Phase Issues Between Multiple Channels
Phase cancellation produces thin sound with minimal bass. Speakers wired incorrectly reverse polarity and cause frequencies to cancel. Test by summing to mono. Center-panned signals that disappear indicate phase problems.
Conclusion
Creating a high-quality surround sound setup requires more than simply placing speakers around your room. It involves understanding how each component of a 5.1 surround sound setup works together to deliver a cohesive and immersive listening experience. When the front speakers, center channel, surround speakers, and subwoofer are positioned correctly and calibrated properly, they create a realistic sound environment that brings movies, music, and games to life.
As we’ve seen throughout this guide, the success of a home theater 5.1 setup depends heavily on preparation and precision. Proper room selection, thoughtful speaker placement, and careful calibration all play a major role in achieving balanced audio. Even small adjustments to speaker angles, distances, or crossover settings can significantly improve clarity, depth, and spatial realism.
Using a clear 5.1 surround sound setup diagram can also make the process much easier. Visualizing the correct speaker positions helps ensure that sound reaches your listening position at the right time and from the correct direction. This attention to detail allows the soundstage to feel natural and immersive, rather than disjointed or uneven.
Equally important is maintaining a well-balanced surround sound speaker setup through proper calibration and testing. Adjusting speaker levels, verifying distances, and optimizing subwoofer placement all contribute to a smoother and more consistent audio performance. Avoiding common mistakes such as incorrect speaker height, poor room acoustics, or imbalanced channels ensures that your system performs at its best.
Ultimately, mastering a surround sound setup is about combining technical accuracy with thoughtful room design. By applying the principles and techniques discussed in this guide, you can transform a standard audio system into a powerful 5.1 surround sound setup that delivers a truly immersive home theater experience. With the right placement, calibration, and attention to detail, your home theater 5.1 setup can provide rich, cinematic sound that enhances every piece of content you enjoy.