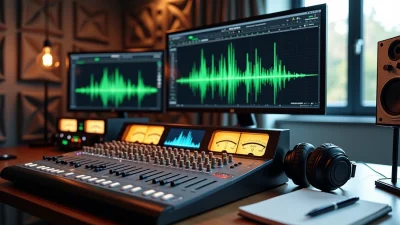

Understanding how do vinyls work starts with a simple truth: vinyl records are plastic plates with continuous grooves that produce sound when a turntable needle tracks them. Vinyl is an analog medium reproducing complete soundwaves with a frequency response from 7Hz to 50kHz and more than 75dB of dynamic range, unlike digital formats. How do vinyls actually work involves complex physics where sound waves become physical grooves. How do vinyls and record players work together determines playback quality. This piece will walk you through how to make a vinyl record from an audio engineer’s point of view, covering the mastering process that transforms your digital files into physical grooves.
How Do Vinyls Work: The Physics Behind the Grooves
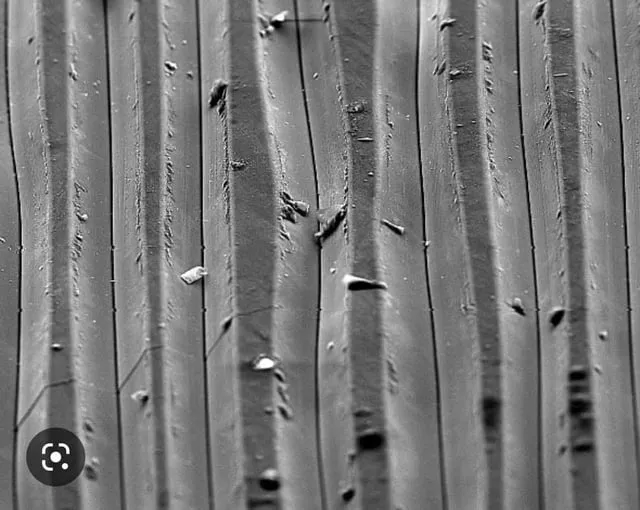
Image Source: Reddit
The Anatomy of a Vinyl Record
Records consist of polyvinyl chloride (PVC), a durable plastic chosen for its flexibility and capacity to hold microscopic details. A single continuous spiral groove runs from the outer edge to the center across the surface. Unwound, this groove would stretch approximately 500 meters on a typical 12-inch LP. The groove itself is V-shaped, with each wall of the V carrying separate stereo information. The outer wall (closest to the record’s edge) carries the right channel, while the inner wall holds the left channel.
Getting into groove geometry makes how vinyls work physics clearer. The width and depth of these grooves encode the frequency and amplitude information of the original recording. Louder sounds create wider, more dramatic side-to-side movements, while pitch is represented by how often these undulations occur. Higher frequencies produce many tiny wiggles in a short span. Bass notes create long, slow waves carved into the vinyl surface.
How Sound Waves Become Physical Grooves
The process of how to make a vinyl record begins at a mastering studio with a cutting lathe. This device uses a diamond-tipped stylus to cut a continuous spiral groove into an aluminum disc covered in lacquer. The audio signal drives the cutter head, which moves in two dimensions using a 45°/45° encoding system. Lateral motion (side-to-side) carries mono information and bass content. Vertical motion (depth variations) encodes stereo differences between channels.
The cutter engraves the groove with lateral and vertical displacements that mirror the instantaneous audio voltage as the lathe rotates. Lower frequencies cause wider side-to-side motion, while higher frequencies make the cutter move faster in narrower spaces. Engineers monitor the cut through a secondary pickup to ensure fidelity and avoid overcutting. This lacquer master then undergoes electroplating to create metal stampers used for pressing vinyl copies.
Why Turntables and Needles Can Read Music
How vinyls and record players work together relies on electromagnetic induction. The turntable spins the record at preset speeds of 33 1/3, 45, or 78 RPM. A stylus (made from industrial diamond due to its hardness) sits at the tonearm’s end and rides in the grooves as the record rotates. The tonearm’s size and shape can affect audio quality.
The stylus vibrates according to the carved patterns as it traces the groove’s undulations. These mechanical vibrations transfer to a cartridge housing either a moving magnet (MM) or moving coil (MC) design. The stylus movement causes a magnet to move relative to fixed coils in moving magnet cartridges, inducing voltage proportional to the motion. Moving coil cartridges work inversely, with the stylus moving coils relative to magnets. This electromagnetic conversion produces a small electrical signal that mirrors the original groove modulation.
The RIAA Equalization Curve Explained
How vinyls work involves a standardized frequency manipulation system. High frequencies are boosted and low frequencies are reduced according to the RIAA equalization curve when records are cut, which became the industry standard in 1954. This pre-emphasis serves multiple purposes: it permits greater recording times by decreasing groove width and improves sound quality while reducing groove damage during playback.
Bass frequencies require large groove excursions that would otherwise limit playing time and cause tracking problems. Engineers control groove width and reduce physical stress on the stylus by attenuating low frequencies during cutting. Boosting high frequencies during recording helps reduce surface noise like hiss and clicks when the inverse curve is applied during playback.
A phono preamp applies RIAA de-emphasis during playback, reversing the frequency shaping by boosting bass and cutting treble in exact amounts. Vinyl would sound thin, bright, and unbalanced without this correction. The curve defines transition points at 2122 Hz, 500.5 Hz, and 50.05 Hz, creating a flat frequency response that restores the original tonal balance and attenuates amplified surface noise.
Why Vinyl Mastering Is Different From Digital Mastering
Image Source: Disc Makers Blog
Mastering for vinyl requires different approaches than digital mastering because physical grooves can’t accommodate the same processing techniques used for streaming or CD releases. I can push limiters hard and maintain aggressive compression throughout at the time I prepare tracks for digital. Vinyl rejects these methods.
Physical Limitations of the Vinyl Medium
A stereo groove holds information on both walls at a 45-degree angle, with the needle moving laterally and vertically as it tracks. Higher frequencies create short, fast movements. Lower frequencies produce longer, slower ones. The difference between the quietest and loudest parts of a track is dynamic range, and the needle needs sufficient space within the groove to track these changes without distortion.
Louder recordings require deeper, wider grooves, which limits playing time and affects sound quality. Bass frequencies are tricky because low-frequency sounds demand even more groove space to reproduce at higher volumes accurately. The stereo image on vinyl uses vertical movement to represent channel differences and horizontal movement for the sum. This system restricts stereo width before phase issues or mechanical tracking errors occur.
Frequency Response and Dynamic Range Differences
Digital files allow over 90dB of difference between the loudest and softest sounds, compared to vinyl’s 70dB dynamic range. Digital offers more than ten times the dynamic range of vinyl recordings. The separation between left and right channels on vinyl measures 30dB, while digital files exceed 90dB. Vinyl has a nowhere near as expansive soundstage compared to digital.
Vinyl can’t compete on loudness because louder passages require bigger grooves. You compress the entire dynamic range to maximum loudness on vinyl, and you need to space grooves further apart. Digital masters often get pushed hard with limiting and compression during the loudness war. But vinyl can’t endure heavy limiting because too much loudness creates issues the physical groove can’t handle. Vinyl mastering needs more headroom and softer peaks to preserve groove integrity.
The Effect of Groove Spacing on Sound Quality
Long sides require tighter groove spacing to fit content onto the disc. This tighter spacing reduces volume levels that can be cut into vinyl, leading to quieter playback. Lower volume levels make records more susceptible to surface noise, including pops and clicks. Tighter groove spacing limits dynamic range and high-frequency response, especially toward inner grooves where linear velocity decreases. Keeping each side of a 12-inch LP under 18-20 minutes is recommended.
The louder you cut the signal, the bigger the groove, and more space gets used. Given these points, less total time fits on a side. A hot club record should stay under 12 minutes, with 8 to 10 minutes being ideal.
Preparing Your Audio Files for Vinyl Mastering
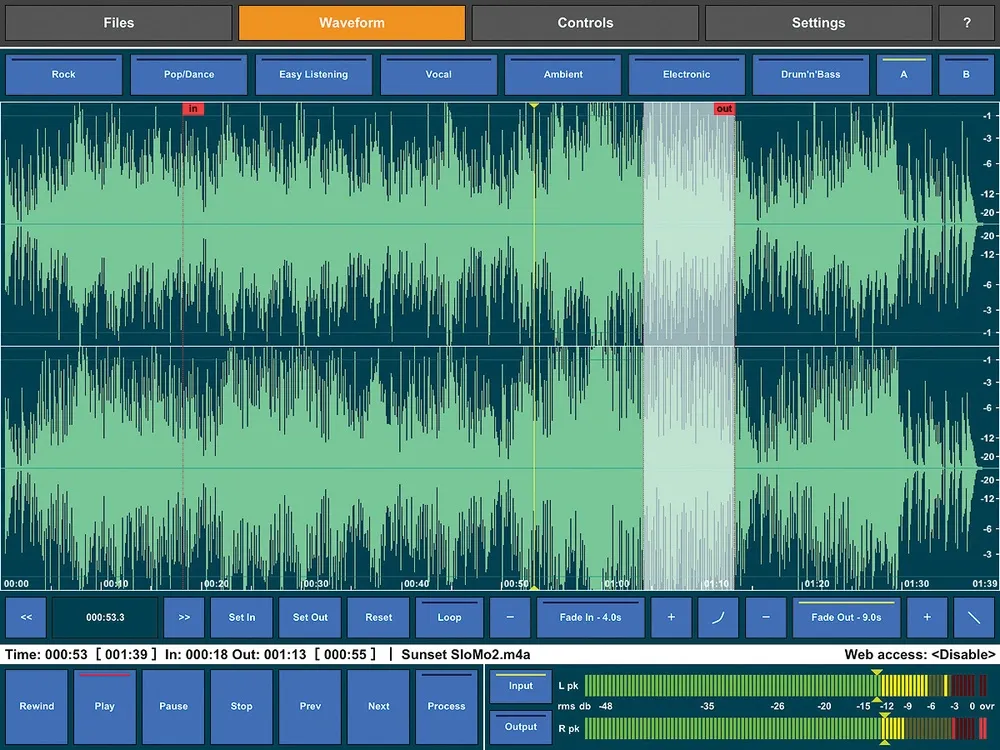
Image Source: Sound On Sound
You need more than just a stereo mix bounce to get your audio files ready for vinyl cutting. The preparation stage determines whether your record plays smoothly or skips across significant moments.
Selecting the Right File Format and Bit Depth
Supply 24-bit WAV or AIFF files as your cutting masters. These lossless formats preserve the full dynamic range without compression artifacts. While 16-bit files work, they offer reduced dynamic range compared to 24-bit alternatives. Some facilities accept 32-bit files, though this format provides redundant headroom for most projects. Deliver files at your session’s native sample rate, whether that’s 44.1kHz, 48kHz, or 96kHz. A higher sample rate than your session provides no benefit when bouncing.
Most cutting engineers prefer receiving assembled Side A and Side B masters as continuous WAV files rather than individual tracks. This approach reduces sequencing errors. A cue sheet showing where each track begins and ends should be included. You can also submit individual files labeled A1, A2, B1, B2 with silence between tracks already embedded.
Bass Frequencies and Stereo Information Management
Stereo bass creates vertical groove movements that cause needles to skip. The side signal in mid-side encoding should measure 6dB lower than the mono signal, or 9dB lower for very loud cuts. Keep stereo information mono-compatible up to 200Hz. Engineers often narrow the stereo field around 300Hz and want full mono between 150Hz and 120Hz.
A steep high-pass filter around 20Hz prevents severe groove lifts. Control frequencies below 40Hz, as these force the needle to swing into neighboring grooves. Bass-heavy electronic tracks need stricter treatment than acoustic material.
High Frequencies and Sibilance Control
Use a de-esser on vocal tracks with prominent sibilance. Harsh frequencies between 6kHz and 12kHz cause playback cartridges to distort when they can’t track rapid groove modulations. Cutting equipment is sensitive to long, excessive high-frequency signals starting from 4-5kHz. Cutting frequencies above 15,000Hz at hot levels should be avoided.
Phase Issues That Cause Skipping
Out-of-phase material pulls the cutting head in opposite directions at once and collapses the groove. Everything under 300Hz should stay in phase. Check your mix in mono to identify phase cancellation.
Proper Headroom and Volume Levels
Peak levels should not exceed -12dB RMS in loudness. Mastering engineers recommend leaving peaks between -3dB and -6dB before mastering. Limiters on vinyl masters should be avoided, as heavily limited files get cut quieter anyway.
Track Sequence and Side Length Planning
Demanding tracks with exposed high frequencies should be placed at the beginning of each side. Inner grooves suffer from reduced fidelity, which makes them suitable for mellower songs. Keep 12-inch sides at 33 1/3 RPM between 15-22 minutes, with 20 minutes or less providing optimal results.
The Vinyl Mastering Process: From Digital to Lacquer
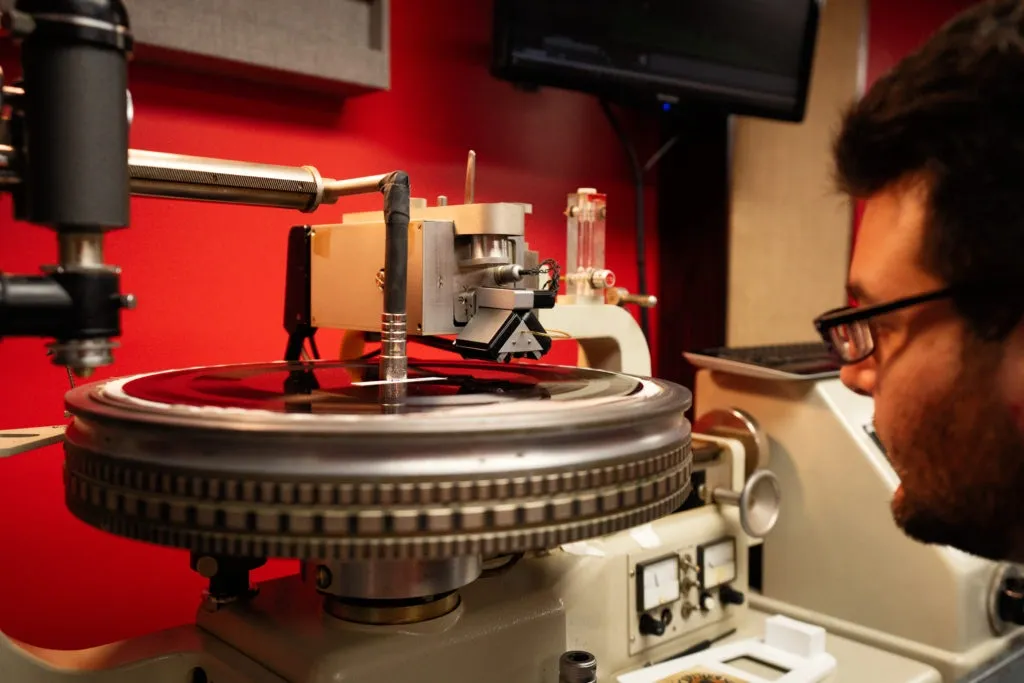
Image Source: Well Made Music
Once files arrive at the cutting facility, mastering engineers apply processing adjusted specifically for vinyl playback. This workflow is substantially different from digital mastering because the cutting lathe imposes its own characteristics on the sound.
Table of Contents
Step 1: Equalization for Vinyl Playback
Engineers boost low-mid frequencies and reduce harsh high frequencies to improve warmth. Analog EQs are favored for their musical curves and smooth coloration. The cutting electronics apply RIAA pre-emphasis, which just needs generous power amplification so the signal becomes powerful enough to move the cutting stylus physically. The mastering engineer must account for how the lathe will alter the sound before the stylus touches lacquer.
Step 2: Compression and Dynamic Control
Compression evens out dynamics and prevents overloading of the cutting head while allowing maximum volume. Attack times need careful adjustment because too fast kills transient energy, while too slow lets excessive peaks through. Release times just need equal attention since fast settings cause audible pumping and slow settings clamp everything down. Multiband compression targets specific frequency ranges but must be used with caution to avoid phase issues.
Step 3: Limiting Without Causing Distortion
A transparent limiter achieves competitive levels without causing distortion or groove issues. Vinyl can’t handle brick-wall limiting like digital formats, so engineers compromise between loudness and clarity.
Step 4: Cutting the Master Lacquer Disc
The cutting lathe holds a lacquer disc made of aluminum coated with nitrocellulose lacquer. A heated cutting stylus engraves modulated grooves into this disc live while music plays. Engineers monitor groove depth and width to ensure highest fidelity. Input levels peak between -3 and -1 on the VU meter. This lacquer master undergoes plating to create stampers for pressing records.
Quality Control and Test Pressings
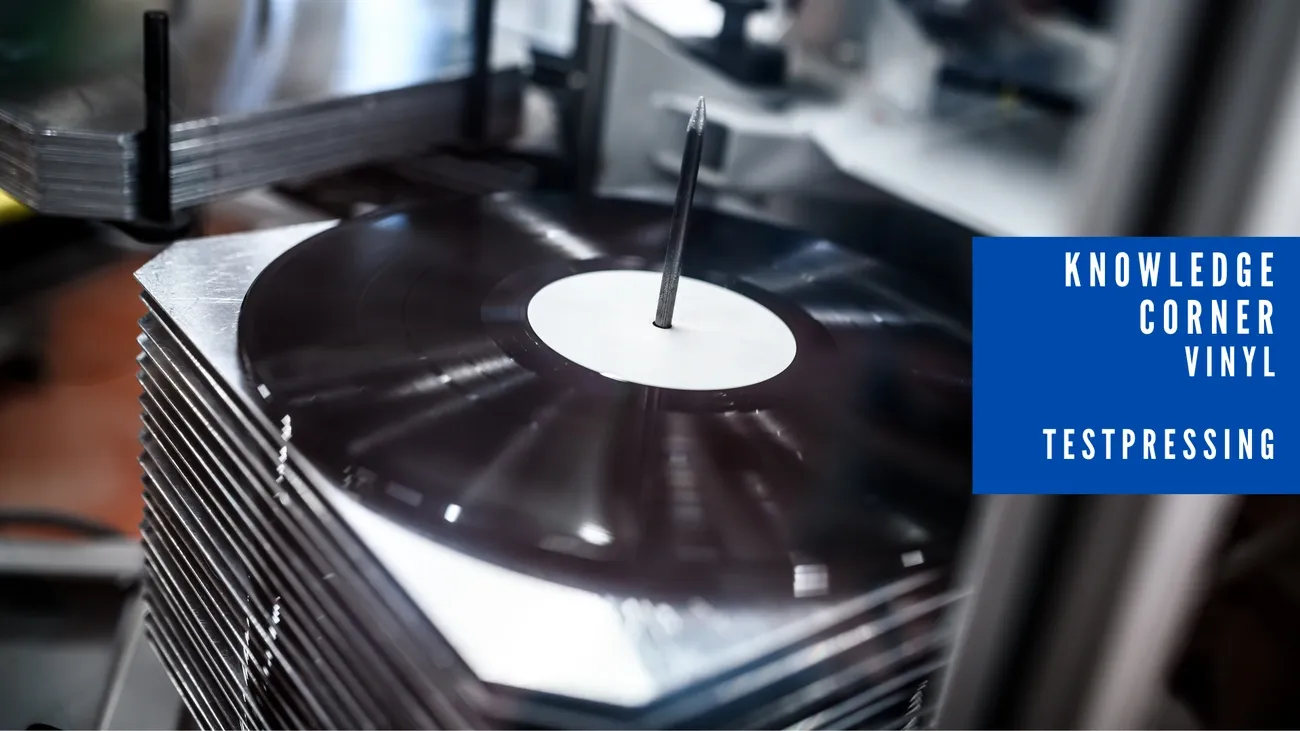
Image Source: MonotypePressing
Test pressings arrive as the first tangible proof of how your master translates to physical vinyl. Pressing plants produce 3-5 copies from the same stampers that will manufacture your full run. These aren’t quality proofs from the facility but tools to verify your approved master sounds correct when played on actual turntables.
What to Listen For in Test Pressings
You should play your test pressings on multiple turntables in different listening environments. Pay attention to overall frequency response, bass response (muddy or thin), high-frequency detail on cymbals and stereo width (vinyl narrows this slightly). Compare against other vinyl records in your genre rather than your digital master, since they shouldn’t sound the same.
Common Problems and How to Fix Them
Slight warping occurs because test pressings ship without the 24-hour cooling period production runs receive. Surface noise in quiet passages and static are normal characteristics of the format. But if clicks or pops appear at the same spots with the same intensity on every test pressing, you’ve found a metalwork defect requiring a recut. Excessive distortion or overwhelming sibilance indicates mastering problems, not pressing plant concerns.
Choosing the Right Vinyl Weight and Material
Standard 12-inch records weigh about 140 grams, while premium pressings use 180-gram vinyl. Heavier records reduce vibration transfer from the turntable motor to the stylus. The stampers and groove depths remain the same between weights, though the extra mass provides better stability as a counterweight for stylus tracking forces.
Conclusion
Vinyl mastering requires a completely different mindset compared with digital mastering. While digital formats allow engineers to push levels with extreme limiting and loudness maximization, vinyl simply does not behave the same way. The physical nature of the medium introduces real mechanical constraints that shape the entire mastering approach. From an engineer’s perspective, this is exactly what makes the format so fascinating.
When people ask how do vinyls work, the answer is not just about placing a needle on a spinning record. The entire process begins long before playback, during the mastering stage where audio is carefully prepared for the physical world. Engineers must control low frequencies, manage stereo width, and carefully balance dynamics to ensure the groove can be cut safely into the lacquer. These constraints force a level of precision that many digital workflows simply do not require.
Understanding how do vinyls actually work means understanding the relationship between sound waves and physical movement. When music is cut into a record, the cutting stylus carves microscopic grooves into the surface. These grooves represent the left and right audio channels as tiny vibrations in the groove walls. During playback, the stylus in the turntable follows those grooves and converts the physical motion back into electrical signals that eventually become sound through speakers. In essence, vinyl playback is a mechanical translation of sound energy.
This is where how do vinyls work physics becomes especially interesting. Every bass hit, vocal phrase, and cymbal crash must be represented as a physical movement of the groove. Low frequencies produce wider groove movements, which means excessive bass can cause the stylus to jump or grooves to collide. High frequencies, on the other hand, require very fine groove detail that can easily be lost if the signal is pushed too hard. Because of these factors, vinyl mastering demands careful frequency management and dynamic balance.
For newcomers trying to understand how do vinyls work for dummies, the concept can actually be simplified quite a bit. Imagine drawing a continuous spiral line into a surface where every tiny wiggle represents part of the music. A needle rides inside that spiral and moves according to those wiggles. The turntable converts that movement into electricity, and your speakers convert that electricity into sound. It is a beautifully simple idea, yet the engineering behind making it work reliably is extremely sophisticated.
The production side is just as fascinating. If you’ve ever wondered how to make a vinyl record, the process involves multiple stages beyond mastering. Once the audio is prepared, a lathe cuts the music into a lacquer disc. That lacquer is then used to create metal stampers through electroplating. Those stampers press the grooves into heated vinyl pellets, forming the final records that listeners place on their turntables. Each step must preserve the precision of the original groove information.
All of this brings us back to the core question: how do vinyls work in practice for engineers and listeners alike? The answer lies in the unique intersection of physics, craftsmanship, and audio science. Vinyl rewards mixes with balanced bass, controlled dynamics, and natural stereo imaging. Instead of chasing loudness, the medium encourages musicality, space, and clarity.
For audio engineers, this is part of the enduring appeal of the format. Vinyl mastering forces you to think about sound not just as numbers in a digital file, but as physical motion that must exist in the real world. When approached with the right understanding of how do vinyls actually work, the result is a listening experience that feels tactile, warm, and deeply connected to the mechanics of sound reproduction.
In the end, learning how do vinyls work physics, understanding how to make a vinyl record, and mastering the technical craft behind the format reveals why vinyl has survived decades of technological change. The process transforms pure audio into a physical object that stores music in microscopic grooves—an elegant blend of art, engineering, and timeless audio design.