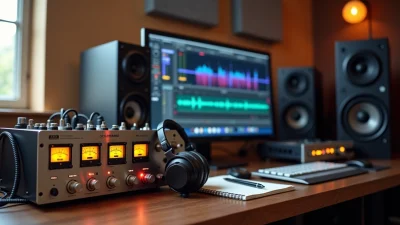
Dithering mastering can make the difference between a clean, professional-sounding final product and one plagued by digital harshness. Most digital audio playback formats yield 16-bit resolution, yet we work at 24 or 32-bit during production. Quantization distortion can add unwanted artifacts to your audio when you reduce bit depth without proper dithering. This piece will explain what dithering is, what it does to preserve audio quality, and when you need to apply it in your mastering workflow.
What Is Dithering in Mastering?
Dithering Definition
Dithering is the process of adding noise to a signal to reduce quantization distortion when reducing the bit depth of a file. This applied form of noise randomizes quantization error and prevents large-scale patterns that would otherwise create audible distortion.
When you create a digital audio file, you’re capturing a digital representation of an analog signal. Digital audio operates as a series of snapshots played in succession and creates the illusion of continuous sound moving through time. Sample rate dictates how many snapshots the recording captures per second, typically 44,100 or 48,000. But bit depth controls how each snapshot captures the details of the original analog signal accurately.
How Dithering Works
Each sample gets assigned an amplitude value, like a dot on a graph. When trying to calculate an infinitely variable number using a finite set of values, things don’t always line up perfectly. The amplitude of an analog signal often falls above or below the nearest digital value and forces the system to round up or down to compensate. This creates quantization errors that produce unwanted distortion.
Think of it as a connect-the-dots puzzle. With only a few dots, the lines appear hard and jagged. The drawing looks like a clunky version of the original. With many dots, you can capture more subtle nuances. Working at a low bit depth resembles carving a sculpture with a saw when you need a scalpel.
Dither works by adding random noise to the signal before bit depth reduction occurs. This noise randomizes the quantization errors and replaces signal-dependent distortion with a constant, fixed noise level. Dithering makes quantization errors harder for our ears to detect by introducing uncorrelated random variations throughout the audio. The result still contains distortion, but it appears as random noise that’s decorrelated from the intended signal.
The Role of Bit Depth in Digital Audio
Bit depth determines the available number of discrete amplitude values for measuring sound. Each additional bit increases the resolution available to measure the incoming signal level. Recordings with larger bit depths achieve greater dynamic range, while recordings with low bit depths face limited dynamic range.
Each bit roughly equates to 6 dB of dynamic range in fixed-point systems. So 16-bit offers around 96 dB, and 24-bit extends to about 144 dB. 32-bit float reaches a large dynamic range.
Most modern systems record digital audio with 32-bit depth and render quantization distortion inaudible. But you still risk creating quantization errors when bouncing your track down to a 16 or 24-bit file. At 16-bits, quantization distortion becomes more audible during quiet passages or fadeouts. When the number of bits gets reduced, so does the available number of discrete amplitude values. This results in more quantization errors.
Why Dithering Mastering Matters in the Final Stage
Preventing Quantization Distortion
Quantization error demonstrates itself in different ways depending on the audio material. A sine wave shows quantization error as extra harmonics in the signal. Music or program material where the signal constantly changes shows quantization error as wideband noise. Your digital audio workstation simply chops off the extra bits of information for each sample through a process called truncation when you don’t use dithering.
Truncation creates errors that aren’t random. These errors relate to the audio signal itself and demonstrate as unpleasant, harmonically related noise or distortion. More sophisticated systems attempt to round amplitude values up or down, but they’re not 100% accurate. Rounding errors also result in unwanted distortion.
The noise power concentrates at frequencies where there is signal and at harmonics thereof, especially with small bandwidth sounds like a sine or a decaying piano tone. These frequencies become audible and sound like harmonic distortion if the signal drops to a soft enough level. Dithering redistributes this quantization noise power that may be concentrated at some frequencies over the full spectrum. This makes the peak level in the noise spectrum smaller.
Maintaining Dynamic Range
Adding dither introduces noise, roughly 4.77 dB for triangular dithering. This seems counterintuitive, yet the trade-off favors audio quality on the whole. Your track loses some of its dynamic range when you skip dithering. The quieter parts of your track may sound crunchy or digital.
Dither increases perceived dynamic range rather than formal dynamic range. It permits signals which are below the quantization floor to be reproduced in a bed of noise. You can hear the tone down to about -115 dBFS before it disappears into the noise with a single frequency 1 kHz tone and good headphones. That’s an increase for 16-bit audio of as much as 20 dB for single frequency tones, though 6 dB represents a conservative estimate.
Quantization distortion makes things sound brittle and gritty while collapsing stereo imaging. Dithered versions sound fuller, warmer and smoother by comparison. You preserve the integrity of the least significant bit by replacing truncation distortion with noise instead. This ensures that even tiny variations in the audio signal are captured more accurately.
Protecting Quiet Passages and Fade-Outs
Quiet sections suffer most from quantization distortion, and this is exactly where dithering mastering becomes essential. Think about that atmospheric intro building tension, or a long, ringing cymbal crash fading into silence—without proper dithering mastering, these moments can reveal unwanted digital artifacts. Clean interludes with delicate guitar arpeggios and lush reverb are particularly vulnerable, making dithering mastering a crucial step for preserving musicality.
Quantization distortion becomes more audible at 16-bit resolution, especially during quiet passages or fadeouts. This is why dithering mastering is so important: it helps maintain clarity, smoothness, and depth in low-level audio content. By applying dithering mastering correctly, you remove that subtle layer of digital harshness that can make a track feel less polished or slightly fatiguing to the ear.
In dense mixes, the absence of dithering mastering might go unnoticed, but in exposed sections, the difference is clear. Dithering mastering ensures that your track transitions naturally into silence without introducing granulation or unnatural textures. It allows your audio to breathe, keeping the listener immersed rather than distracted by technical imperfections.
Those emotional fade-outs on a ballad, the tail of a massive reverb after the final note, or the delicate decay of a ride cymbal all benefit from proper dithering mastering. Skipping dithering mastering in these moments can result in distortion that sounds like digital roughness or unnatural breakup. With dithering mastering, these details remain smooth, clean, and professional—exactly as intended in a high-quality master.
When You Need to Use Dithering
Apply dithering audio whenever you reduce bit depth from your working resolution to a lower delivery format. This isn’t a suggestion or best practice recommendation. It’s a technical requirement that helps you retain audio integrity during the bit depth reduction process.
Reducing Bit Depth from 24-bit to 16-bit
The 24-bit to 16-bit conversion represents the most common dithering scenario in mastering. Reducing the bit depth from 24-bit audio to 16-bit audio means fewer steps are available to reconstruct the original waveform’s amplitude values. Then quantization distortion starts to get rather noticeable in reverb tails, fade-outs and quiet moments.
CD production still requires 16-bit/44.1 kHz files according to the Red Book standard. Preparing physical CD masters means you must dither from your 24-bit or 32-bit working files down to 16-bit. This scenario is where dithering matters most. Skip this step and truncation artifacts become permanent fixtures in your audio. Once you add undithered truncation artifacts to the audio stream, there’s no fix.
You should always apply dither when bouncing a 16-bit file from a 24 or 32-bit mix. Reducing bit depth from 64 or 32-bit floating-point to 24-bit fixed point, or from 24-bit down to any lower fixed-point value, means you need to add dither. It will always do more good than harm.
Exporting Final Masters for Streaming
Modern streaming platforms have evolved their technical requirements. Many services now accept and prefer 24-bit masters. DistroKid accepts both 16-bit and 24-bit WAV files up to 24-bit/96 kHz. Spotify supports high-resolution masters and uses 24-bit files for newer lossless tiers. Apple Music streams audio from 16-bit/44.1 kHz up to 24-bit/192 kHz, while Tidal and Amazon Music prioritize 24-bit files for their highest-quality streaming tiers.
You don’t have to worry about dithering if you’re exporting a 32-bit floating-point file or higher because it’s a high enough resolution that produces no audible quantization distortion. You should only dither audio when bouncing down to 24-bits or less.
Some engineers apply dither even when submitting 24-bit files for streaming platforms. Streaming encoders convert files to AAC, MP3 or Opus formats. Clean word-length reduction helps downstream processing, though the audible difference at 24-bit remains minimal.
Always the Last Step in Your Signal Chain
Dithering must be the absolute last edit performed on an audio file, except for the final conversion to lower bit depth. Any effect applied after dithering, even a slight gain adjustment or sample-rate conversion, can undermine the positive effects of your dithering. This timing requirement isn’t flexible or negotiable.
A dither plugin should always be the very last plugin in your signal chain. Many limiters feature built-in dithering capabilities for this exact reason. The master fader should remain at zero when using a dither plugin. Dithering in both a plugin and your DAW’s render settings doubles the noise.
Only dither once for a specific bit-depth reduction. If you later open that dithered file, make minor edits and re-save it at the same bit depth, do not dither again. Dithering adds noise, and multiple applications accumulate more noise.
When You Should NOT Use Dithering
You prevent unnecessary noise accumulation and preserve your original audio quality when you know the right time to skip dithering. Several common scenarios don’t require dithering, whatever you might have heard.
Bouncing at the Same Bit Depth
Modern 32 or 64-bit float processing doesn’t need dither internally. Dithering serves one purpose: final word-length reduction. You bounce a 24-bit session to a 24-bit file, and no bit depth reduction occurs. The theoretical noise floor of 24-bit sits at -144 dBFS. No microphone preamp or converter in existence approaches that threshold.
Bouncing from 16-bit to 16-bit requires no dither either. You maintain the same resolution, so no quantization error gets introduced. Some engineers believe streaming platform conversions warrant dithering even at matching bit depths. Despite downstream format changes to AAC or MP3, dithering a 24-bit file that stays at 24-bit adds unnecessary noise for minimal benefit.
Sending Files to a Mastering Engineer
Never apply dither when sending files to a mastering engineer. Dithering represents the absolute last process in the signal chain. Your mastering engineer needs the cleanest possible file at your session’s native bit depth and sample rate. They’ll handle dithering during final delivery.
Pre-dithered files limit what the mastering engineer can accomplish. Most professionals prefer receiving 24-bit files at whatever sample rate you recorded. Bumping a 16-bit mix to 24-bit does nothing. Send the earliest generation of your mix in its native format.
Avoiding Multiple Dithering Applications
You accumulate noise and degrade audio quality when you apply dithering multiple times. A client sends you a pre-dithered 16-bit file, and you shouldn’t re-dither it when exporting at the same bit depth. You compound the error rather than fix anything.
One exception exists: you need to make processing changes to an already dithered file, so bump it to 24 or 32-bit for editing and then dither back to 16-bit. This approach decreases dynamic range slightly but beats working directly on dithered audio.
Types of Dithering and Noise Shaping Options
Multiple dithering algorithms exist, each optimized for different audio scenarios. Understanding these options helps you make informed decisions during the final export stage.
POW-r Type 1, Type 2, and Type 3
Audio engineers from Dolby Labs, Weiss Engineering, Millennia Media, and Z-Systems created what they called “the most sonically transparent dithering algorithm possible” in 1997. They showed Psychoacoustically Optimized Wordlength Reduction, or POW-r, the following year. Most DAWs like Logic, Pro Tools, and Ableton now feature built-in processors based on this algorithm.
Type 1 suits loud mixes with low dynamic range, like compressed rock or pop songs. It uses no noise shaping and maintains a flat frequency response.
Type 2 targets speech applications. It employs a simple noise shaping curve with a dip around 2 kHz and a boost above 14 kHz.
Type 3 handles dynamic recordings such as orchestral music or film scores. It features a more aggressive EQ curve.
TPDF Dither
TPDF stands for Triangular Probability Density Function. It uses two noise sources to create this triangular distribution. TPDF represents the industry standard, correct dithering method. It transitions sounds into silence while maintaining an unvarying noise profile. Similar to analog circuits that introduce consistent noise, TPDF provides reliable performance across all situations.
Noise Shaping Algorithms
Noise shaping applies EQ to dither noise and makes it less audible. Dither noise remains inaudible at 24-bits, but noise shaping makes a noticeable difference when bouncing files to 16-bits. This process redistributes spectral energy and shifts noise toward frequencies less perceptible to human hearing. Perceived noise floor can drop to -105 dBFS or lower with aggressive shaping.
Choosing the Right Dither Type for Your Music
The differences between dithering settings remain subtle. POW-r performs well for 24-bit to 16-bit conversions where you might hear differences. Type 3 lends a glossy, focused presentation suitable for bright material. Type 1 offers gentler results for less hyped sounds. Unshaped TPDF reduces amplitude while avoiding nonlinearity for situations with 24 or 20-bit dithering. Listen to your specific material and choose the dither matching your desired timbre.
Table of Contents
Conclusion
Dithering mastering might seem like an unnecessary complication, but in reality, it’s one of the subtle details that separates an amateur result from a truly professional master. When you understand dithering mastering, you realize it’s not about changing the sound dramatically—it’s about preserving it. Without proper dithering mastering, reducing bit depth can introduce unwanted digital distortion, especially in quiet passages, fadeouts, and delicate reverb tails.
The golden rule of dithering mastering remains simple but essential: apply it once, apply it last, and only when reducing bit depth—most commonly from 24-bit to 16-bit. This ensures that your audio maintains clarity and avoids quantization errors. Effective dithering mastering helps retain low-level detail, making your track sound smoother, more natural, and closer to an analog feel.
When choosing your method, dithering mastering offers different options depending on your material. POW-r Type 3 is ideal for dynamic and complex mixes, while TPDF dithering mastering provides a reliable, transparent standard for most use cases. Understanding when and how to apply dithering mastering gives you more control over your final output and ensures consistency across different playback systems.
It’s also important to consider modern distribution standards. Many streaming platforms now accept 24-bit files, which means dithering mastering isn’t always required. However, when you do need to deliver in 16-bit—such as for CD formats—proper dithering mastering becomes critical. Ignoring dithering mastering in these situations can lead to noticeable degradation in audio quality.
In the end, dithering mastering is not just a technical step—it’s a finishing touch that protects your mix. Mastering engineers rely on dithering mastering to maintain integrity from studio to listener. If your goal is a clean, polished, and professional sound, then mastering dithering mastering techniques is non-negotiable.