Mastering EQ doesn’t need the aggressive 5dB boosts most producers think it does. Most listeners hear changes greater than 3dB, yet professional engineers often limit their moves to just 1dB. I spent weeks testing linear phase against minimum phase EQ and compared subtle adjustments to heavy-handed cuts. I also learned about mid-side techniques that promise width without artifacts. The results challenged everything I thought I knew about eq mastering. This piece breaks down which mastering eq plugin approaches improved my final mixes and which master equalizer settings you should avoid.
What Is Mastering EQ and Why It Matters for Your Final Mix
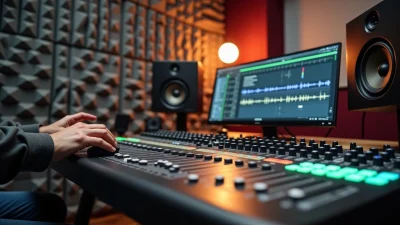
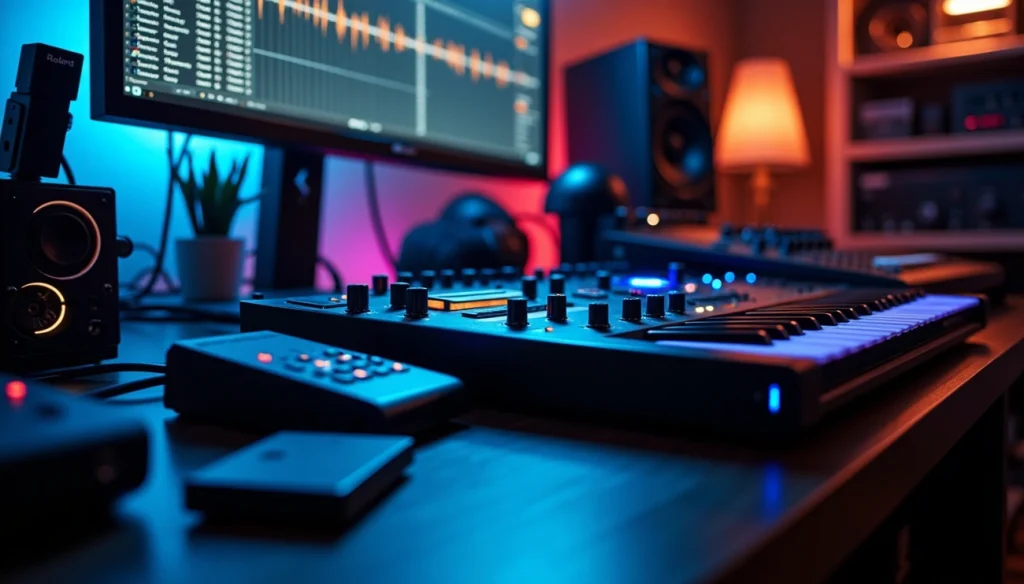
EQ shapes the tonal foundation of your master before any dynamics processing takes place. I position it first in my mastering chain because frequency balance affects how compressors and limiters respond to the material directly. The global market for equalizers is projected to reach USD 2.5 billion by 2033, driven by over 3.2 million music creators in the U.S. who rely on these tools.
The Role of EQ in the Mastering Chain
Two distinct types of EQ serve different purposes during mastering. Cleaning EQ removes problematic frequency ranges with transparent processing. When harsh high mids dominate a mix, I turn them down using broad Q values to make subtle adjustments. This corrective step handles rumble and muddiness without altering the mix’s character.
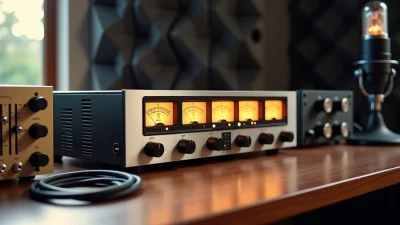
Tonal EQ adds color and musical character, especially when you have a mix that sounds overly digital or pristine. Hardware processors and their emulations excel here because they impart pleasant distortion as audio passes through them. Certain frequencies receive gentle boosts coupled with harmonic enhancement. I sometimes run tracks through tonal EQ without making any cuts or boosts, just for the sonic coloration hardware imparts.
How Mastering EQ Is Different from Mix EQ
Scale separates mastering EQ from mixing EQ in every respect. You might apply a 3 dB boost to a lead vocal’s midrange or a steep high-pass filter at 80 Hz on guitar tracks while mixing. These adjustments work on individual elements. Mastering operates on the approved stereo mix where every adjustment affects everything at once.
Professional mastering EQ adjustments stay within 0.5 to 2 dB. I work with 1 dB or less on specific frequency ranges because the processing magnifies across the entire mix. Plugin design reflects this difference in detail. Mixing EQ allows boosts up to 15 dB and cuts down to -30 dB, while mastering EQ limits mousable range to 6 dB boosts and -10 dB cuts.
Broad, musical Q values define mastering work. Narrow surgical cuts that fix a guitar frequency in mixing will rip a massive hole through an entire song when applied during mastering. The philosophy changes from individual problem-solving to global enhancement. Mastering requires thinking about how each move affects everything from sub-bass kick drums to the air in vocal performances.
Common Mastering EQ Mistakes to Avoid
The most frequent problems I encounter come from mixing techniques applied during mastering sessions. A bold 6 dB cut that works on a harsh guitar track becomes destructive when applied to a stereo master. That aggressive move signals you should return to the mix itself to correct things.
Major issues shouldn’t be fixed with mastering EQ. If vocals sit too quiet or mid frequencies overwhelm the balance, the mixing engineer needs to address those problems. Mastering makes small tweaks that raise already professional-sounding mixes. Until those fundamental balance issues get resolved in the mix, no amount of mastering EQ will save the track.
Overusing EQ sucks the life from mixes. Minimal tweaks prevent this. A couple of dB adjustments are enough. When you find yourself reaching for cuts or boosts beyond 3 dB, you’ve slipped back into a mixing mindset rather than maintaining the restraint mastering demands.
Testing Linear Phase vs Minimum Phase EQ: Real-World Results
I ran similar 1 kHz oscillators through both linear phase and minimum phase mastering eq plugins to see what actually changes under ground conditions. The differences shocked me. Both EQ types produced different results despite processing the exact same source material. This finding made me test dozens of masters from genres of all types, and the results revealed when each approach delivers better outcomes.
How Linear Phase EQ Works
Linear phase EQ delays all frequencies by equal amounts to maintain phase relationships. You boost 100 Hz, and the plugin doesn’t just process that band. It delays your entire signal so every frequency arrives at the output at once. Minimum phase EQ only delays the specific bands you’re adjusting. Linear phase processing affects everything.
This creates pre-ringing, an artifact that sounds like reversed audio spliced before transients hit. The effect becomes more pronounced with steeper curves and higher latency settings. Low latency mode adds about 70 ms of delay at 44.1 kHz sample rate, while maximum resolution introduces roughly 1509 ms. Higher settings provide better low-frequency accuracy but increase pre-ringing severity.
Pre-ringing can suck the punch from drums and percussive elements. I tested a kick drum loop with a 20 dB boost at 200 Hz using a high Q value of 15+, and the pre-ring became obvious. It weakened the original transient attack and made the drum sound softer than it was.
When Minimum Phase EQ Sounds Better
Minimum phase EQ exhibits the characteristic sound associated with analog processing. These algorithms mirror how analog equalizers handle latency and phase shift. They create pleasant coloration many engineers prefer. The phase smearing that occurs can sound nice rather than problematic.
I conducted tests with massive treble boosts comparing both modes. Minimum phase added a distinct upper midrange edge that felt more musical. Linear phase sounded more transparent and neutral, but also sterile on certain material. Minimum phase delivered better results for tonal shaping where you want character coupled with frequency adjustment.
Post-ringing occurs with minimum phase EQ, but it happens after transients. The audio following the transient masks this ringing and makes it inaudible in practice. Minimum phase uses nowhere near as much CPU power as linear phase alternatives.
Phase Cancelation: What We Found
Phase issues killed low end and deflated impact during my tests. Tracks sounded flat, thin, or dull when phase cancelation occurred. I zoomed into waveforms of stereo masters and found opposing wave movements creating frequency cancelations.
Phase relationships become essential for proper stereo imaging below 1 kHz. Above 3 kHz, the ear cannot assess phase in binaural hearing. I used linear phase for lower and mid-frequency manipulation to keep phase relations intact.
Best Mastering EQ Plugin for Each Scenario
Hybrid configurations delivered the best results in my testing. Minimum phase in deep lows or for tight bandwidths, combined with broad linear phase bells or shelving in the highs, provided excellent digital EQ performance. This configuration preserves low-end punch while maintaining transparent high-frequency adjustments.
Linear phase prevents the phase shifts that alter tone when blending with dry signals for parallel processing. I also found linear phase superior for narrow cuts where you need surgical precision without affecting surrounding frequencies. Minimum phase remains my first choice for general tonal shaping and adding musical character to overly clean digital masters.
The 1dB Rule Test: Small Changes vs Aggressive Boosts
I tested the same rock track with both 1dB adjustments and aggressive 5dB boosts to understand what separates amateur masters from professional ones. The difference wasn’t subtle.
Why Professional Engineers Limit EQ Moves to 1dB
Every adjustment in mastering eq affects the entire stereo mix at once. Boost 200 Hz by 3dB and that gain applies to every instrument occupying that frequency range. The effect magnifies across your whole production. Many albums were mastered with dedicated equalizers featuring only 2dB steps.
Training your ears to hear these micro-adjustments takes practice. A 0.3dB change becomes audible in fast A/B comparisons. I found 0.5dB audible on my monitoring setup, though not always right or wrong. Mastering engineers with 15 years of experience report hearing changes from 0.3 to 0.5dB reliably.
Gain-matched A/B comparisons prevent loudness bias from influencing decisions. You’ll mistake louder for better every time without matching levels.
Testing 1dB Changes Against 3-5dB Adjustments
My tests revealed that 3dB represents a breaking point. Broad tone shaping moves fall in the 0.5 to 1dB range. More specific corrections of resonances can reach larger amounts, but 3dB qualifies as substantial.
A 4dB boost at 1-2 kHz thinned out the mix and developed an annoying resonance the ears proved sensitive to. That same frequency range responded well to a 1dB adjustment and added subtle energy without the abrasive quality.
You should remix if you need more than 2 or 3dB. Professional mastering engineers call mixers to request revisions rather than compensating with heavy eq mastering moves.
Effect on Mix Balance and Clarity
A secondary effect emerged during testing. Low-end boosts dulled the high frequencies. The highs hadn’t been reduced, but human perception registered them as having less presence due to increased low frequencies.
I found that there was this effect after adding 3dB at 150 Hz. The mix felt darker and forced me to compensate with high-end adjustments that wouldn’t have been needed with a 1dB move.
Master Equalizer Settings That Work
Subtractive EQ opens more processing doors with greater transparency. Cutting problem frequencies preserves mix fidelity better than boosting desired ones. A wide cut around 150-250 Hz cleared cluttered low-mids without compromising the original character.
Dynamic EQ proved essential for larger corrections. Dynamic processing prevented constant heavy-handedness after correcting low end required 2+ dB moves. The best mastering eq plugin approaches address resonances only as they occur, not throughout the entire track.
Mid-Side EQ Techniques: Which Approaches Deliver Width Without Artifacts
Mid-side processing divides your stereo master into separate mid (center) and side (stereo edges) channels. This allows independent EQ adjustments that standard stereo processing cannot achieve. The technique gave me precise control over spatial balance and clarity at the same time. The mid channel contains elements like vocals, bass, kick and snare that are panned center. The side carries ambience, reverb and stereo spread of guitars and keyboards.
Cutting Low End from the Side Image (Below 80Hz)
My tests involved applying a high-pass filter to the side channel at 80 Hz. This made all frequencies below that point mono. Low-end energy concentrated in the center, which tightened bass response and improved mono compatibility. You could roll off the sides as high as 160 Hz without missing fundamental frequencies. Setting mine to 135 Hz made the kick and bass focused. Any reverb or delay that caused low frequencies to bleed into the stereo image got attenuated.
Electronic basslines benefit from this approach. A low-cut filter on the side channel between 80-300 Hz keeps tight low mono frequency and maintains wider highs. Bass frequencies prove less directional than high frequencies, so panning does less as frequency drops.
Boosting Side Channel Highs for Air and Space
A gentle high-shelf boost above 10-12 kHz on the side channels added airiness and spatial sparkle. My tests with boosts in the 2-7 kHz region used a Q of 1.0. I found that 1 dB or less delivered noticeable width. A second bell-shaped filter boosting 7-12 kHz by a bit more than the previous step expanded the stereo field further.
High frequencies in the side channel increased perceived spaciousness when boosted. Cymbals and reverb tails felt wider. I found that cutting 4-6 kHz on the center channel created room for vocal tracks. The side boost boosted width at the same time.
Managing Vocal Clarity in the Mid Channel
The main vocal level rose without affecting the overall feel when I increased gain on the mid signal from 300 Hz to 1 kHz. I reduced the side signal at those same frequencies to prevent masking. Background vocals benefited from a gentle boost at 300-800 Hz in the sides. This increased their apparent volume without compromising lead vocal clarity.
Stereo Width Without Phase Issues
Linear phase EQ kept phase relationships between left and right channels intact during mid-side processing. Phase correlation meters monitored my adjustments. I kept readings near +1 for solid phase integrity. Minimum phase EQ on the side channel can scramble the stereo image to some extent. I checked every master in mono to make sure mid-side adjustments didn’t create phase cancelation. This would compromise playback on mono systems.
Surgical EQ vs Broad Strokes: Testing Both Methods on Real Masters
Bandwidth selection determines whether your mastering eq fixes problems or destroys mixes. I compared narrow Q surgical cuts against broad strokes on the same masters to determine which approach produces cleaner results.
Narrow Q for Problem Frequencies
Narrow cuts remove specific problem frequencies without affecting surrounding ones. I used high Q settings to identify harsh resonances around 800 Hz to 1.5 kHz in vocal-heavy tracks. A surgical cut of 1-2 dB at the exact problem spot cleaned up the resonance without compromising adjacent frequencies. Wide cuts strip away too much signal and destroy the sound’s defining characteristics.
Wide Bandwidth Boosts for Tonal Shaping
Broad bandwidth adjustments affect overall tonal balance rather than individual instruments. Unnatural ringing became apparent right away after I boosted with narrow Q. Wide boosts sounded transparent because they affected many frequencies at once. Keeping bandwidth set to broad delivered better results for meaningful mastering eq.
Mastering EQ Cheat Sheet: Q Values That Work
Table of Contents
A Q of 0.6 to 0.7 provides wide, gentle adjustments suitable for transparent boosting and equates to about two octaves of bandwidth. Q of 1.4 equals one octave and works for careful boosting or cutting. Higher Q values above 2 suit surgical cutting. I found Q settings around 0.7 to 1.0 ideal for gentle tonal shaping with low-Q broad bell filters.
Combining Both Techniques for Best Results
Surgical cuts cleaned up problems before broad tonal shaping began. I removed nasty elements with narrow bands first and created room for the good stuff to come through. Wide bandwidth boosts added warmth and character without introducing resonances after that.
Conclusion
The 1dB rule changed everything for my masters. Hybrid EQ configurations delivered better results than committing to either linear or minimum phase alone. I now use minimum phase for tonal shaping and linear phase for surgical work below 1 kHz. Mid-side processing tightened my low end by a lot once I started cutting everything below 80 Hz from the sides.
Restraint proves harder than aggressive moves. Most tracks need nowhere near the EQ you think. Start with 0.5 to 1 dB adjustments, cut problems before boosting strengths, and always A/B compare with gain matching. Your ears will thank you.