Logic Pro mastering feels like the final frontier for many producers – that mysterious process where good mixes become great records.
The art of mastering a song enhances and refines its overall sound to create a cohesive and balanced composition. My 12+ years of teaching music production helped me realize that mastering in Logic Pro X goes beyond plugins – it’s about strategy. Many tutorials demonstrate simple techniques but rarely show the professional processes that create polished results.
Most beginners focus on the Adaptive Limiter at the time they start mastering in Logic Pro X. This plugin delivers smoother sound through its built-in lookahead and adaptive release. Professional mastering requires a more sophisticated approach. Success depends on understanding loudness metering options like LUFS to measure perceived loudness. Optimal levels typically range between -10 to -14 LUFS based on your genre and platform.
This piece walks you through the complete mastering workflow. You’ll learn everything from setting up multiband processing with auxiliary channels to making crucial decisions about limiting and tonal balance that distinguish professional results from amateur attempts.
Logic Pro Mastering Session Setup in Logic Pro X
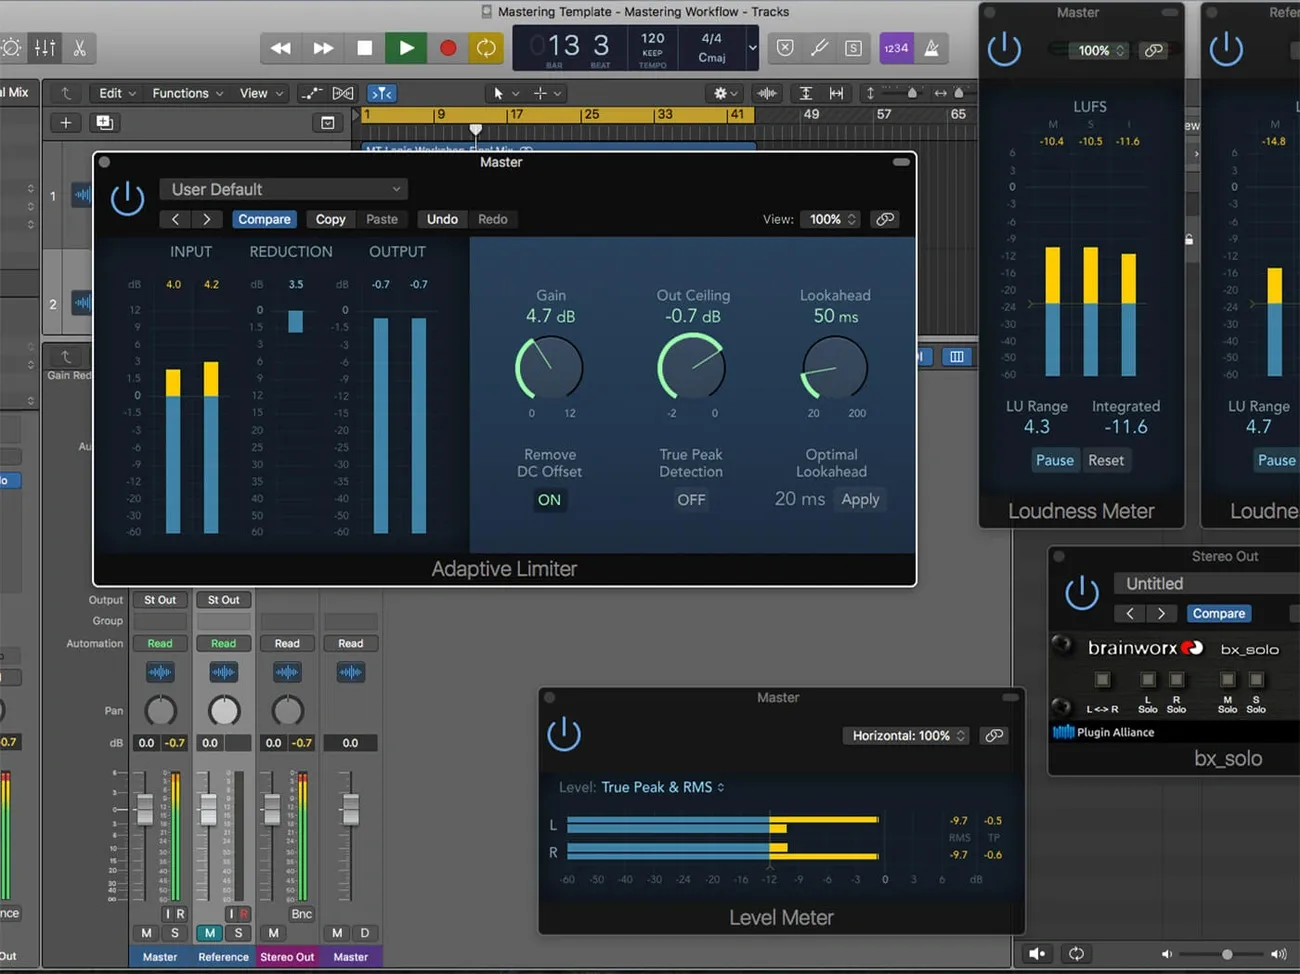
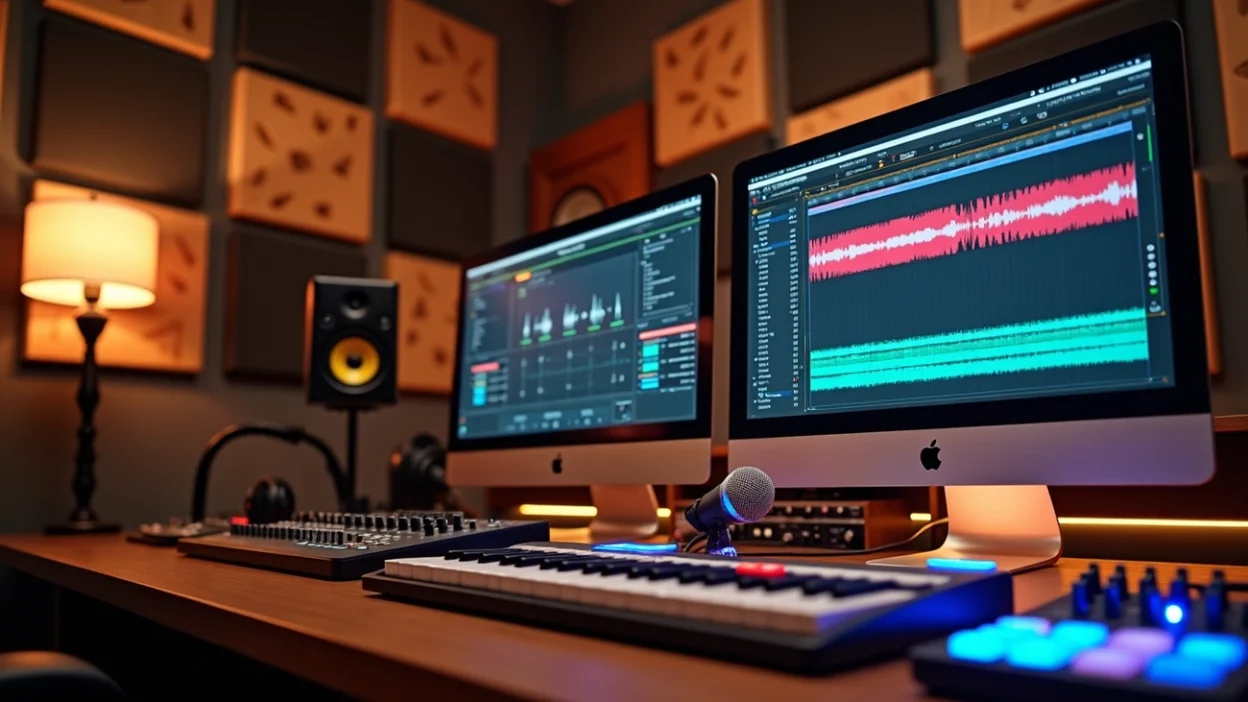
Image Source: MusicTech
A proper mastering session setup in Logic Pro X helps you achieve professional results. Your original setup affects how well you make critical decisions throughout the mastering process.
Choosing the Right Sample Rate and Bit Depth
The right technical parameters form the base of any mastering session. Sample rate measures how many times per second an analog signal converts to digital. This choice in Logic Pro matters more than most people think.
A sample rate of 44.1 kHz is still the CD standard, while 48 kHz works best for video production. Higher sample rates like 88.2 kHz and 96 kHz might give better audio quality, but they need a lot more processing power and storage space.
The 24-bit depth gives you 144 dB of dynamic range compared to 16-bit’s 96 dB. This extra headroom lets you work better during mastering, especially when you have to make small tweaks.
Don’t change these parameters once you start your project. Your audio files might not play right if you change the project sample rate after adding them. Your audio file sample rate should match your project sample rate. Enable the “Convert audio file sample rate when importing” option in File > Project Settings > Assets.
Organizing Tracks and Reference Files
A well-laid-out session helps you work faster and make better decisions. Start by importing your final mix as a bounce with 1-2 dB of headroom and no stereo bus processing.
Put this file on both a “Master” and “Reference” track to aid quick A/B comparisons between processed and unprocessed versions. You can also set up multiple screensets – one for standard arrange view and another to show your metering plugins for better monitoring.
Take care of “top and tail” by trimming extra silence from file ends and adding subtle fades. This prevents unwanted clicks or pops. Even clean audio can have tiny background noise from analog-emulation plugins that might cause problems without proper fades.
Using Busses and Aux Channels for Multiband Control
Frequency-specific processing is vital for professional mastering. Logic Pro doesn’t come with a dedicated multiband tube compressor, but you can build your own multiband processing setup with busses and auxiliary channels.
Create three stereo auxiliary channels and set up sends from your master track to each one. Add Logic’s Linear Phase EQ to each auxiliary and set them to handle different frequency ranges—lows, mids, and highs. Make sure your crossover points line up perfectly. If your low band stops at 300Hz, your mid band must start at exactly 300Hz.
This setup lets you process each frequency range on its own. You can compress the low end differently from the highs or add harmonic saturation to specific bands without touching others.
Your multiband setup gives you the same precise control as dedicated mastering software. You’ll get a cleaner, more balanced master with professional quality using Logic’s native plugins.
Mastering Logic Pro X: Core Tools You Should Know
Professional-sounding results need a good grasp of Logic Pro X’s mastering tools. These tools work together in the mastering chain to create polished, broadcast-ready tracks.
Adaptive Limiter vs Standard Limiter
Logic Pro X gives you two different limiters that sound quite distinct from each other. The Adaptive Limiter produces a smoother sound because it has a built-in lookahead function and adaptive release. These features adjust to your music’s dynamics automatically. This smart design cuts down transients better and keeps distortion under control. The standard Limiter, on the other hand, keeps more transient detail and sounds more precise, though you might hear more distortion.
The Adaptive Limiter rounds off and smooths peaks in your signal. This creates an effect that’s like pushing an analog amplifier—adding a subtle color to your sound. You’ll find key controls such as the Gain knob for post-input boost, Out Ceiling to set maximum levels, and Lookahead to set how far ahead the plugin looks for peaks.
My mastering approach puts the Adaptive Limiter between multiband compression and final gain control. This method helps maximize loudness without the unwanted distortion that happens above 0 dBFS.
Match EQ and Tonal Reference Matching
Match EQ stands out as one of the most powerful tools available for logic pro mastering, yet it’s often overlooked by many producers. In the context of logic pro mastering, this tool analyzes the frequency spectrum of both your reference track and your current material, then generates a corrective EQ curve to bridge the gap between them. Think of Match EQ as a spectral “fingerprint” that helps your mix align with the tonal balance found in professional, commercially released tracks during logic pro mastering.
The workflow for using Match EQ in logic pro mastering is straightforward but extremely effective when applied with intention. Begin by activating the Reference Learn button and playing your chosen reference track all the way through. Next, use the Current Learn button to analyze your mix. Once both signals are captured, clicking EQ Curve Match applies the tonal difference as an EQ curve—an essential step in modern logic pro mastering workflows.
The real artistry of logic pro mastering emerges during the fine-tuning phase. The Apply slider controls how strongly the matched curve affects your audio; settings around 70–80% typically deliver more musical and transparent results. Increasing the Smoothing control helps reduce harsh or overly complex adjustments, resulting in a more natural tonal balance that’s better suited for professional logic pro mastering.
When used carefully, Match EQ can dramatically improve clarity, cohesion, and translation across playback systems. However, the goal of logic pro mastering isn’t to copy a reference blindly—it’s to use tools like Match EQ as guidance, not a crutch. With trained ears and subtle adjustments, Match EQ becomes a powerful ally in achieving polished, broadcast-ready masters entirely within the logic pro mastering environment.
Loudness Metering: Targeting -14 to -9 LUFS
Modern mastering requires a good understanding of Loudness Units Full Scale (LUFS). Unlike peak measurements, LUFS shows how loud humans actually hear the music. Logic’s Loudness Meter follows the EBU R 128 standard and shows three key measurements:
Momentary (M): Current instantaneous loudness
Short-term (S): Loudness over the last few seconds
Integrated (I): Average loudness over time (most important for mastering)
Streaming platforms now use loudness normalization, with targets between -14 and -9 LUFS depending on the service. My years of professional mastering experience show that -14 LUFS works best for most streaming platforms. This level prevents your track from getting compressed during playback. Tracks not meant for streaming can go higher, around -10 to -11 LUFS, for more impact.
The Loudness Meter should sit at the end of your mastering chain. This placement lets you see how all your processing affects the final output. Your master will meet platform standards while keeping your music’s dynamic range intact.
How to Master in Logic Pro X: A 5-Step Workflow
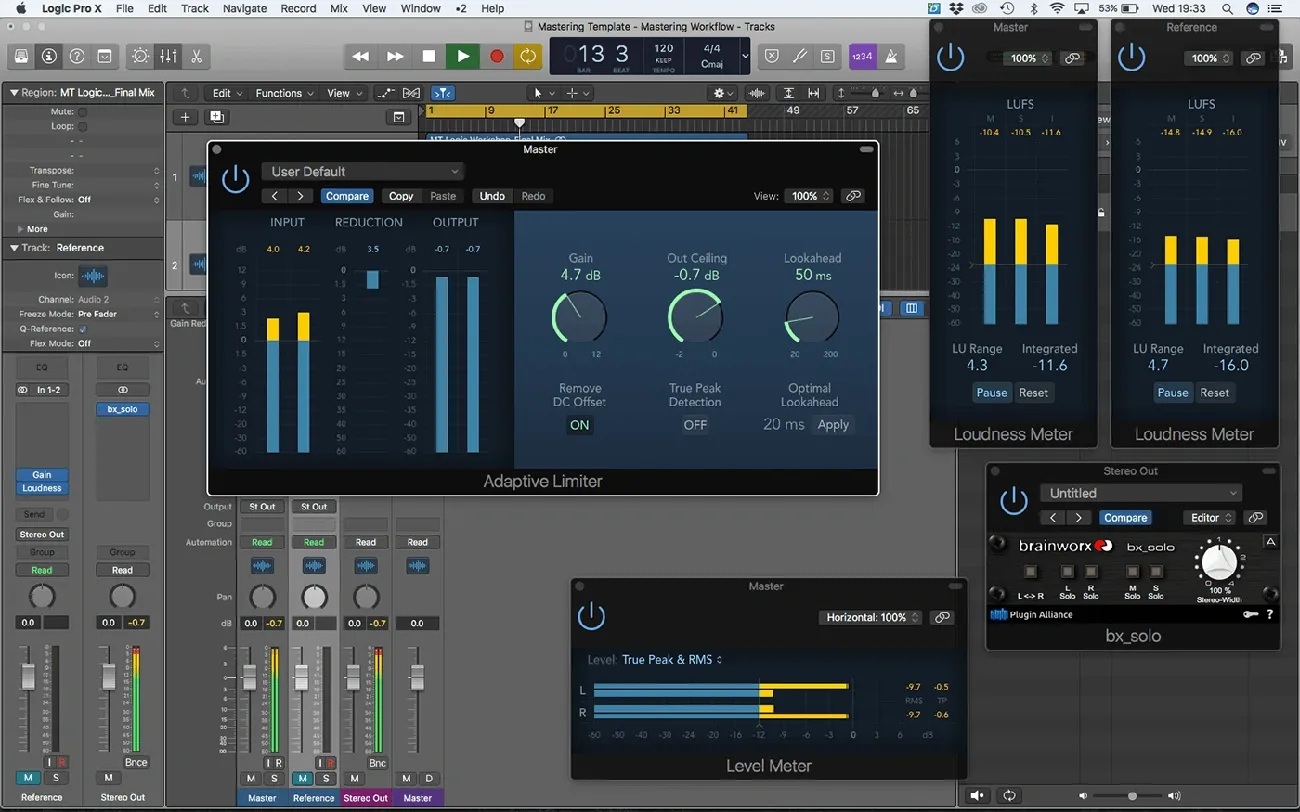
Image Source: MusicTech
Getting skilled at Logic Pro X mastering doesn’t have to be complicated. You just need to understand the right workflow. I’ve created a simple 5-step approach that breaks down this often confusing process into manageable stages with consistent results.
1. Reference Track Gain Staging
The foundation of proper gain staging starts when you import your final mix into both Master and Reference tracks in Logic Pro X. This setup lets you compare your processed version with the unprocessed one throughout the mastering process. Your mix bounce should have enough headroom—ideally peaking between -8dB and -6dB. This prevents clipping and gives you room to work.
The Gain plugin before your loudness meter helps you adjust either track’s volume for accurate A/B comparison. This way, you can compare your master to the reference without volume bias. Your ears naturally think louder sounds “better”.
2. Tonal Matching with Match EQ
Logic’s powerful Match EQ helps you analyze reference tracks and apply their tonal characteristics to your mix. The steps are straightforward: click “Template Learn” to analyze your reference track, stop playback (your ears will thank you!), then hit “Match”.
The “Apply” slider controls the effect’s strength—starting at 70-80% usually sounds more musical than an exact match. You might want to use different Match EQ settings for various frequency ranges to shape the tone better.
3. Loudness Optimization with LUFS
Logic’s Loudness Meter helps you target the right LUFS levels. Modern streaming needs levels between -14 and -9 LUFS, depending on your genre and platform. The integrated loudness measurement (I) matters most for mastering since it shows the average loudness over time.
Make your adjustments while looping the loudest section. This ensures your master stays consistently loud throughout the song.
4. Final Limiting and Clipping
Your Adaptive Limiter settings control peaks while preserving sound quality. The Output Ceiling should sit slightly below 0dB (between -1dB and -0.3dB) to prevent intersample peaks. Adjust the Gain parameter until you reach your target LUFS level, usually around -12 LUFS for most modern productions.
Higher Lookahead values create smoother transitions between limited and unlimited sections, resulting in more transparent limiting.
5. Exporting for Streaming Platforms
The final step needs the right export settings. WAV or AIFF format with 24-bit depth works best for masters. Choose “Overload Protection Only” under Normalize settings during the final export. This prevents potential clipping without changing your carefully crafted dynamics.
A quick test of your master on loudnesspenalty.com shows how streaming platforms might adjust your track. You can then fine-tune your limiting based on these results to sound great across all platforms.
Creative Enhancements for a Pro Sound
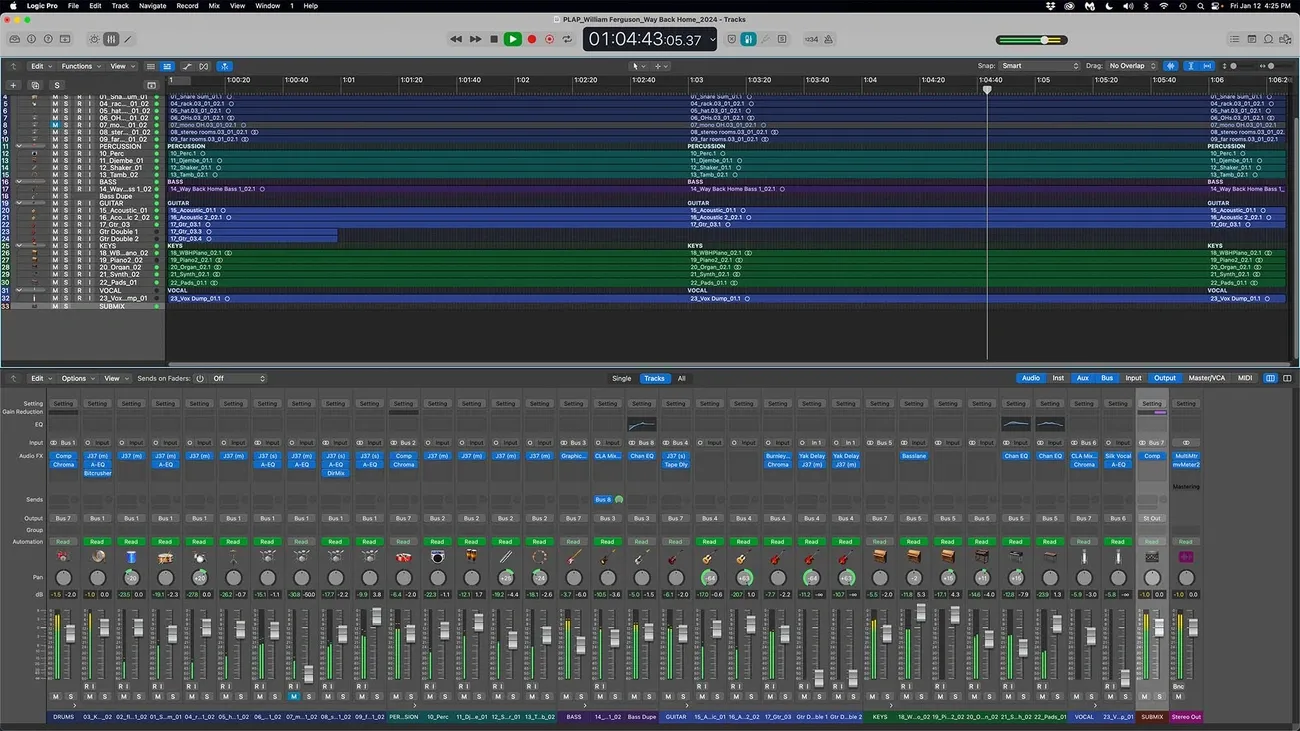
Image Source: digitalfilms – WordPress.com
The creative side of mastering goes beyond technical skills. Small creative touches can turn good masters into exceptional ones. These final adjustments set professional mastering apart from amateur work in Logic Pro X.
Using Exciter for Harmonic Color
The Exciter plugin adds controlled harmonic distortion to your masters. At its core, exciters create extra harmonics from your audio signal. This makes the high-frequency range richer without just boosting it with EQ. You need a light touch when mastering – even small amounts can change your sound a lot. Start with the Amount control at 0 and slowly turn it up until you get the harmonic texture you want. Keep the settings under 10.
Adding Sub Bass for Low-End Weight
Logic’s SubBass plugin generates frequencies that sit below your original signal. It works like an octave divider. This tool adds weight to your masters, which helps genres that need strong bass. I usually set the center frequency lower on the low side and use a 2x ratio. This makes the generated signal twice as low as the original. Be careful though – SubBass can create very loud output signals.
Boosting Presence with Midrange EQ
Midrange frequencies between 2-5kHz are vital to clarity and presence in mastering. A boost in this range makes the master sound louder without pushing the limiter too hard. You can get better clarity by adding a gentle boost around 2-3kHz on your mid-frequency aux tracks.
Stereo Width and Imaging Adjustments
The Stereo Spread plugin makes the stereo field wider. It does this by spreading selected middle frequency bands between left and right channels. The Lower Intensity slider needs careful handling. Spreading low frequencies between speakers can really change your mix’s energy. Keep the Lower Frequency setting above 300 Hz. The Order knob splits your signal into frequency bands. Eight bands are usually enough, but you can use up to 12 to get more detailed control.
What Pro Engineers Won’t Tell You About Mastering
After becoming skilled at mastering thousands of tracks in Logic Pro X, I found that there was a set of principles that sets professionals apart from amateurs. These insights rarely appear in typical tutorials.
Why Subtlety Is Key in Mastering
Professional mastering engineers know that small adjustments create the best results. Yes, it is the subtle changes of 0.5-1dB in EQ or 1-2dB of compression that produce the most natural-sounding masters. The mastering process should enhance your mix without being noticeable. My best mastering sessions use just three plugins with minimal tweaks.
Common Mistakes Beginners Make
Beginners tend to overprocess their masters and use too much compression that destroys dynamics. There’s another reason why masters fall short – boosting frequencies without purpose just because a tutorial suggested it. New producers often chase loudness instead of getting the tonal balance right first. Logic Pro’s mastering tools can cause problems when users don’t understand how they affect the signal chain.
How to Train Your Ears for Mastering
You need dedicated ear training to develop mastering skills. The best way to practice is to switch between reference tracks and your master at matched volumes. We focused on analyzing one element at a time – bass first, then midrange, followed by treble. A dedicated monitoring preset in Logic Pro’s Channel EQ helps isolate specific frequency ranges for better listening practice. The most valuable practice sometimes comes from turning off your monitor screen and trusting your ears.
Conclusion
Logic pro mastering is your final opportunity to elevate a track from good to truly professional. With the right mindset, logic pro mastering becomes less about chasing loudness and more about clarity, balance, and emotional impact. By applying thoughtful gain staging, subtle processing, and disciplined listening, logic pro mastering allows your music to translate beautifully across all playback systems.
What makes logic pro mastering so powerful is its accessibility. You don’t need an expensive plugin chain or an elaborate studio to achieve commercial-quality results. When used intentionally, the native tools inside Logic Pro X are more than capable of delivering polished, broadcast-ready masters. The key to great logic pro mastering lies in restraint, precision, and consistent decision-making.
As you continue refining your workflow, remember that logic pro mastering is both a technical craft and an artistic discipline. Each project sharpens your ears, strengthens your judgment, and deepens your understanding of how subtle changes shape the final sound. Master logic pro mastering, and you gain full control over the final presentation of your music—ensuring every release sounds confident, cohesive, and professional.