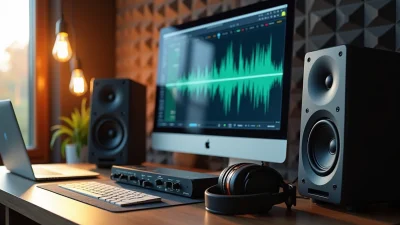
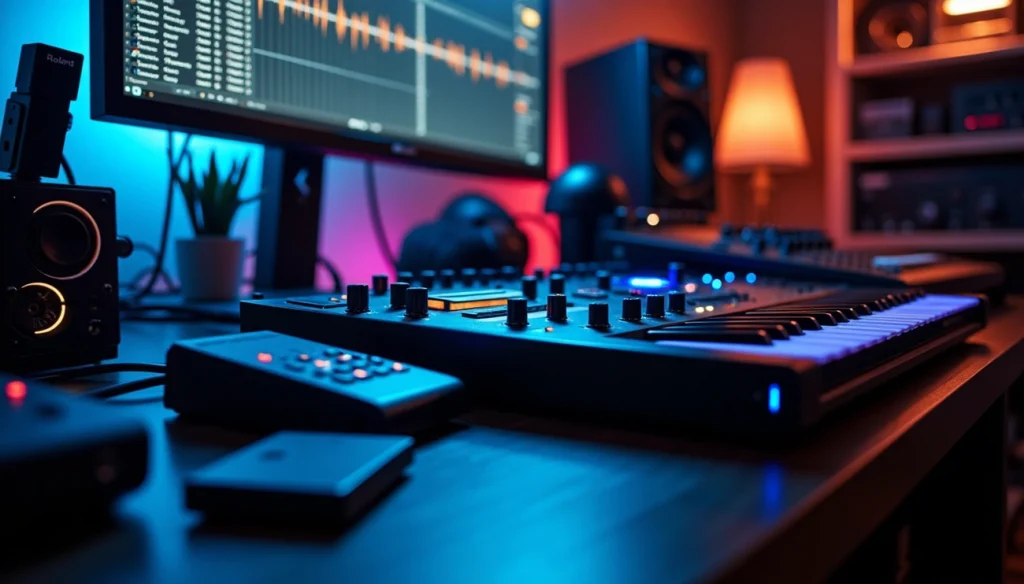
Techno mastering has never been more available, with DIY approaches easier than ever in 2026. But here’s the catch: plugin choices have exploded, and then finding tools that handle the low-end punch and club-ready loudness of hard techno feels overwhelming. AI mastering services promise quick fixes, but there’s still a most important quality gap compared to skilled hands-on techniques. I’ve spent weeks testing the leading mastering plugins on real techno tracks and pushed them to typical levels around -8 dB RMS. This piece breaks down which tools deliver for electronic music mastering and how to build your techno masering chain that works.
What Makes Techno Mastering Different From Other Genres
Most genres share common mastering principles, but techno needs a specialized approach that is fundamentally different from rock, pop, or even other electronic styles. The relentless four-to-the-floor kick pattern and sustained sub-bass create unique frequency management challenges. Standard mastering techniques often fail to address them.
The Low-End Challenge
The frequency spectrum between 20 Hz and 250 Hz contains the foundation of any techno track. The most critical energy concentrates between 20 Hz and 160 Hz. This range hosts both the kick drum and bassline and creates immediate competition for sonic space. Bass instruments play intermittently in other genres. Techno presents continuous low-frequency content that needs careful control.
Masking becomes the primary obstacle. Low frequencies generate longer waveforms that interact and clash with each other. Kick drums and basslines occupy similar frequency bands and create a sonic blur where neither element achieves clarity. The result feels muddy rather than powerful. This is a problem when your track needs to translate cleanly on massive club systems.
Bass frequencies carry substantial energy that drives metering high while failing to deliver perceived loudness. Excessive low-end buildup consumes headroom without adding effect and prevents you from achieving competitive loudness levels. Strategic frequency allocation becomes needed to control this energy. Some producers allocate the kick around 80 Hz while extending bass presence down to 20 Hz. Others reverse this approach. Neither method proves superior—they create different sonic characteristics on the dancefloor.
Keep frequencies below 150 Hz in mono. This solidifies the low-end and prevents phasing issues. Stereo width in sub frequencies might sound interesting on headphones. Club systems and vinyl cutting need mono bass content for technical stability though.
RMS Levels and Club Systems
Techno mastering targets integrated loudness between -8 to -6 LUFS. This ensures tracks cut through powerful club sound systems. This range delivers the volume needed where music competes with ambient noise and massive speaker arrays. Peak-time hard techno often pushes toward -6 LUFS for maximum club effect. Melodic techno mastering benefits from sitting around -8 LUFS to preserve atmospheric elements.
True peak levels must stay below -1 dBTP. This prevents clipping on club digital-to-analog converters. Short-term LUFS measurements capture the loudness of drops and peak moments. They fall between -6 to -9 LUFS. The gap between integrated and short-term values indicates dynamic variation. Smaller gaps suggest denser, more aggressive energy appropriate for industrial techno.
Club sound systems present specific challenges. Many venues run mono systems or stereo configurations so poorly implemented that crowds cannot see spatial information. Your stereo imaging might sound impressive in the studio, but it vanishes in actual playback environments. On top of that, club subwoofers run at maximum capacity with built-in limiters. Overly dynamic sub-bass triggers these limiters inconsistently and creates loudness penalties when DJs monitor gain levels.
Dynamic Range vs. Loudness in Electronic Music
Dynamic range measures the contrast between the quietest and loudest sections of your track. Larger dynamic range can create powerful effect through contrast. Excessive compression squashes musical life though. The challenge lies in achieving club-ready loudness without sacrificing the transient punch that makes techno engaging.
Electronic dance music occupies middle ground compared to classical music (which needs wide dynamic range) and heavily compressed pop. Techno requires punch and energy while maintaining space for kick drums and bass to hit hard. Over-compression makes tracks sound lifeless despite high loudness readings. Insufficient limiting leaves tracks feeling weak against commercial releases.
Streaming platforms like Spotify apply loudness normalization. They measure tracks and adjust playback to around -14 LUFS. Your techno master at -7 LUFS hits the platform and gets turned down automatically. This normalization doesn’t affect dynamic range or introduce distortion. The advantage of mastering louder than platform targets lies in preserving your loudest moments. Peak sections maintain intensity relative to quieter tracks mastered directly at -14 LUFS after normalization.
Achieving aggressive loudness without sacrificing dynamics or triggering streaming penalties requires precise limiting techniques. Light compression ratios between 1.5:1 and 2:1 maintain natural dynamics while providing cohesion. Limit total gain reduction to 2-4 dB across all dynamics processors. This avoids noisy, distorted masters that fatigue listeners.
FabFilter Pro-L 2: Transparent Limiting for Hard Techno
I tested FabFilter Pro-L 2 across multiple hard techno projects and focused on tracks with aggressive kick patterns and sustained basslines. This plugin offers eight limiting algorithms, each designed for different sonic characteristics. The Modern, Aggressive, and Transparent styles turned out most relevant to electronic music production for techno mastering.
Testing Methodology: Peak Time Techno at 140 BPM
My testing centered on peak-time hard techno at 140 BPM and pushed tracks toward typical club levels around -8 dB RMS. I assessed each limiting style and monitored how well the plugin preserved kick drum transients under heavy gain reduction. The Modern algorithm became the default choice, designed for transparency across most program material. But the Aggressive style caught my attention for its near-clipping arrangement tuned for IDM and electronic genres.
The Audition Limiting function was a great way to get insights during testing. This feature solos the difference between input and processed output and isolates the effect of limiting so you hear only the gain reduction and distortion. You can hear what the limiter removes and reveals whether you’re destroying transient punch or keeping the aggressive character hard techno demands.
True Peak Control and Oversampling Results
Inter-sample peaks showed up right away when pushing gain hard. Digital limiting creates peaks in the reconstructed analog signal that exceed individual sample values. These true peaks cause audible clipping during D-A conversion and format changes to MP3. FabFilter addresses this through dedicated true peak limiting and metering that complies with ITU-R BS.1770 and EBU R128 standards.
True peak limiting activates a two-stage process when you enable it. The limiter detects existing true peaks in the input signal and reduces them as needed. Any true peak overshoot introduced by the limiting process itself gets smoothly attenuated afterward. But asking the true peak limiter to work too hard increases latency and introduces sonic costs.
Oversampling was critical for controlling inter-sample peaks at the source. Pro-L 2 offers oversampling up to 32x, though this creates extreme CPU load. I found 4x oversampling sufficient for most techno mastering work and reduced aliasing without excessive processing demands. Combined with minimum lookahead of 0.1 ms, the 4x setting keeps inter-sample peaks within 0.1 dB range. The oversampling reduces aliasing by running the internal limiting process at higher sample rates.
Attack and Release Settings for Kick Drum Preservation
Attack behavior on Pro-L 2 is fundamentally different from compressors. The attack parameter determines how long before the release function begins, not how quickly gain reduction occurs. With 30 ms attack and 300 ms release, the 300 ms release starts after the original 30 ms attack period. Shorter attack times result in louder masters but risk distortion, while longer times provide safety at the expense of perceived volume.
Lookahead settings control how far ahead the limiter examines incoming audio to predict gain reduction. Very short lookahead times below 0.1 ms approximate hard clipping and introduce distortion and aliasing. This increases inter-sample peaks and degrades conversion quality. Longer lookahead preserves cleanliness but can reduce apparent loudness and cause transients to recede in the mix.
I settled on 0.5 ms lookahead with 40 ms attack and minimal release around 2 ms for preserving kick drum impact in hard techno. This balance kept transient punch while achieving loudness without excessive distortion.
When FabFilter Falls Short
The new limiting styles react minimally to parameter changes compared to older algorithms and suggest more automatic processing behind the scenes. This reduces tweakability when you just need precise control. The Modern style sounds clean but becomes overcompressed quickly when pushed hard on transient-heavy material. Transparent works well on uncompressed sources but doesn’t deal very well with material already heavily processed.
The filters used for oversampling can introduce slight softness and smearing, though the 4x implementation proves transparent enough. True peak limiting adds approximately 5 ms latency, which matters for real-time performance scenarios.
iZotope Ozone 12: AI-Assisted Mastering for Techno
Ozone 12 introduces three modules engineered for modern electronic music mastering. The toolkit moves beyond traditional single-band processing. The IRC 5 Maximizer mode represents the first multiband limiter algorithm in Ozone’s two-decade history. Bass Control and Stem EQ address persistent low-end and balance challenges through AI-powered source separation.
IRC 5 Maximizer Performance Test
The IRC 5 algorithm splits incoming audio into four frequency bands. Each operates with its own optimized attack and release times. This multiband design solves a fundamental problem with single-band limiters: heavy bass notes no longer affect higher-frequency sounds through shared gain envelopes. Aggressive limiting on kick drums would cause pumping or distortion across the entire frequency spectrum before.
I tested IRC 5 on industrial techno at -9 LUFS. The test pushed boundaries where earlier Ozone versions introduced audible breathing. The multiband approach prioritizes frequency bands that contribute most to peak levels. It attenuates them first and clears headroom for other bands. The reduction in pumping becomes obvious at similar loudness targets compared to IRC 4. Kick drums maintain punch while snares retain snap. The collapsed low-end that plagued previous algorithms is gone.
IRC 5 builds on IRC 3’s psychoacoustic model technology. It determines limiting speed before producing detectable distortion. But this comes at a cost. IRC 5 demands the most CPU resources and latency of all IRC modes. Ozone requires more system resources compared to FabFilter’s efficient processing. The multiband processing can create subtle tonal shifts at extreme settings. iZotope’s team balanced this carefully to preserve character. The spectrum remains unaltered when no limiting occurs.
Bass Control Module for Sub-Frequency Management
Bass Control tackles the low-end inconsistency problem through visual feedback combined with dynamic shaping. The module provides Balance and Punch meters alongside a low-frequency oscilloscope. The Balance meter displays your low-end energy relative to the rest of the signal. The Punch meter shows crest factor, which is the peak-to-average ratio of your bass frequencies.
What matters for techno mastering: the Balance meter’s target range spans roughly 18 dB. This wide latitude means you shouldn’t obsess over centering the indicator. I run reference tracks through Bass Control before mastering sessions. This establishes genre-appropriate targets.
The oscilloscope visualizes the relationship between transient and sustained bass material immediately. Adjusting the kick/bass balance becomes straightforward when you see exactly how the sub-40 Hz content behaves against upper-bass frequencies. I tightened subs below 40 Hz while opening upper-bass space. The result achieved depth without overwhelming the mix.
Bass Control offers Punch shaping for transient attack and Sustain Power for body and decay. Peak Control manages spikes. Subtle harmonic generation helps bass translate on small speakers that lack true sub-frequency response. Peak Control operates in clean or dirty modes. The latter adds slight grit. Changes of just a few dB prove sufficient.
Stem EQ for Post-Limiting Adjustments
Stem EQ separates stereo masters into vocals, bass, drums, and “other.” It uses immediate, low-latency source separation. Each stem receives independent EQ and gain control. This addresses situations where you lack mix access but need surgical corrections.
I worked on a hard techno track with buried hi-hats post-limiting. I selected the Drums stem and boosted 8-12 kHz by 2.5 dB. The hi-hats emerged without affecting bassline clarity. Cutting low-mid muddiness in the Bass stem around 250 Hz cleaned the mix. I didn’t need to return to the project file.
Stem separation artifacts appear when you solo individual stems. But within the full mix, results sound transparent. The module replaces the older Master Rebalance tool with more precise control. CPU usage runs high, coupled with the processing demands of IRC 5. Aggressive use strips away musical feel. Restraint remains necessary.
Real-Life Results: Before and After Comparison

I tested Ozone 12 on a peak-time techno track at 140 BPM. The master achieved -9 LUFS without the digital strain previous versions introduced. The master retained breath and openness compared to IRC 4’s flattened output. Bass Control set up stable kick/bass relationships early in the chain. This created predictable behavior through subsequent processing. Stem EQ pulled back the kick slightly after Bass Control reinforced it. This demonstrates how these modules work together. Ozone 12 delivers louder, cleaner techno masters while maintaining the transient punch club systems demand.
Newfangled Elevate Bundle: Psychoacoustic Multi-Band Processing
Newfangled Audio’s Elevate takes a fundamentally different approach to mastering limiters. It builds its processing around how human hearing perceives sound rather than arbitrary frequency divisions. The plugin separates incoming audio using an auditory filter bank that divides the spectrum into bands spaced according to the MEL scale. This spacing mirrors the frequency curve of the human ear and gives you control over how sound hits your eardrum rather than mathematically even frequency splits.
26-Band System Explained
The filter bank operates with a maximum of 26 bands, though you can reduce this count to lower CPU demands. Each band receives independent analysis immediately, with adaptive algorithms adjusting gain, speed and transients for every band at once. This creates transparency even under aggressive limiting. Traditional multiband processors often introduce phase issues and tonal shifts.
Machine learning algorithms optimize the gain curve in each band relative to all others. A 26-band limiter would produce unpredictable results that sound harsh without this intelligence layer. The algorithms prevent bands from working against each other and maintain tonal balance automatically while you push loudness.
Elevate functions as a post-limiting EQ beyond limiting. The Limiter/EQ page lets you adjust individual band levels like a graphic equalizer or draw curves across the spectrum. I targeted specific problem areas in my techno masters: cutting rumble below 40 Hz, reinforcing kick presence around 50 Hz and removing mid-range mud at 400 Hz without affecting the limiting behavior. You can solo individual bands or groups to identify exactly where frequency buildups occur.
The Transient Emphasis module provides 26-band control over transient gain and allows you to preserve or exaggerate percussive impact in specific frequency ranges. Fast transients can pass through the limiter unchanged, or you can increase them for aggressive character. I boosted snare snap around 2.5 kHz while maintaining natural kick transients in the sub-bass.
Saturate for Pre-Limiting Headroom
Saturate offers up to 24 dB of overdrive using spectral clipping technology. Conventional clippers allow low frequencies to dominate and muddy the signal. Saturate treats sine waves at different frequencies independently. The Detail Preservation algorithm adds fine detail back into the saturated signal and maintains tonal balance whatever how hard you drive it.
The Shape control morphs between mathematically smooth soft-knee saturation and hard clipping. I used moderate Drive settings with softer knee shapes on pre-master material. This added weight to basslines while controlling peak levels before they hit Elevate’s limiter stage.
Elevate Limiter Test on Industrial Techno
Testing Elevate on industrial techno revealed impressive loudness capabilities. The multiband approach let me achieve competitive RMS levels even when the kick drum dominated the pre-master mix. Individual band limiters prevented the kick from controlling the entire limiting envelope and maintained clarity across the frequency spectrum.
CPU usage runs high with all 26 bands active. I reduced the band count to 16 for immediate processing without sacrificing noticeable quality.
Frequency Balance Across Different Club Systems
The MEL-scale spacing proved advantageous for club translation. The bands line up with how human hearing perceives frequency spacing, so adjustments made in the studio translated predictably on various sound systems. You can independently shape limiting and EQ in each band. This provided flexibility that traditional graphic EQs cannot match.
Slate Digital FG-X: Virtual Mastering Console Approach
Slate Digital’s FG-X takes a markedly different philosophy from the multiband processors I’ve tested so far. The company calls it Intelligent Transient Preservation, and it achieves loudness without destroying the percussive character that makes techno physically engaging. It doesn’t split frequencies into bands.
ITP (Intelligent Transient Preservation) Algorithm
The ITP system analyzes incoming transients through a complex lookahead detection algorithm and identifies specific transient types before they arrive. The algorithm detects a kick drum transient and optimizes saturation curves to preserve low-frequency energy. Snare hits get different treatment—the system shifts optimization toward upper mid-range punch. This frequency-specific approach is different from standard limiters that apply uniform processing whatever the source material.
FG-X offers four processing modes that provide creative flexibility. You can get transparent limiting with zero pumping or loud processing with colorful saturation. The plugin presents two interface views: Easy mode delivers fast results, and Advanced mode reveals additional parameters for seasoned engineers. The ITP slider controls how hard transients sound in the mix, which I noticed during testing. Pushing the slider fully upward introduced slight to aggressive distortion on my hard techno tracks. Pulling it down eliminated these artifacts even under aggressive gain reduction.
The Character slider runs from Hard to Soft and affects the loudest transients that actually hit the threshold and trigger peak saturation. Traditional limiters make these transients sound smeared and weak when pushed hard. FG-X maintains impact and punch on drum fills where other processors fail.
Dynamic Perception Control
FG-X provides three additional shaping controls beyond the core ITP algorithm. Lo Punch adds impact to kick drum hits and bass notes. Detail brings higher transients like snare hits into focus. These parameters proved useful to recover low-end presence and clean up top-end that got squashed by previous processing decisions.
Dynamic Perception improves or suppresses transients whatever their level in the mix. This becomes especially effective when you have low-level transient information that needs bringing up without overtly shifting the overall balance. I used it to emphasize ghost notes in hi-hat patterns that disappeared during heavy limiting.
How It Handles Percussive Loops
Testing FG-X on percussive techno loops revealed exceptional transient retention. At sensibly loud levels up to -9 dB RMS, FG-X outperformed other processors I tried and even beat Ozone 4’s limiter at the time. Mix elements maintained their positions rather than jostling for attention. Kick drums stayed locked. Guitar chugs remained aggressive and forward. The FG Comp master bus compressor component controls complex full-on material without overreacting, which makes it useful for extreme electronic music.
Pushing toward extreme levels around -5 dB RMS introduced treble distortion and audible transient saturation. Even so, these artifacts proved preferable to the nauseating pumping of standard limiters. The plugin preserved more punch and dynamic feel compared to brickwall limiting alternatives.
Waves L2 vs. Modern Alternatives: Is Classic Still King?
The Waves L2 came out in 1994 and still appears on mastering chains throughout the industry. The L2 offers just three primary controls: output ceiling, threshold, and release shaping. This stands in sharp contrast to the complex multiband processors and AI-driven algorithms I’ve covered. This simplicity proves both its strength and limitation.
Speed and Simplicity Test
The L2 takes seconds to set up. You determine your peak level relative to digital full scale and adjust the threshold until the gain-reduction meter shows limiting on the loudest peaks. No algorithm selection, no band splitting, no machine learning analysis. This workflow beats modern alternatives for rough masters and club test versions.
The interface design remains a lesson in restraint. The lack of options prevents overthinking when mastering techno tracks under time pressure. I slapped the L2 on a hard techno mix and dialed in 4 dB of gain reduction. A club-ready test master was done in under a minute. FabFilter and Ozone just need more thought despite their superior transparency.
Loudness Comparison at -8 dB RMS
I pushed toward typical techno mastering levels around -8 dB RMS. This revealed the L2’s character. Most material tolerates 4 to 6 dB of peak limiting without audible side effects, equivalent to doubling the signal level. The L2 exhibits transient softening and a midrange push that becomes obvious beyond this range. The L2 sounds less transparent at similar settings compared to Pro-L 2’s Modern algorithm.
The distortion artifacts emerge over time rather than suddenly. Light use keeps things clean, but heavy limiting above 6 dB introduces audible coloration that some engineers describe as a 2000s character. Whether this suits your esthetic depends on the track. Aggressive industrial techno might benefit from the grit. Minimal techno mastering demands cleaner processing.
Why Some Engineers Still Choose L2
Price remains a factor. The L2 costs around $29 during sales, nowhere near as much as modern alternatives. This affordability matters for bedroom producers building their first techno mastering chain.
Transparency claims hold merit when used conservatively. One mastering engineer confirmed the L2 as the most transparent limiter for rough masters that need quick loudness. The L2 delivers sufficient gain without complexity when matched against feature-rich modern tools. Experienced engineers prefer getting loudness pre-limiter and using the L2 for just 2 to 4 dB of final level. This approach uses its transparency while avoiding the colored sound that heavy limiting introduces.
Building Your Techno Mastering Chain: Plugin Order and Settings
Plugin order determines whether your techno mastering chain succeeds or collapses under pressure. The sequence affects how each processor interacts with the next and creates cumulative effects that shape your final sound.
Pre-Mastering EQ Adjustments
High-pass filtering belongs at the chain’s start. This prevents ultra-low frequencies from triggering downstream dynamics processors without need. I set filters around 20-30 Hz to remove rumble without touching kick fundamentals. Surgical EQ comes next and removes nasty resonances with narrow cuts before compression amplifies these problems. Room resonances and low-end noise get addressed here through subtractive work. Tonal EQ waits until after compression, where I boost high-mids and upper treble areas to improve pleasing elements. The compressor won’t react to boosted frequencies this way.
Table of Contents
Saturation Stage for Analog Warmth
Saturation produces even or odd harmonics depending on the emulation type. Tube-style processors generate even harmonics at intervals of two, four, and six. This creates warm and buttery character ideal for bass. Transistor saturation adds odd harmonics at three, five, and seven intervals and provides grit and punch for drums. I apply subtle saturation between EQ and compression stages. This adds richness without overwhelming the natural character.
Multi-Band Compression: When and Why
Multiband compression solves specific problems rather than serving as default processing. I use it at the time kick drums overpower the compressor and cause unwanted pumping across the full spectrum. A two-band setup isolates low frequencies under 150 Hz with separate threshold control. Attack times above 40 milliseconds preserve kick punch. I use one or two bands maximum and avoid the factory preset trap of activating all bands at once.
Final Limiting: Settings That Work
The limiter sits last in the chain and gets applied only after the mix and master chain are really set. I target ceiling levels between -0.3 dB and -1 dB to prevent inter-sample peaks. Attack and release settings prove critical for kick drum preservation. Lookahead stays enabled at 5-10 milliseconds minimum to block transients. Oversampling reduces distortion artifacts introduced during limiting.
Which Plugin Bundle Delivers Best Value in 2026
Bundle philosophy changed from quantity to cohesion. Most producers need fewer plugins that work together rather than massive collections that clutter workflows. This approach affects value calculations when you build your techno mastering chain.
Price-to-Performance Analysis
FabFilter’s Mastering Bundle delivers at USD 514.00 and provides Pro-Q 4, Pro-C 2, Pro-MB, and Pro-L 2 for transparent techno mastering. Softube Weiss commands USD 999.00 for mastering-grade precision through original Weiss algorithms. Budget ranges clarify spending decisions: USD 600 covers 95% of production needs, whereas USD 1100 eliminates limitations.
Single Plugin vs. Complete Suite
Cohesive systems outperform fragmented solutions pieced together from multiple ecosystems. Bundles provide tools designed to slot into workflows from early production through final masters. iZotope’s Music Production Suite exemplifies this through plugin communication and offers mix suggestions and masking detection that speed decisions. Individual plugins force manual integration without intelligent assistance.
Budget Options for Bedroom Producers
Free setups achieve professional-quality production at USD 0.00. Ozone 12 Elements serves as an entry point at USD 49.00 and provides mastering reference capabilities before you invest in premium tools. Therefore, bedroom producers should start with free essentials, add affordable mastering references, then layer premium tools as budgets allow.
Conclusion
FabFilter Pro-L 2 remains my go-to choice for transparent hard techno limiting. Ozone 12’s IRC 5 algorithm handles aggressive bass content with less pumping, though. Newfangled Elevate delivers exceptional loudness capabilities, but the CPU requirements make it impractical for work that happens in real time. I find myself reaching for the simple Waves L2 more often than expected for quick club test masters.
The FabFilter Mastering Bundle at $514 provides the best value for producers who take their craft seriously. Bedroom producers should start with Ozone 12 Elements and build their toolkit as skills develop.
When it comes to techno mastering, choosing the right tools is only part of the equation. Understanding how to balance loudness, dynamics, and low-end energy is what truly separates an average track from a club-ready release. A solid techno mastering guide should always emphasize clarity in the kick and bass relationship, controlled saturation, and limiting that enhances impact without destroying transients.
For producers focused on hard techno mastering, achieving aggressive loudness while maintaining punch is critical. This often means combining multiple stages of processing rather than relying on a single limiter. Whether you’re using Pro-L 2, Ozone, or Elevate, your approach to mastering techno music should stay intentional and adapted to your track’s energy and structure.
Ultimately, techno mastering is about consistency and translation across sound systems—from headphones to massive club rigs. By refining your workflow and understanding your tools, you’ll be able to create masters that hit hard, stay clean, and compete with professional releases.p.