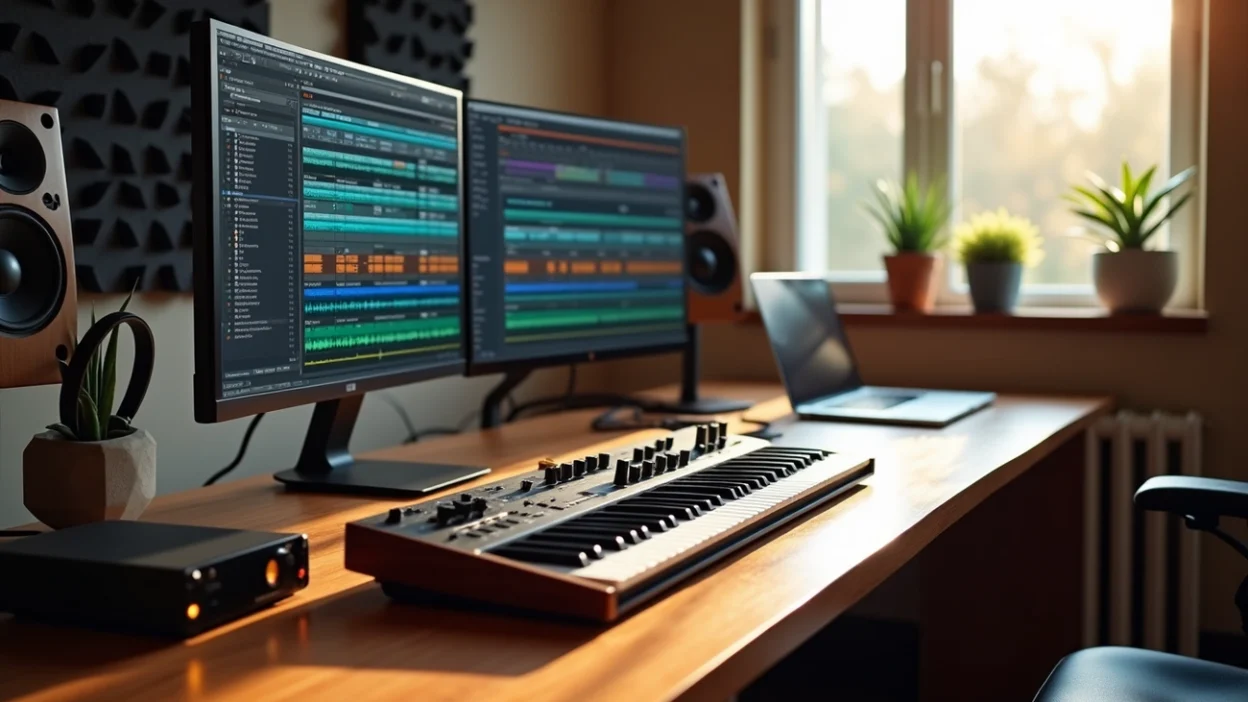
Your audio workflow determines whether you spend your time creating or just trying to stay organized. Disorganized sessions lead to wasted hours searching for files, redoing work and missing deadlines.
An optimized audio production workflow changes everything. We’re talking about the quickest systems for your audio post production workflow, from original setup through your audio mastering workflow. This piece walks you through each stage in detail and shows you how to optimize templates, automate repetitive tasks and maintain quality control. Then you’ll spend less time managing files and more time doing what you do best: producing great audio.
Setting Up Your Audio Production Workflow
Building a solid foundation for your audio production workflow starts with four critical components that work together. These elements save time on every project and prevent the chaos that derails sessions.
Create a project template system
Templates turn repetitive setup tasks into one-click solutions. You waste time opening an empty session and building everything from scratch when you could spend that time recording or mixing. A well-laid-out template loads with tracks, routing, effects, and settings already configured.
The key is matching templates to your actual work. Create separate templates for each scenario if you record solo acoustic artists one day and full bands the next. Templates should have empty tracks ready for immediate recording, with a mix of mono and stereo audio tracks plus MIDI tracks for flexibility.
Start by grouping tracks into folder structures within your template. Group related elements like rhythm guitars or backing vocals into folders, then hide what you’re not actively working on. This keeps your session navigable without visual clutter. Set track outputs to appropriate group channels rather than the main stereo output and customize your transport panel to show only what you need.
Name every track in your template before saving. Proper naming means recorded audio files inherit those names automatically and save you from sorting through generic “audio_01” files later.
Establish consistent file naming conventions
Your file naming system either helps or hinders you months after a project wraps. Machine-readable formats improve interoperability between facilities and vendors. Though many conventions exist, consistency matters more than perfection.
A practical format has these components in sequence:
ProjectName_STAGE_BPM_Key_Version_MixType
For example: Midnight_DEMO_120bpm_Gmin_v3_INST
Production stages create a clear hierarchy: WORKTAPE for rough end-of-day bounces, DEMO for external sharing, PRODUCTION for commissioned work, MIX and MASTER for final stages. Version numbers (v1, v2, v3) track client revisions, while letters (v1a, v1b) mark personal iterations you test internally. This prevents clients from wondering why version numbers jumped unexpectedly.
Add BPM and key signature for collaborative work or pitching songs. Mix types like INST (instrumental), ACA (acapella), or SINGB (singback) go at the end.
Date-based naming offers another approach: YYMMDD_FullName_Category. Reverse date order displays files chronologically in folders. Add numbers to maintain recording sequence for multiple recordings on one day.
Filenames should contain only alphanumeric characters, hyphens, periods, and underscores. Characters like “@”, “#”, “(“, and “)” create compatibility issues in different systems. Keep filenames under 255 characters and use letter case consistently throughout your workflow.
Set up folder structures
Folder systems fail when they’re too complex. The three-click rule applies here: if finding a file takes more than three clicks, your structure needs simplification. Fewer subfolders mean faster access and less time categorizing.
Plan your hierarchy on paper first. Start with a parent folder for all music production work, then create project folders beneath it. Within each project, sort by production stage: Ideas, In Progress, and Completed. Each project folder should be self-contained with the DAW file, audio recordings, MIDI files, presets used, reference tracks, mixes, masters, and artwork.
Keep samples in a separate location rather than duplicating them in different projects. Create dedicated folders for plugin presets and sort them by the plugin’s native folder structure. Add a bounce folder within each project so you can preview tracks without opening sessions on slow computers.
Configure default track routing
Default routing eliminates repetitive manual assignments. Most DAWs let you set a default output bus in I/O settings. New tracks then route automatically to your chosen bus instead of the main output, though existing tracks require manual changes.
Track presets offer another solution. Create presets for audio, instrument, FX, and group tracks with outputs already configured. Some DAWs remember your last-chosen output when adding tracks. Configure DAW tracks to send audio to virtual channels where you can apply processing and create custom monitor mixes with live inputs for discrete headphone mixes.
Setting pre-fader sends allows independent control of headphone levels without affecting your main mix. This routing flexibility becomes vital during tracking sessions when performers need specific monitor balances.
Optimize Your Session Before Recording
Pre-recording preparation determines whether your session flows smoothly or grinds to a halt with technical problems. Three specific tasks ensure clean recordings and comfortable working conditions for everyone involved once routing is configured.
Set proper gain staging levels
Recording levels at the source require precision before audio hits your DAW. The goal is capturing healthy, balanced audio that avoids both clipping and excessive noise. Adjust levels at your instrument and mic preamp, not your mix faders, which should stay at unity (0dB) during this stage.
You want to target maximum levels of -6 dBFS as indicated by the sample peak meter to prevent peaks from entering the red zone. Average signal levels should hover around -18 dBFS on the RMS meter, which corresponds approximately to 0 VU from traditional analog metering practices. A different approach targets -12 dBFS as a good recording level, leaving enough headroom while avoiding noise issues.
Watch your DAW or interface metering for green-yellow-red indicators. Stay in the green and occasionally touch yellow while avoiding red which indicates clipping. Play or sing the loudest part of your song for practical home recording, then set gain to hit between -12 and -14 dBFS in your DAW, making sure you never exceed -10 dBFS.
Pad switches become essential for exceptionally loud sources. Certain instruments produce signals too strong for preamps to handle without distortion, even with gain at its lowest setting. Pad switches typically reduce the signal by -10 dB to -20 dB and allow your interface to capture the true sound without clipping. Be prepared to adjust gain between takes when switching microphones or instruments, or if performer dynamics change substantially.
Configure monitoring and headphone mixes
Headphone mixes determine performer comfort and performance quality. Creating sends and roughing out mixes ahead of the session pays dividends in time saved. This prevents multiple requests at once if people can hear at least something from the outset.
Set up a reverb and compressor ready for the monitor mix before vocalists put on headphones. The processors don’t need to be the same ones you’ll use during mixdown; what matters is making the singer sound good to themselves. You’ll face an uphill battle of insecurity to overcome without this ready.
Most people want to hear themselves louder than everything else. Assuming a comfortable level at a singer’s headphone amp, create the differential they need to hear themselves over their acoustic-self, with enough headroom in reserve for “I still can’t hear myself” requests. Set their send at something like -6dB and the band as low as -18dB to accommodate this.
Compression in the monitor mix makes subtleties of the performance emerge and allows singers to hear minute articulation and expressions. Pitch improves and they hear themselves clearer. Turn something else down instead when someone requests more of something. Even 3dB out of the guitars makes it much easier to hear vocals.
Table of Contents
Prepare track colors and grouping
Visual organization accelerates your workflow once recording begins. Color-coding by track type creates instant recognition without reading track names. All drums share one color, keyboards another, vocals another, and so forth. The specific colors matter less than using them from one session to the next consistently. You’ll identify track types at a glance after memorizing your color scheme.
This consistency helps you work faster and more efficiently, just as templates do. Include color-coded tracks in your session templates so they’re preconfigured from the start. Erase unused tracks as needed, but the visual system remains intact. Grouping related tracks together and combining them with your color system creates a session layout you can work through instinctively rather than searching through track names.
Streamline Your Audio Post Production Workflow
Editing efficiency separates producers who finish projects on schedule from those perpetually behind. Post production audio workflow demands speed without sacrificing precision, which means memorizing shortcuts and automating everything repeatable.
Build efficient editing shortcuts
Keyboard shortcuts transform your audio post production workflow from tedious to fluid. Shortcuts that embed themselves in muscle memory let your hands react to ideas with minimal thought or effort. This reduces the technical burden of your DAW and lets you focus on storytelling.
Keyboard Focus mode offers the fastest entry point. Click the ‘az’ icon in the top right corner of Pro Tools’ edit window to enable single-key shortcuts. Position your left hand on A, S, D, F as you learned in typing class. These keys control trimming and fades: A trims clip start to cursor, S trims clip end to cursor, D creates fade-in from start to cursor, F creates crossfades, and G fades out from cursor to end. These shortcuts work across multiple tracks at once and make background editing substantially faster.
The Smart Tool in Pro Tools combines selector, grab, and trim functions into one context-sensitive tool. Position it in different areas of a clip to activate different functions without manually switching tools. Place it in the bottom half to move clips freely. Position it in the top corners to create fades. It creates crossfades between adjacent clips at the bottom. You can click and drag on existing fades to adjust their shape without opening dialog boxes.
Strip Silence detects and removes silent sections within tracks automatically. This powerful alternative to manual cutting streamlines your audio production workflow substantially.
Use batch processing to handle repetitive tasks
Batch processing applies similar changes to multiple files at once rather than editing each file separately. This automation saves substantial time when you just need format conversions, level adjustments, or effects applied across numerous tracks.
Duplicate your audio files before running any batch process. Batch processors execute whatever instructions you provide without questioning them, like the animated brooms in The Sorcerer’s Apprentice. Steps set up incorrectly mean the processor ruins multiple files at once. Safety copies protect you until you confirm the results.
Most DAWs include native batch processing. Twisted Wave, iZotope RX Standard, Adobe Audition, and Amadeus Pro all feature built-in batch tools. Audacity implements batch processing through its Macro function, which can apply single macros or nested macro sequences to file sets. Reaper users probably already involve automation features.
One editor changed Twisted Wave’s Special Paste function to just the ‘V’ key instead of Command-Y. This single modification gained more than 15% time savings on like editing sections. The shift between two hand positions was eliminated and reduced total audio editing time substantially.
Implement quick selection tools
Tab navigation arranges your cursor to the next edit or sync point. Option+Tab arranges it to the previous edit point. Return takes you to the session beginning, Option+Return to the end. These four shortcuts eliminate constant timeline scrolling.
Markers create strategic navigation points across your project. Place them at section boundaries, then use keyboard shortcuts to jump between different parts during editing. Grid mode snaps clips to grid lines and provides precise timing alignment, useful especially when you have metronomic music. Slip mode allows free movement between grid lines and provides subtle timing adjustments.
Create custom macros to handle common actions
Custom macros string together multiple operations into single keystrokes. Open the Actions list by pressing Shift+? in Reaper. Search the filter box to find desired actions, select them, click Add under shortcuts, then press your chosen key combination. Create new custom actions by dragging and dropping actions from the list.
Pro Tools lacks official macro support, but third-party applications like QuicKeys enable this functionality. QuicKeys records sequences of actions you trigger from single key commands. Work at a measured pace and wait for each element to turn green at the time you record macros, which confirms QuicKeys has acknowledged your position and intended action. Most macro applications repeat actions as long as you hold down the shortcut and let you process entire songs in seconds.
Scripts offer advanced automation beyond built-in features. Adobe Audition uses JavaScript to handle complex tasks like automatic file renaming, metadata addition, or conditional edits that apply processing only when specific conditions exist.
Master Your Mixing Signal Chain
Plugin order and routing decisions shape your mix more than any individual plugin setting. Swap two processors and you change the entire character of your track. Understanding signal flow becomes non-negotiable for your audio production workflow.
Order your processing plugins correctly
The sequence you arrange plugins matters because each processor operates on a simple input/output basis. What comes in gets processed and sent out. Change plugin order and you change what each processor receives and outputs.
Most engineers agree on a more conventional approach: place EQ first, then compression. The reasoning comes down to source assessment. If your source needs tonal improvement, go straight for EQ to even out frequency spectrum imbalances that make the source sound unnatural. Use the compressor afterward to add dynamic or performance control, especially if the mix needs it.
Alternatively, place the compressor first if the source already sounds great tonally but needs dynamic control. Then add EQ for tonal shaping to compensate for any new frequency imbalances the compressed signal created. Sometimes the compressor can’t grab the signal right without being placed before the EQ. Notice how much more compression happens with the compressor placed first.
After EQ and compression, add other effects like dessers and modulating effects. You don’t want to effect or improve a signal that still has unwanted frequencies in it.
Use busses and aux sends effectively

A mix bus routes multiple tracks into one channel to process them at once. This lets you use one signal chain to affect an entire group of instruments and adjust level and pan via one channel. The master bus gives you a way to make final adjustments to your full mix before audio leaves your DAW.
Subgroups collect similar channels together so you can process them and control their level in unified fashion. Assign all drum tracks to a bus as an example. Adjust the level of that bus channel and EQ it once as desired rather than adjusting 12 faders and risk messing up the balance.
Auxiliary channels receive a copy of the signal through sends. The original continues to a subgroup or the master bus. Place reverb on an aux channel rather than each individual track. This gives you control over the amount of reverb on each drum via the sends and overall reverb via the aux channel fader. You save CPU cycles too.
Apply parallel processing techniques
Parallel processing mixes a processed wet signal with the original unprocessed dry signal. This lets you apply extreme dynamic processing to the parallel signal while all dynamic and transient content of the dry signal remains intact.
Apply heavy compression on the duplicated track with gain reductions of 10dB to 20dB, or even 30dB or more. This will make the processed signal sound very crushed and unnatural, which is why you only blend in a fraction of the signal.
Post-fader sends are the default in most mixing scenarios. This makes sure that the wet/dry relationship remains consistent when you adjust the volume of the source track.
Set up reference track comparisons
Load reference tracks onto separate tracks or use specialized plugins that help easy A/B comparisons without disrupting your audio workflow. Route these tracks to your monitoring outputs and bypass any master bus processing applied to your mix.
Limit your listening to short segments, around 5 to 10 seconds. Our brains adjust to tonal balances fast, and long listening can skew perception. Use metering tools to match the RMS or LUFS levels of your mix and the reference tracks. Adjust the gain of the reference tracks rather than your mix to prevent collateral changes.
Speed Up Your Audio Mastering Workflow
Mastering represents the final stage where your mix transforms into a polished, distribution-ready product. This phase of your audio mastering workflow demands precision in preparation and technical execution, which affects how your track performs across streaming platforms and playback systems.
Prepare mixes properly for mastering
Headroom determines whether mastering engineers can improve your mix or spend time repairing it. Leave at least 2 to 3 dB of headroom on the rendered file. Your loudest peak should sit between -6dBTP and -3dBTP. This provides enough space for mastering processing while utilizing most of the available bit depth.
Remove any limiter or mastering plugins from your mix bus before export. These tools flatten dynamics and create distortion when mastering engineers apply additional processing. Normalization creates similar problems by adjusting levels without addressing average volume. It moves the loudest peak to digital zero whatever the overall mix balance. Skip normalization.
Export at your session’s native resolution. You recorded at 24-bit/48 kHz? Export the same format. Higher bit depths like 24-bit or 32-bit float provide wider dynamic range and greater detail compared to 16-bit. Sample rates of 44.1kHz remain the industry standard, whereas 48kHz serves higher fidelity applications. Turn off dithering when exporting, as this should only be applied during final mastering.
Use analysis tools for objective decisions
Metering tools reveal technical issues your ears might miss. Analysis suites like iZotope’s Insight offer capabilities beyond standard DAW meters for mixing and mastering decisions. The Loudness panel in Insight measures your track’s specifications by playing the song from start to finish without interruption. So you gain objective data about LUFS levels and True Peak readings that determine how streaming platforms process your audio.
Apply limiting and loudness optimization
Limiters belong at or near the end of your mastering chain. Insert the limiter on your master channel as the final plugin, followed by a levels meter to monitor loudness and dynamics. You want to hit your target LUFS reading without crushing dynamic range as you adjust the limiter.
True Peak levels staying below -0.3 dBTP prevent distortion when files convert to lossy formats for streaming. Some engineers use dual limiting: a non-True Peak limiter with a ceiling at -1 dBFS, followed by a True Peak limiter set to -0.3 dBTP. Bypass and re-engage your limiter to compare processed versus unprocessed signals. Click the delta function to hear exactly what changes in your audio.
Create multiple format exports
Export workflows often require multiple file types at once. Set up exports for 16-bit WAV and high-quality MP3 formats together rather than running separate export passes. Native multiple format export features save a lot of time at the mastering phase when delivering various file types to clients. Always export in lossless formats like WAV or AIFF to preserve full audio quality. Avoid MP3 which loses data through compression.
Manage Multiple Versions and Revisions
Version confusion costs you time and damages client relationships. Your naming system has failed when you reach “Mix 4 Final Final 3“. You’ll deliver the wrong file version or spend hours reconstructing which changes belong to which revision without a systematic approach.
Track version numbers systematically
Version numbers split into two categories that serve different purposes. Numbers like v1, v2, v3 track client revisions. Letters like v1a, v1b mark your personal iterations that you test internally. Clients won’t wonder why version numbers jumped unexpectedly.
Meaningful suffixes clarify each version’s purpose. TrackName_v1 starts your sequence. TrackName_v2 follows after the first round of client feedback. Add letters for major internal changes between client submissions: TrackName_v2a for your first attempt at those revisions and TrackName_v2b for your second approach.
DAW-specific features handle versions internally rather than requiring separate files. Cubase’s Track Versions system displays one version at a time instead of spreading multiple lanes across your session. Create new versions through the Project menu, track name dropdown, or Inspector panel before recording each take. The Inspector’s Track Versions tab lets you rename, delete, or duplicate any version instantly.
Logic’s Project Alternatives work the same way. Create alternatives for major changes so you can compare previous versions without opening separate files. Most producers maintain four to five alternatives by project completion.
Document client feedback in the quickest way
Email templates standardize how clients submit revision requests. Pre-written responses explain how you want revisions laid out using timestamps, why listening on multiple devices matters, and that one spokesperson should compile all notes. Store these templates in Gmail as canned responses or use apps like Keyboard Maestro to trigger them with keystroke combinations.
Audio glossaries prevent miscommunication. Create a simple document with common audio terms so clients find words for what they’re hearing. You both reference the same terminology rather than decoding requests like making something sound more “glamorous”.
Dedicated review systems centralize feedback in one location. Every comment and revision request gets documented within a single platform. This eliminates scattered email threads. These systems provide sequential version access whatever the file naming and display Version 1, Version 2, and so forth in clear order. Clients mark approved versions directly within the system. This prevents delivery mistakes.
Save alternate mixes strategically
Checkpoint stems capture your project at key milestones. Export stems after arrangement, after your first mix pass, and after the final mix. These snapshots let you reconstruct any stage even if the DAW file corrupts.
Automate Repetitive Tasks
Repetitive technical work drains creative energy from your audio production workflow. Modern DAWs have built-in automation that handles tedious tasks while you focus on artistic decisions.
Use DAW automation features
DAW automation adjusts parameters over time without manual intervention. You can automate volume, panning, sends, faders and settings inside plugins. Modern DAWs allow limitless simultaneous automation, so reverb send amounts can fade while compression thresholds and delay mix adjust together.
Three methods record automation into your sessions. Draw automation curves using your mouse manually to get precise results. Perform changes by moving faders on channel strips or within plugins. Use assigned knobs on MIDI controllers while your DAW records those adjustments. Drawing automation produces the most precise results and does it quickly.
Create custom scripts and actions
Scripting languages like EEL and Lua in REAPER automate tasks such as batch processing, file renaming and plugin parameter adjustments. Scripts handle mundane work to free time for high-level decisions. Custom actions in REAPER execute complex sequences with single keystrokes and make repetitive editing tasks instantaneous.
On top of that, macros tailor your DAW to unique needs. One click can export stems, apply EQ settings or organize tracks according to predefined criteria.
Batch export multiple tracks
Cubase introduced batch export functionality that allows multiple audio channels to export at once. Access this through File / Export / Audio Mixdown, where a Channel Batch Export checkbox acts as a select-all option for available tracks. The automatic file-naming facility has track names, project names and incremental numbers.
Pro Tools users can select all desired tracks, right-click and choose bounce to export each track as individual audio files.
Set up automatic backup systems
The 3-2-1 backup rule protects your audio workflow: three copies of files, two different storage types and one copy stored off-site. Cloud services like Dropbox and Google Drive sync folders without manual intervention. External hard drives provide fast local backups.
Automated scheduling handles backups overnight during non-working hours. Set incremental backups during the day to capture only changed files.
Maintain Quality Control Throughout
Final validation catches problems before clients do. Testing your audio workflow outputs in environments of all types reveals issues invisible in your studio.
Check your mix on multiple systems
Review your mix on at least two or three playback systems. Include headphones and smaller speakers. Car tests are a great way to catch low-end clarity and vocal balance problems. Club or PA systems highlight high-energy, high-volume performance. Earbuds and Bluetooth speakers emphasize certain frequencies or compress audio and affect how kick, bassline, and lead vocal translate. Check in mono since many portable devices lack true stereo separation. This exposes phase cancelation that makes mix elements disappear. Pro studios maintain a ‘grot box’ for testing on poor-quality systems.
Use metering tools for technical standards
Metering provides visual confirmation of levels, frequency content, stereo spread, and dynamic range. Phase meters show the relationship between left and right channels on a scale from -1 to +1, where +1 indicates complete correlation. Loudness metering measures LUFS with momentary (400ms), short term (three seconds), and integrated (complete program) readings. Frequency analyzers reveal peaks or troughs your monitoring setup prevents you from hearing.
Compare against reference tracks
Over 300,000 producers use reference tools to compare their mix against professional tracks. Level matching ensures fair comparison for informed decisions. Listen to references for ear calibration at session start, then compare low end, high end, kick snare level, and snare vocal level.
Verify file formats and metadata
MediaInfo displays structural metadata of audio files for compliance verification. Check creation dates, format specifications, bit depth, and sample rates to confirm files meet delivery requirements.
Conclusion
You now have a complete system for transforming your audio workflow from chaotic to controlled. We’ve covered everything from original project setup through final delivery and revealed where hidden efficiency gains exist inside your daily audio workflow.
A structured audio workflow doesn’t just save time — it protects your creativity. When your audio workflow is organized, decisions become faster, revisions feel lighter, and collaboration becomes smoother. Instead of reacting to problems, your audio workflow supports you proactively.
By implementing these strategies, you’ll reclaim hours previously lost to file searches, disorganized sessions, and repetitive tasks. A refined audio workflow means fewer distractions and more momentum. Templates, shortcuts, naming conventions, and automation handle the technical friction while you stay focused on creative direction.
The real power of a strong audio workflow appears over time. Each improvement compounds. A cleaner folder structure improves session speed. A smarter mastering chain enhances consistency. A repeatable export system eliminates last-minute stress. Step by step, your audio workflow evolves into a reliable production engine.
Start small. Choose one part of your audio workflow that frustrates you the most. Improve your template system. Learn three essential keyboard shortcuts. Optimize your session layout. Each small refinement strengthens your overall audio workflow and builds professional habits that scale with you.
Remember: a powerful audio workflow is not about rigidity — it’s about clarity and control. The more intentional your audio workflow becomes, the more mental space you free up for experimentation, sound design, arrangement, and emotion.
Your goal isn’t just efficiency. It’s creative freedom powered by a smart audio workflow. And once your audio workflow works for you instead of against you, you’ll spend less time managing projects and more time making music that truly stands out.