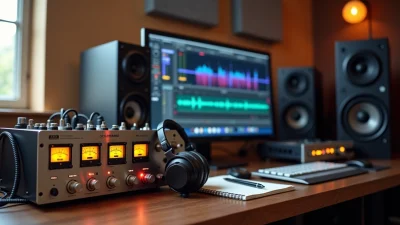
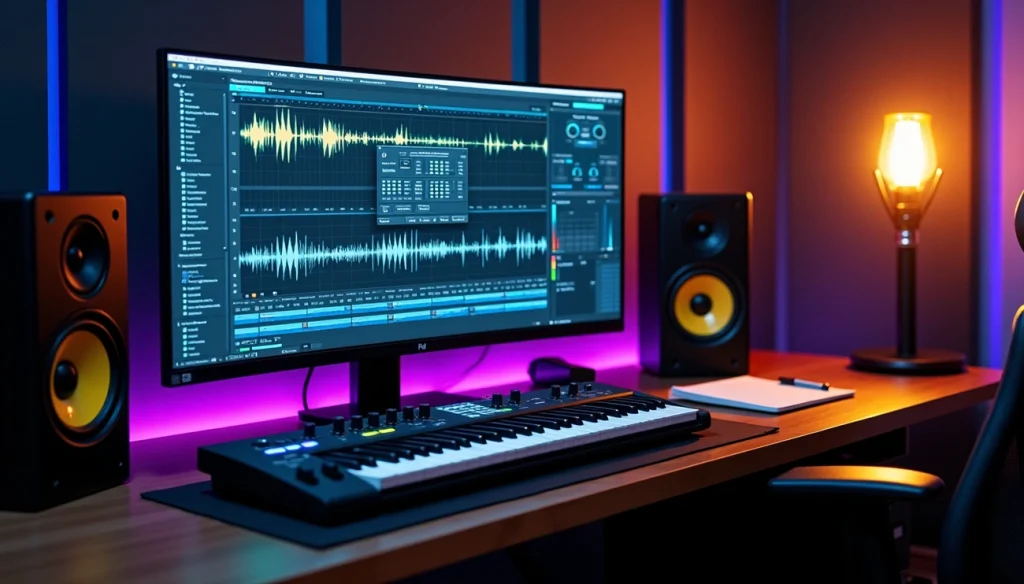
Multiband compression mastering separates your mix into distinct frequency bands and compresses each one on its own, giving you surgical control that single-band compression can’t match. To cite an instance, this technique helped strengthen the bass and drums in Michael Jackson’s ‘Thriller’, and it remains essential for professional masters today.
In this piece, we’ll show you how to use multiband compression in mastering with precision. You’ll learn how to use a multiband compressor, find optimal multiband compressor settings for different scenarios, and become skilled at mastering compression that sounds transparent yet powerful.
What is Multiband Compression in Mastering
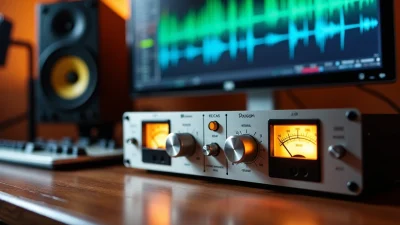
How Multiband Compressors Work
Multiband compression divides your audio signal into several distinct frequency ranges, processes each band independently, then reassembles them into a unified output. The processor uses crossover filters to split the spectrum at designated frequency points. You might separate your master at 120 Hz, 1200 Hz, and 9000 Hz and create four distinct bands that receive individual compression treatment.
Each band operates as its own compressor with independent threshold, ratio, attack and release controls. A loud bass note triggers compression in the low band, but the midrange and high frequencies remain unaffected. This selective processing prevents the common problem where broadband compression reduces the entire mix’s volume when only one frequency range needs control.
The reassembly process adds artifacts and distortion, even with no compression applied. You need to understand this trade-off before adding multiband compression to your mastering chain.
Multiband vs Single-Band Compression
Single-band compression treats your entire frequency spectrum as one signal. A loud bass drum impulse triggers the compressor and reduces volume across all frequencies, including the midrange and high frequencies of other instruments. This creates an undesirable pumping effect where cymbals and vocals duck whenever the kick hits.
Multiband compression solves this frequency-dependent pumping by isolating the low-end compression from upper frequencies. A bass-heavy kick triggers gain reduction only in the low band and leaves your vocal, guitars and cymbals at their natural levels. You maintain clarity in the upper frequencies while controlling bass dynamics.
The key difference lies in spectral selectivity. Broadband compression applies uniform gain reduction across all frequencies, whereas multiband processing targets specific problem areas without affecting the entire mix.
Why Use Multiband Compression MasteringWhy Use Multiband Compression for Mastering
Mastering engineers reach for multiband compression in two scenarios: controlling specific frequency ranges or achieving transparent glue without bass-driven pumping.
Specific frequency control addresses problems that occur only occasionally during a song. Certain bass notes might poke out, or harsh high frequencies might appear in particular sections. You compress just the problematic band and correct these issues without processing frequencies that sound balanced.
The glue effect creates cohesion across your mix by applying gentle compression to multiple bands. This works like bus compression but with one critical advantage: you prevent the low end from causing upper frequencies to pump in an undesirable way. The same settings in each band, typically a 2:1 ratio with 100-ms attack and release, produce that gluey cohesion while maintaining transparency.
Multiband compression also balances your mix’s frequency response dynamically. Parametric EQ applies static changes, but multiband processing responds to the audio signal immediately. The compressor automatically reduces its level when your low-end becomes too dominant at higher volumes and maintains consistent tonal balance throughout the track.
Some genres attain part of their signature sound from extreme multiband processing that single-band compression cannot achieve. EDM productions rely on multiband dynamics to create the punchy, controlled low-end that defines the genre.
The main guideline remains simple: use the minimum number of bands required to solve your spectral problem. This approach yields transparent results without unflattering sonic side-effects.
When to Use Multiband Compression in Mastering
Controlling Specific Frequency Ranges
Most mastering sessions don’t require multiband compression. Professional engineers bypass it on well-balanced mixes. But problems in isolated frequency ranges make multiband compression a useful problem-solving tool.
I reach for multiband compression when certain bass notes poke out of the mix or when harsh high frequencies appear in specific sections. Your client’s mix might have excessive energy around 250 Hz that creates muddiness. You can compress just that range when it becomes too loud. This dynamic approach is different from static EQ cuts because compression only engages when the problem frequency exceeds your threshold.
Vocal loudness issues represent another common scenario. A lead vocal might cover too much of the frequency spectrum but only needs moderate control. A three-band setup with the middle band targeting 250 Hz to 5 kHz works well. Start with a 1.5:1 ratio, 30-50 ms attack and 100-200 ms release. The compressor should pull 2-3 dB when the singer gets loud and 1 dB or less during softer passages.
Sibilance and brightness respond well to band-specific compression. Attack and release times run faster above 6 kHz since high-frequency compression avoids the distortion issues that plague low-frequency processing.
Preventing Bass-Driven Pumping
Dance and club genres face a specific challenge: the pounding low-end drives the compressor over threshold. The whole mix dips in level with every kick drum hit. This bass-driven pumping destroys the energy of your master.
A two-band compressor solves this problem. It separates low frequencies, under 150 Hz or so, from the rest of the track. One compressor controls the low frequencies while another handles everything above. So when that loud kick comes along, only the bass frequencies compress. The midrange and high frequencies remain unaffected.
Achieving Transparent Glue Effect
You might want the cohesion of bus compression without the pumping artifacts. Multiband compression with linked band settings produces gluey results while maintaining transparency.
Start with similar settings on all bands: 2:1 ratio, 100-ms attack and release, with a soft knee. This configuration applies gentle, musical compression that binds your mix together. You can use three bands where you control the low and high end independently but leave the midrange uncompressed. This gives you bass control combined with glue.
Genre-Specific Applications
Hip-hop and R&B demand powerful low-end and vocal presence. Engineers compress low frequencies to keep bass and kick punchy while avoiding muddiness that clouds vocals. Midrange compression boosts vocal clarity and high-frequency compression smooths sibilance without harshness.
Pop music requires clean, polished sound with boosted vocal presence. Compress the midrange to highlight vocals while controlling the low end. Bass and kick stay solid without overshadowing other elements. High-frequency compression adds subtle brightness for radio-ready sound.
Electronic and experimental genres benefit from extreme multiband processing that creates their signature sound. These styles require multiple layers of processing to achieve the correct sonic character.
How to Set Up a Multiband Compressor for Mastering
Choosing the Right Number of Bands
Three questions determine how to use a multiband compressor in mastering: how many bands, what crossover frequencies, and what settings per band. The answer to band count remains simple: as few as possible.
Two bands are enough when you only need to control a dynamic bottom or top end, where just one band might be active. You can also use two bands when you want bus compression sound but the low end causes upper frequencies to pump in an undesirable way. Three bands work when you want to control low and high ends on their own while you leave the midrange uncompressed, or when you need extra high-end smoothing beyond low-band control. Four bands address very specific problems.
Dynamic EQ becomes the better tool if you want more than four bands. Factory presets in most plugins activate all bands at once, but this approach creates unflattering sonic side-effects. Keep your mind focused on the spectral problem and use the minimum number of bands required to solve it.
Setting Crossover Frequencies
Crossover placement determines where one frequency band ends and another begins. Some multiband compressors offer Learn features that suggest useful crossover points, but manual placement follows clear principles.
You should find crossover points where you split a main instrument in two in the least obvious way. Some overlap remains unavoidable, but you don’t want a lead vocal’s fundamental in the low band while its midrange sits in the mid band. Try not to set crossover points in the middle of the vocal range because the human ear remains sensitive to vocal sounds, and unnatural artifacts become audible.
Crossover slopes affect your sound in different ways. Steep curves like 48 dB/oct sound precise yet more noticeable, whereas gradual curves like 12 dB/oct sound more natural yet less transparent. Delinking bands provides maximum isolation but can sound less natural, while you lower the slope to allow bands to crossover and emulate natural musical dynamics with less control.
Configuring Attack and Release Times
Default presets use slower to faster reaction times from low end to high end. This pattern exists because heavier elements in the low frequencies need different timing than transient-rich high frequencies.
Attack and release establish the timbre of your compression. Fast attack with long release creates smooth, possibly blurred sound, while opposite settings increase clarity. Listen for drum punch when you set attack time to ensure you’re not affecting their effect, and stay wary of times below 40 milliseconds.
Low-frequency compression uses slower attack times around 70-100 ms to preserve punch. Mid-frequency compression benefits from moderate settings between 30-50 ms. High-frequency compression runs faster, especially for sibilance control where 1-5 ms attack and 25 ms release work well.
The heavier your gain reduction, the more careful you need to be with fast times because changes become audible and apparent, especially in mastering on the whole stereo sum.
Setting Ratio and Threshold Per Band
Each band needs individual threshold and ratio settings. Threshold determines when compression engages, while ratio controls how much reduction occurs above that threshold.
The compressor reacts only to signal peaks when you set the threshold high, while setting it low makes it react to the signal body and results in more constant gain reduction. Start with low ratios between 1.5:1 and 2:1 for transparent results, and use higher ratios only when you solve specific problems.
Using Band Solo and Bypass Functions
Solo each band to hear the region of sound you want to target. This tuning process resembles using parametric EQ to find problematic frequencies: boost the band gain so you hear it clearly, sweep until you find what you’re looking for, then apply appropriate compression.
Bypass unused bands rather than leave them active. Many engineers use just one active band to control specific problem areas while they leave other bands bypassed.
Starting with Linked Band Settings
Link bands and set similar settings across all active bands as your starting point. Use a 2:1 ratio, 100-ms attack and release, and a soft knee. Pull down the threshold until you see slight gain reduction in one or two bands with Link Bands enabled.
You can experiment with individual band settings from this home base. Perhaps a lower ratio on the mid band sounds nice, or maybe you want a lower threshold with faster attack and release to grab more of the high band. You can always return to your home base settings if you get in trouble with an individual band.
Common Mastering Problems and Multiband Solutions
Taming Excessive Low-End
Proximity effect creates bass boost variations when vocalists move around cardioid microphones. Set your low band to control the sub-300Hz region with a 3:1 ratio and short release time. Attack time matters here: anything faster than 50ms makes vocals sound emotionally squashed.
Room resonances around 70Hz plague upright bass and electric bass-amp recordings in project studios. These match typical ceiling heights of 2-2.5 meters. Control the bass spectrum below 100Hz to rein in notes that excite unwanted resonances. Sub-bass thuds from finger tapping during DI’d bass performances require similar low-frequency compression to prevent overpowering the kick drum.
Controlling Harsh High Frequencies
Vocal harshness coincides with pitch register rises, performance intensity increases, or specific vowel sounds. Simple EQ cuts fail because cuts strong enough to tame piercing syllables make other sections sound muffled. Use narrow-band compression targeted at the harsh-sounding region, like de-essing. Spectrum analyzers help diagnose problem frequencies, though sweeping a narrow EQ cut works too.
Multiple frequency regions may contribute harshness and require two bands with crossover slopes upwards of 18dB/octave for forensic work.
Managing Vocal Loudness Issues
Lead vocals covering too much frequency spectrum need three-band compression with the middle band set from 250Hz to 5kHz. Start with 1.5:1 ratio, 30-50ms attack, and 100-200ms release. The compressor should pull 2-3dB of gain reduction when the singer gets loud and 1dB or less during soft passages.
Fixing Hot Notes in Specific Frequencies
Acoustic tracks have one note that pops out from resonant frequencies or room problems occasionally. Set up three bands, leave two bypassed, and tune the middle band to catch the resonant note. The song’s key helps locate open string frequencies. Use medium attack between 20-50ms, slow release between 50-250ms, and start with 4:1 ratio.
Multiband Compressor Settings for Professional Results
Two-Band Setup for Bass Control
Set both compressors to similar starting values: 1.3:1 ratio, 70-100ms attack, and 100ms release. The low-frequency band handles everything under 150Hz, while the higher band manages the rest of the track. Leave the low-frequency threshold at maximum at first, then lower the threshold on the higher band until you achieve 2dB of compression. You might add some compression on the low band, but keep attack time above 40ms to preserve kick drum punch.
Three-Band Setup for Full Mix Control
Configure the middle band to cover 250Hz to 5kHz to control vocals. Start with 1.5:1 ratio, 30-50ms attack, and 100-200ms release. Set the threshold so loud passages trigger 2-3dB of gain reduction while soft sections show 1dB or less.
Four-Band Setup for Complex Problems
Use ratios around 1.5:1 or lighter for all bands to glue. This conservative approach compresses sections enough for control while letting lightly compressed bands shine through.
Tempo-Based Release Settings
Calculate musical release times by dividing 60,000 by your song’s tempo to get a quarter note value in milliseconds. Extend release to 250ms or more for mid-tempo tracks.
Avoiding Over-Processing
Keep your focus on the spectral problem and use the minimum number of bands required to solve it. Conservative settings work better than aggressive processing. Don’t activate all bands at once just because they exist.
Table of Contents
Conclusion
Right now, you have everything you need for multiband compression mastering that works and solves frequency-specific problems in your mixes.
The golden rule of multiband compression mastering remains simple: use the minimum number of bands required for your spectral issue. Conservative ratios around 1.5:1 to 2:1 are a solid starting point for multiband compression mastering. Dial in appropriate attack and release times for each frequency range, and bypass any bands you don’t need during your multiband compression mastering process.
Keep in mind that multiband compression mastering is a problem-solving tool, not a mandatory step. Many well-balanced mixes don’t require multiband compression mastering at all. Avoid the common mistake of activating every band—effective multiband compression mastering is about precision, not excess.
Your multiband compression mastering settings should always remain transparent. Focus on solving specific issues, enhancing clarity, and maintaining musicality. When used correctly, multiband compression mastering can elevate your track to a professional level without compromising its natural dynamics.ing actual problems rather than processing for the sake of it, and your masters will sound professional and cohesive.